My journey in "The 100 days of SwiftUI"
swift ·In this blog post, I will log my journey in learning Swift and SwiftUI by following “The 100 days of SwiftUI”.
There are two reasons for this diary to exist and be publicly available: first, to share my thoughts about the language and the framework, and second, as a review of the learning process proposed by “The 100 Days of Swift,” which, as the title says, you have to follow for one hundred days. Moreover, as I am a person who already knows some programming languages, I was curious about how a new language is taught.
Index:
- Day 1: variables and constants part 1/2
- Day 2: variables and constants part 2/2 and string interpolation
- Day 3: arrays, dictionaries, enums,
- Day 4: typing
- Day 5: conditional statements
- Day 6: loops
- Day 7: functions part 1/2
- Day 8: functions part 2/2
- Day 9: functional programming
- Day 10: struct part 1/2
- Day 11: struct part 2/2
- Day 12: classes
- Day 13: protocols and extensions
- Day 14: optionals
- Day 15: Swift recap
- Day 16: WeSplit part 1/2
- Day 17: WeSplit part 2/2
- Day 18: WeSplit challenges
- Day 19: Unit converter
- Day 20: GuessTheFlag part 1/3
- Day 21: GuessTheFlag part 2/3
- Day 22: GuessTheFlag part 3/3
- Day 23: more details on view and modifier
- Day 24: challenges with details learned during day 23
- Day 25: RockPaperScissors, a new app made with everything learned so far
- Day 26: BetterRest part 1/3
- Day 27: BetterRest part 2/3
- Day 28: BetterRest part 3/3
-
Day 29: WordScramble part 1/3 (
List) - Day 30: WordScramble part 2/3
- Day 31: WordScramble part 3/3
- Day 32: Animation in SwiftUI 1
- Day 33: Animation in SwiftUI 2
- Day 34: Animation in SwiftUI 3
- Day 35: Milestone: multiplication table app
- Day 36: iExpense part 1/3
- Day 37: iExpense part 2/3
- Day 38: iExpense part 3/3
- Day 39: Moonshot part 1/4 (images, scrool views, navigation stacks, more on codable, and grid views)
- Day 40: Moonshot part 2/4
- Day 42: Moonshot part 4/4
-
Day 43: more details on navigation 1/2 (
navigationDestination) - Day 44: more details on navigation 2/2 (programmatic navigation)
- Day 45: styling navigation
- Day 46: challenges with navigation
- Day 47: ActivityTracker
- Day 48: Break
-
Day 49: Connection to the Internet (
URLSession) andAsyncImages - Day 50: Custom codable keys, Haptic Engine, and Cupcake Corner 1/3
- Day 51: Cupcake Corner 2/3
Day 1
The day started with a brief introduction to the Swift programming language and how variables, constants and literals work in an assignment statement (the type inference concept is briefly introduced).
In Swift, there are both variables and constants. The former can be reassigned to a new value, while the latter cannot be reassigned (although you can probably change values inside them when objects come into play).
var aVariable = 0
let aConstant = "String which cannot be reassigned"
Regarding literals, this first day is about strings, multi-line strings, integer, and doubles.
Day 2
The following day, the course covered Boolean variables and string interpolation.
Regarding Boolean variables, the only novelty was the .toggle() method, which switches the value of the variable (similar to doing myVar = !myVar).
Regarding string interpolation (which is achieved through the () pattern), the course stated that it is more efficient than concatenation using the + operation. For example, "\(s1) \(s2) \(s3)" is faster than s1 + s2 + s3 because concatenation requires the use of a temporary variable for each “sum” except the last.
Finally, a simple exercise was assigned: a Celsius to Fahrenheit converter that required the knowledge acquired during the first two days.
let temperatureInCelsius = 29.0

print("Today's temperature is \(temperatureInCelsius)C or \(temperatureInCelsius*9/5)F")
Day 3
During the third day, we started looking into more complex data structures such as arrays, dictionaries, sets, and enumerations.
let anArray = ["Tim", "Craig", "Stever"]

let aDictionary = [
	"name": "Tim",
	"job": "CEO",
	"birthday": "November 1"
]

let aSet = Set(["Apple", "Orange", "Apple", "Pear"]) // ["Apple", "Orange", "Pear"] —> distinct items

enum WeekDays {
	case monday, tuesday, wednesday, thursday, friday, saturday, sunday
}
var weekday = WeekDays.monday
weekday = .friday
Two interesting facts about these data structures are:
- Sets are incredible faster than array when you are looking for an item inside (
.contains(…)) but they are not ordered and cannot contains duplicates - When working with enums you don’t have to write every time
WeekDaysbecause the compiler is capable of understating it by the variable type.
Day 4
In Swift, you can specify the type of a variable when you declare it. If you don’t do ii, the compiler will infer the type. Up to now, it hasn’t been necessary to specify the type, but in the feature it could come in handy.
Moreover, with type specification you can declare a variable or a constant without initiating it.
let username: String
print(username) // Constant ‘username’ used before initialized
username = "jjocram"
print(username)
Finally, another checkpoint/exercise is proposed. In this checkpoint you have to declare a list with some duplicate, a set from the list and print both their .count showing that the set doesn’t have the duplicates.
let anArray: [String] = ["Apple", "Orange", "Apple", "Pear"]
let aSetFromAnArray: Set<String> = Set(anArray)
print("anArray has \(anArray.count) elements of which \(aSetFromAnArray.count) are unique")
Day 5
Conditional statement are introduced. if-then-else, switch, and ... ? ... : ...(ternary operator) can change the flow of your program.
Example with if-else if-else
enum Weather {
    case sun, rain, wind, snow, unknown
}

let todaysWeather: Weather = .sun

if todaysWeather == .sun {
    print("Let's go to the park")
} else if todaysWeather == .rain || todaysWeather == .snow {
    print("Let's go to the mall")
} else if todaysWeather == .wind {
    print("Let's bring the kite with us")
} else {
    print("Something else")
}
Example with switch-case
enum Weather {
    case sun, rain, wind, snow, unknown
}

let todaysWeather: Weather = .sun

switch todaysWeather {
case .sun:
    print("Let's go to the park")
case .rain, .snow:
    print("Let's go to the mall")
case .wind:
    print("Let's bring the kite with us")
default:
    print("Something else")
}
In addition to this simple example, the switch-case statement can be use with the pattern matching (we wrote an article about it for the Python programming language. Check it out).
Moreover, Swift has a fallthrough statement. When a case block ends with the fallthrough statement, the program will execute the following case even though the condition doesn’t match.
Example with the ternary operator ... ? ... : ...
let age = 18
let canVote = age >= 18 ? true : false
You can read the ternary operator as <condition> ? <value if condition is true> : <value if condition is false>.
Day 6
Now it’s time of iteration. for-in loop, and while loop
let platforms = ["iOS", "macOS", "iPadOS", "tvOS", "watchOS"]

for os in platforms {
    print("Swift is grat on \(os).")
}

for i in 1...12 {
    print("5 x \(i) = \(5*i)")
}

for i in 1...5 {
    print("Counting from 1 through 5: \(i)")
}

for i in 1..<5 {
    print("Counting from 1 up to 5: \(i)")
}

var lyrics = "Haters gonna "

for _ in 1...5{
    lyrics += "hate "
}

print(lyrics)
It is worh noting how ranges work in Swift: [min]...[max (included)] and [min]..<[max (excluded)].
while loops have nothing new with respect to other languages.
var roll = 0
var times = 0

while roll != 20 {
    roll = Int.random(in: 1...20)
    times += 1
    print("I rolled \(roll)")
}

print("Crit! in \(times) roll")
Finally, continue and break statement:
let fileNames = ["A.jpg", "work.txt", "sophie.jpg"]

for fileName in fileNames {
    if fileName.hasSuffix(".jpg") == false {
        continue
    }

    print("Image file: \(fileName)")
}

let number1 = 4
let number2 = 14
var multiplies: [Int] = []

for i in 1...100_000 {
    if i.isMultiple(of: number1) && i.isMultiple(of: number2) {
        multiplies.append(i)

        if multiplies.count == 10 {
            break
        }
    }
}

print(multiplies)
In Swift we can also have labeled statement. In this way we can break an outside loop when cycling inside a nested one.
enum Controls {
    case up, down, left, right
}

let options: [Controls] = [.up, .down, .left, .right]
let secretCode: [Controls] = [.down, .up, .right]

outerLoop: for option1 in options {
    for option2 in options {
        for option3 in options {
            let attempt = [option1, option2, option3]

            if attempt == secretCode {
                print("Found the secret code \(attempt)")
                break outerLoop
            }
        }
    }
}
Today was also a checkpoint day. Now we know all the basic stuff to write any computer program.
The solution for the fizz-buzz problem follows.
for i in 1...100 {
    if i.isMultiple(of: 3) && i.isMultiple(of: 5) {
        print("FizzBuzz")
    } else if i.isMultiple(of: 3) {
        print("Fizz")
    } else if i.isMultiple(of: 5) {
        print("Buzz")
    } else {
        print(i)
    }
}
Day 7
With iterations done, we reached a turning point in studying Swift. Today we step up and start studying functions.
func printTimesTables(number: Int, end: Int) {
    for i in 1...end {
        print("\(i) * \(number) is \(i*number)")
    }
}

printTimesTables(number: 7, end: 20)
By default, Swift requires the names of the parameters when we call the function.
Returning values is as in many other programming language: return keyword and the type returned in the function declaration (with -> <Type>).
import Cocoa

func sameCharInStrings(stringA: String, stringB: String) -> Bool {
    return stringA.sorted() == stringB.sorted()
}

print("home has the same chars of emoh? \(sameCharInStrings(stringA: "home", stringB: "emoh"))")
It is not true that the return keyword is always needed. When the return statement is the first line of the scope we can ommit the keyword.
func specialHello(to: String) -> String {
    if to == "Tim" {
        "Hello Mr. Tim"
    } else {
        let normalGreet = "Hello \(to)"
        return normalGreet
    }
}
During this day, tuples are introduced as a way to return multiple values from a function:
func getUser() -> (firstName: String, lastName: String) {
    return (firstName: "John", lastName: "Doe")
}

let user = getUser()
print("Name: \(user.firstName) \(user.lastName)")
In Swift, tuples are like C’s struct (they can only hold data) but defined in the return type. Moreover, you can also deconstruct a tuple into variables (we can use _ to ignore some parts of the tuple).
func getUser() -> (firstName: String, lastName: String) {
    return (firstName: "John", lastName: "Doe")
}

let (namePart1, namePart2) = getUser()
print("Name: \(namePart1) \(namePart2)")
Dive into function’s parameters
In Swift, it is interesting looking into how parameters are a first-class citizen when we talk about functions.
First of all, they are integral part of the function name. It means we can have functions with the same name but different parameters’ name.
func a(b: String) { }
func a(c: String) { }
Then, we can have two names for a parameter: one used inside the function body and the other used in function call (which could be _ to have nothing)
func specialHello(to name: String) -> String {
    if name == "Tim" {
        return "Hello Mr. Tim"
    } else {
        return "Hello \(name)"
    }
}

print(specialHello(to: "Tim"))
Day 8
In Swift, we can also have default parameters. That is done adding the default value in the parameter declarationn func f(a: String = "default string") { }.
Functions can also throw exceptions and that must be added to the function definition with the throws keyword.
enum PasswordError: Error {
    case short, obvious
}

func checkPassword(password: String) throws -> String{
    if password.count < 8 {throw PasswordError.short}
    if password == "password" {throw PasswordError.obvious}

    if password.count < 10 {
        return "OK"
    } else if password.count < 12 {
        return "Good"
    } else {
        return "Great"
    }
}
To call a function which could throw an exception we have a couple of ways: do-try-catch block or try!.
do {
    let passwordResult = try checkPassword(password: "1234567890")
    print("The password is \(passwordResult)")
} catch PasswordError.short {
    print("You should use a longer password")
} catch PasswordError.obvious {
    print("Your password is 'password'")
} catch {
    print("Generic error: \(error)")
}

let passwordResult = try! checkPassword(password: "1234") // ! = danger. In this case it will crash the program
print("The password is \(passwordResult)")
Finally, to test functions in a more real use case this day’s checkpoint requires to find the integer square root of an integer number.
enum SqrtError: Error {
    case outOfBound, noRoot
}

func sqrt(of number: Int) throws -> Int {
    if number < 1 || number > 10_000 {throw SqrtError.outOfBound}

    for i in 1...100 {
        if i*i == number { return i}
    }

    throw SqrtError.noRoot
}

let number = 10000
do {
    let root = try sqrt(of: number)
    print("sqaure root of \(number) is \(root)")
} catch SqrtError.outOfBound {
    print("Number must be grater than zero and lessere than 10_001")
} catch SqrtError.noRoot {
    print("No root has been found for \(number)")
}
Day 9
After functions, it is time to go functional!
A function can be assigned to a variable and called from that variable. That is usefull when you want to let the user define a behaviour to call later.
func a() {
    print("Hello from a")
}

var aCaller = a
aCaller()

let bCaller = {
    print("Hello from b")
}
bCaller()
In the example, bCaller is called closure (a.k.a anonymous function).
To accept some values as input and return, we have to specify it in the closure with {(<parameter list>) -> <returnType> in } (which is also the type of the function).
let sayHello: (String) -> String = { (name: String) -> String in
    return "Hi \(name)"
}

let message = sayHello("John")
In a closure, we can avoid using parameters name and use $0, $1, $2, ... and inline the function definition (having an anonymous function) instead. That is called trailing closure syntax.
let alphabet = ["B", "D", "X", "A", "F"]

let reverseSorted = alphabet.sorted {
    return $0 > $1
}

let onlyA = alphabet.filter { $0.hasPrefix("A") }
Obviously, function can be accepted as parameter by other functions (we can say that is what functional means).
func makeArray(size: Int, using generator: () -> Int) -> [Int] {
    var numbers: [Int] = []
    for _ in 0..<size {
        let newNumber = generator()
        numbers.append(newNumber)
    }
    return numbers
}

let intArry = makeArray(size: 10) {
    Int.random(in: 1...20)
}
One thing I am not really happy with is how are handled multiple closure as parameters
func a(first: () -> Void, second: () -> Void, third: () -> Void) {
    first()
    second()
    third()
}

a {
    print("First")
} second: {
    print("Second")
} third: {
    print("Third")
}
Finally, as checkpoint, here it is a program that exploits the power of closures.
let luckyNumbers = [7, 4, 38, 21, 16, 15, 12, 33, 31, 49]

luckyNumbers
    .filter({$0.isMultiple(of: 2)})
    .sorted()
    .map({"\($0) is lucky number"})
    .forEach({print("\($0) is a lucky number")})
Day 10
After functional, object-oriented programming joins the game.
We start with structs:
struct Album {
    let title: String
    let artist: String
    let year: Int

    func printInfo()  {
        print("\(title) (\(year) by \(artist)")
    }
}

let red = Album(title: "Red", artist: "Taylor Swift", year: 2012)
red.printInfo()
By defualt a struct instance is constant. It means you cannot change the value of its variables even if they are marked as var.
struct Employee {
    let name: String
    var vacationRemaining: Int

    func takeVacation(days: Int) {
        if vacationRemaining > days {
            vacationRemaining -= days
            print("You can go to vacation. \(vacationRemaining) days left")
        }
    }
}
In the example above, when we do vacationRemaining -= days, the compiler will complain with the following error message: Left side of mutating operator isn't mutable: 'self' is immutable.
To change this behaviour we have to explicitly mark the function as mutating.
struct Employee {
    let name: String
    var vacationRemaining: Int

    mutating func takeVacation(days: Int) {
        if vacationRemaining > days {
            vacationRemaining -= days
            print("You can go to vacation. \(vacationRemaining) days left")
        }
    }
}
However, when we declare the variable holding our instance it changes if we declare it as let or as var.
struct Employee {
    let name: String
    var vacationRemaining: Int

    mutating func takeVacation(days: Int) {
        if vacationRemaining > days {
            vacationRemaining -= days
            print("You can go to vacation. \(vacationRemaining) days left")
        } else {
            print("You don't have enough vacation days")
        }
    }
}

var john = Employee(name: "John", vacationRemaining: 10)
john.takeVacation(days: 5)
print(john.vacationRemaining)

let mary = Employee(name: "Mary", vacationRemaining: 10)
mary.takeVacation(days: 5)
print(mary.vacationRemaining)
When we declare let mary = ... we cannot invoke any mutating function. We will get the following error: Cannot use mutating member on immutable value: 'mary' is a 'let' constant
Notes on properties
Computed property
That is a fancy name for a getter and setter. For the setter the new value is hold by the automatic newValue parameter.
struct Employee {
    let name: String
    var vacationAllocated: Int = 14
    var vacationTaken = 0

    var vacationRemaining: Int {
        get {
            vacationAllocated - vacationTaken
        }
        set {
            vacationAllocated = vacationTaken + newValue
        }
    }
}

var john = Employee(name: "John")
john.vacationTaken += 4
print("\(john.name) has \(john.vacationRemaining) days of vacation")

john.vacationRemaining = 10
print(print("\(john.name) has a total of \(john.vacationAllocated) days of vacation"))
It is worth notice that, computed properties can only be var.
Observed property
In addition to getter and setter we have also didSet and willSet to observe how a variable is changed or is goining to change.
struct Game {
    var score = 0 {
        didSet {
            print("Someone just scored. Now it is \(score), before was \(oldValue)")
        }
    }

    var player: [String] = [] {
        willSet {
            print("List of player is going to change. The list of player will change from \(player) to \(newValue)")
        }
    }
}

var game = Game()
game.player = ["John", "Tim"]
game.score += 1
game.player = game.player + ["Craig"]
game.score += 1
Initializer
Finally, let’s talk about how to initialize our structs.
By defualt we have a generated initializer which takes in input all the properties of our struct.
struct Player {
    let name: String
    let number: Int

    init(name: String) {
        self.name = name
        self.number = Int.random(in: 1...99)
    }
}

var player = Player(name: "John")
print("\(player.name) is number \(player.number)")
Before calling any struct’s method inside the initializer we have to initialize every property.
Day 11
Access modifier
By defualt the access to struct’s members are public. There are other two access modifier:
-
private: only by struct -
fileprivate: only in the same file
We can go further and use private and fileprivate also by setter.
private(set) var ...
An interesting point is that Swift cannot generate the initializer when we have a mix of private and public attributes.
struct A {
    private var a = "a string"
}

let a = A() // OK

struct B {
    private var b = "b string"
    var c: String
}

let b = B(c: "c string") // !Error: initializer is inaccessible due to 'private' protection level
Static members
We can declare static members for our structs.
struct A {
    static var a = 0

    static func f(s: String) {
        print(s)
        a += 1
    }
}

A.f(s: "a string")
print(A.a)
In a static method we can access to “self” through the keyword Self (note the capital S).
Checkpoint
Today has been also a checkpoint day.
Today’s task was to define a struct for a car which can change gear.
enum GearMovement {
    case UP, DOWN
}

enum GearException: Error{
    case NO_UP, NO_DOWN
}

struct Car {
    let model: String
    let seats: Int
    private(set) var currentGear: Int = 0

    init(model: String, seats: Int) {
        self.model = model
        self.seats = seats
    }

    mutating func changeGear(_ move: GearMovement) throws {
        if currentGear == 10 && move == .UP {throw GearException.NO_UP}
        if currentGear == 0 && move == .DOWN {throw GearException.NO_DOWN}


        switch move {
        case .UP:
            currentGear += 1
        default:
            currentGear -= 1
        }
    }
}


var myCar = Car(model: "MIa", seats: 5)

do {
    try myCar.changeGear(.UP)
    print("Now you are in \(myCar.currentGear)")
} catch {
    print("Error: \(error)")
}
Day 12
Structs can hold data and perform operations through functions but OOP is much more. For this reason we need classes.
In addition to structs, classes are defined by:
- Inheritance
- Not having an auto-generated initializer
- Copying an instance of a class means copying its reference
- De-initializers
- The possibility to change properties of an object declared as constant
Copy means shallow copy
class Game {
    var score = 0 {
        didSet {
            print("Score is now \(score)")
        }
    }
}

var newGame = Game()
newGame.score += 1 // score = 1

var anotherGame = newGame
anotherGame.score += 1 // score = 2

newGame.score += 1 // score = 3
We have to implement our own deepCopy function to overcome this.
Inheritance
Regarding inheritance, Swift works as many other programming languages.
class ParentClass {
    func work() {
        print("work from ParentClass")
    }
}

final class ChildClass: ParentClass {
    override func work() {
        super.work()
        print("And then work from ChildClass")
    }
}
Initializer
Initializers are a bit more complicated than struct’s initializers because inheritance could be in between.
class ParentClass {
    var a: Int

    init(a: Int) {
        self.a = a
    }
}

final class ChildClass: ParentClass {
    var b: Int

    init(a: Int, b: Int) {
        self.b = b
        super.init(a: a)
    }
}
It is worth noticing that in ChildClass’s initializer we must initialize its own attributes before calling ParentClass initializer.
De-initializer
We can define the behaviour when an object is destroyed. In Swfift we don’t have to manage the memory (no new and delete keyword). So, an object is destroyed when the last variable, pointing to it, is unreachable (out of scope ({...})). Swift uses Automatic Reference Counting (ARC) to keep trace of which objects are still reachable by some variable.
class A {
    var a: Int

    init(a: Int) {
        print("Init an object of type A")
        self.a = a
    }

    deinit {
        print("Destroyed an object of type A")
    }
}

func main() {
    var a = A(a:0)

    for i in 1...5 {
        var copyOfA = a
        copyOfA.a += 1
        print("a's new value is \(copyOfA.a)")
    }
}

main()
Variables or constants?
When we declare a constant object (let a = A(a: 0)) we are saying that a will point to that area of memory and cannot be changed (a = A(a: 1)). The area of memory holding the object is not constant and can be changed (if properties are declared as var and not as let).
This brings another difference from structs. Classes don’t have the mutating keyword for functions.
Checkpoint
Classes can be challenging. To be sure to have understood how they work an exercise is proposed: a class hierarchy for animals.
class Animal {
    let legs: Int

    init(legs: Int) {
        self.legs = legs
    }
}

class Dog: Animal {
    init() {
        super.init(legs: 4)
    }

    func speak() {
        print("Bau")
    }
}

class Corgi: Dog {
    override func speak() {
        print("Bau but in corgi dialect")
    }
}

class Poodle: Dog {
    override func speak() {
        print("Bau but in poddfle dialect")
    }
}

class Cat: Animal {
    var isTame: Bool

    init(isTame: Bool) {
        self.isTame = isTame
        super.init(legs: 4)
    }

    func speak() {
        print("Mio")
    }
}

class Persian: Cat {
    init() {
        super.init(isTame: true)
    }

    override func speak() {
        print("Miao but in persian dialect")
    }
}

class Lion: Cat {
    init() {
        super.init(isTame: false)
    }

    override func speak() {
        print("Miao but in lion dialect (a.k.a. roar)")
    }
}
Day 13
Protocols
Next and last step in OOP is learning interfaces (Swift calls them protocols).
Protocols can require also to declare variables. For each one you have to declare if they are only readable {get} or readable and writable {get set}
protocol Moving {
    var speed: Int { get }
    func estimateTime(for distance: Int) -> Int
    func travel(distance: Int)
}

class Car: Moving {
    var speed: Int = 50

    var travelledKm = 0

    func estimateTime(for distance: Int) -> Int {
        return distance / speed
    }

    func travel(distance: Int) {
        travelledKm += distance
    }
}

class Feet: Moving {
    var speed: Int = 5
    var hurt = false

    func estimateTime(for distance: Int) -> Int {
        return distance / speed
    }

    func travel(distance: Int) {
        if distance > 100 {hurt = true}
    }

}

func commute(distance: Int, using tool: Moving) {
    tool.travel(distance: distance)
}
Opaque return types
Sometimes we cannot tell to the compiler what type we are returning from a function because it will complain, maybe, without reason.
func getRandomNumber() -> Equatable {
    return Int.random(in: 1...6)
}

func getRandomBool() -> Equatable {
    return Bool.random()
}

print(getRandomNumber() == getRandomNumber())
The solution is telling Swift that we return some of that type
func getRandomNumber() -> some Equatable {
    return Int.random(in: 1...6)
}

func getRandomBool() -> some Equatable {
    return Bool.random()
}

print(getRandomNumber() == getRandomNumber())
The some keyword let the compiler to know the real type reuturned but from our perspective it is only an equatable.
The some keyword can be read as: “we are returning a specific type of equatable but we are not saying which one”.
SwiftUI uses this feature a lot.
Extensions
With extensions we can add function(alities) to any type.
extension String {
    func toStrangeFormat() -> String {
        var newString = ""
        for (i, c) in self.enumerated() {
            newString += i.isMultiple(of: 2) ? String(c) : c.uppercased()
        }
        return newString
    }
}

let myNormalString = "A normal string".toStrangeFormat()
print(myNormalString) // A nOrMaL StRiNg
Moreover, if we implement a custom initializer for a struct inside an extension, Swift will keep the default initializer and of our custom one.
We can extend protocols as well. In this case we can specify implementation for functions in protocols accessible everywhere. In the example before, we can specify the method estimateTime as an extension of the protocol Moving in order to provide the default implementation return distance / speed.
Checkpoint
Also today has been a checkpoint-day. The challenge was about modelling a protocol for a building and implementing it for two structs.
protocol Building {
    var rooms: Int {get}
    var cost: Int {get set}
    var seller: String {get}

    func printSummary()
}

struct House: Building {
    var rooms: Int
    var cost: Int
    var seller: String

    func printSummary() {
        print("This house is selled by \(seller). It has \(rooms) rooms and it costs \(cost)$")
    }
}

struct Office: Building {
    var rooms: Int
    var cost: Int
    var seller: String

    func printSummary() {
        print("This office is selled by \(seller). It has \(rooms) rooms and it costs \(cost)$")
    }
}
Day 14
Last topic about the Swift programming language: the optional type. In Swift, we can mark any type as an optional type, which means that the variable holding that type could be an instance of the type or nil (null, None, or nullptr in other languages).
In Swift, to say that a type can be nil we specify it in the type specification with a question mark: Type?.
Unwrapping optional values
We have a couple of solutions to unwrap optional values:
if-let
var maybeString: String? = nil

if let maybeString = maybeString { // Shadowing
    print("I'm sure maybeString is not nil and its value is \(maybeString)")
} else {
    print("maybeString is nil. Nothing to show")
}
guard-let
func doSomething(a: String?) {
    guard let a = a else {
        print("a was nil. Returning")
        return
    }

    print("Here I'm sure 'a' is not nil: \(a)")
}
Nil coalescing
Also known as: default value. It is achieved adding a doubble question mark ?? after the use of the optional value.
let map = [
    1: "A",
    2: "B",
    3: "C"
]

let missing = map[4] ?? "N/A"
It is worth noticing that you can chain default values: let a = f1() ?? f2 ?? "default".
Optional chaining
We can use optional inside optionals.
let a = ["a", "b", "c", "d"]
let chosen = a.randomElement?.uppercased() ?? "No one"
You can read it as: “unwrap the value and continue the processing. If any step fails unwrapping, then fallback to the default value”.
Optional instead of exception
We can catch an exception and return a nil instead of handling the exception. To do so, we can use try? before calling the throwing function.
enum UserError: Error {
    case badId, networkFailed
}

func getUser(id: Int) throws -> String {
    throw UserError.networkFailed
}

if let user = try? getUser(id: 42) {
    print("User: \(user)")
}

let user = (try? getUser(id: 42)) ?? "Anonymous"
We can also let the program crash. When we use try! f() the program will crash if any exception is thrown in the function called after the try!
Checkpoint
Also today was a checkpoint-day. The challenge was about coding a function that handles optional values in a single line of code.
func f(a: [Int]?) -> Int{
    return a?.randomElement() ?? Int.random(in: 1...100)
}
Day 15
Today has been dedicated to a recap of the foundamentals learned so far. Nothing new has been added. From tomorrow we move into SwiftUI and app development.
Day 16
Today we start iOS app development with a running example. WeSplit is an app that allows to split the cost of a launch or a dinner among people.
Structure of a SwiftUI app
When we create a new iOS app in XCode, the IDE will genereate a couple of file for us.
The main file is the file with the name of our app. It will contain the following code
import SwiftUI

@main
struct WeSplitApp: App {
    var body: some Scene {
        WindowGroup {
            ContentView()
        }
    }
}
This struct will live for the whole time our app will run.
The interface is handled by ContentView
import SwiftUI

struct ContentView: View {
    var body: some View {
        VStack {
            Image(systemName: "globe")
                .imageScale(.large)
                .foregroundStyle(.tint)
            Text("Hello, world!")
        }
        .padding()
    }
}

#Preview {
    ContentView()
}
For now everything will be managed by ContentView. At a first glance we can already see a lot of stuff we have already see in the last days.
We have:
- a
structrepresenting our view which implemnts theViewprotocol - a computed property called
bodyof typesome View
Then we have new stuff:
- a
VStack - an
Image - a
Text - a call to the
padding()method
Last thing is the #Preview statement which initialize an object of type ContentView which will be showed in XCode without running our app. This feature is called canvas.
Form
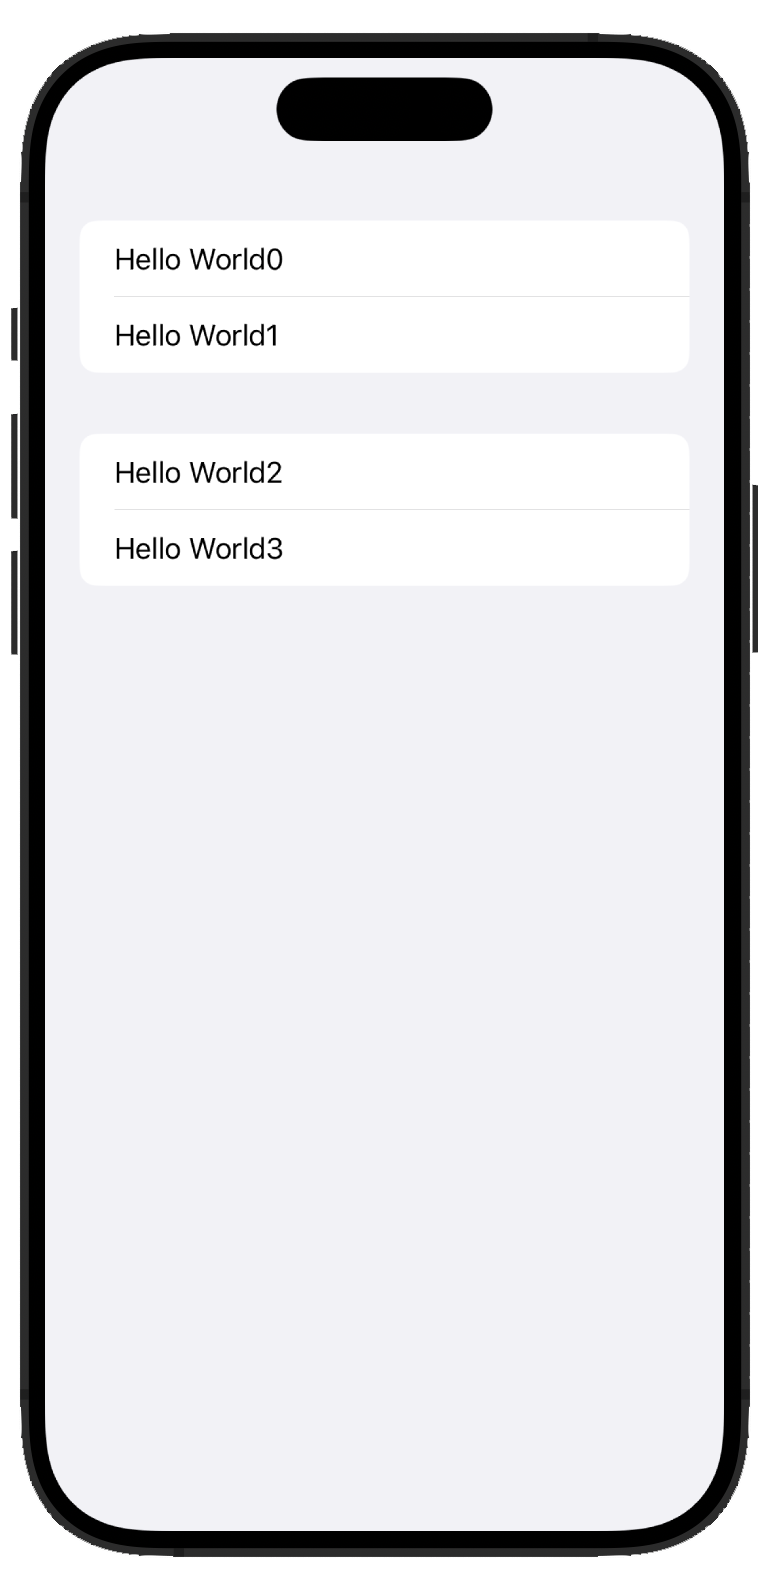
A Form is a graphical element which can be used as container for other elements (usually, for data input from the user). We can separate sections of the forms, grouping them inside a Grouping object.
|
 |
Navigation bar
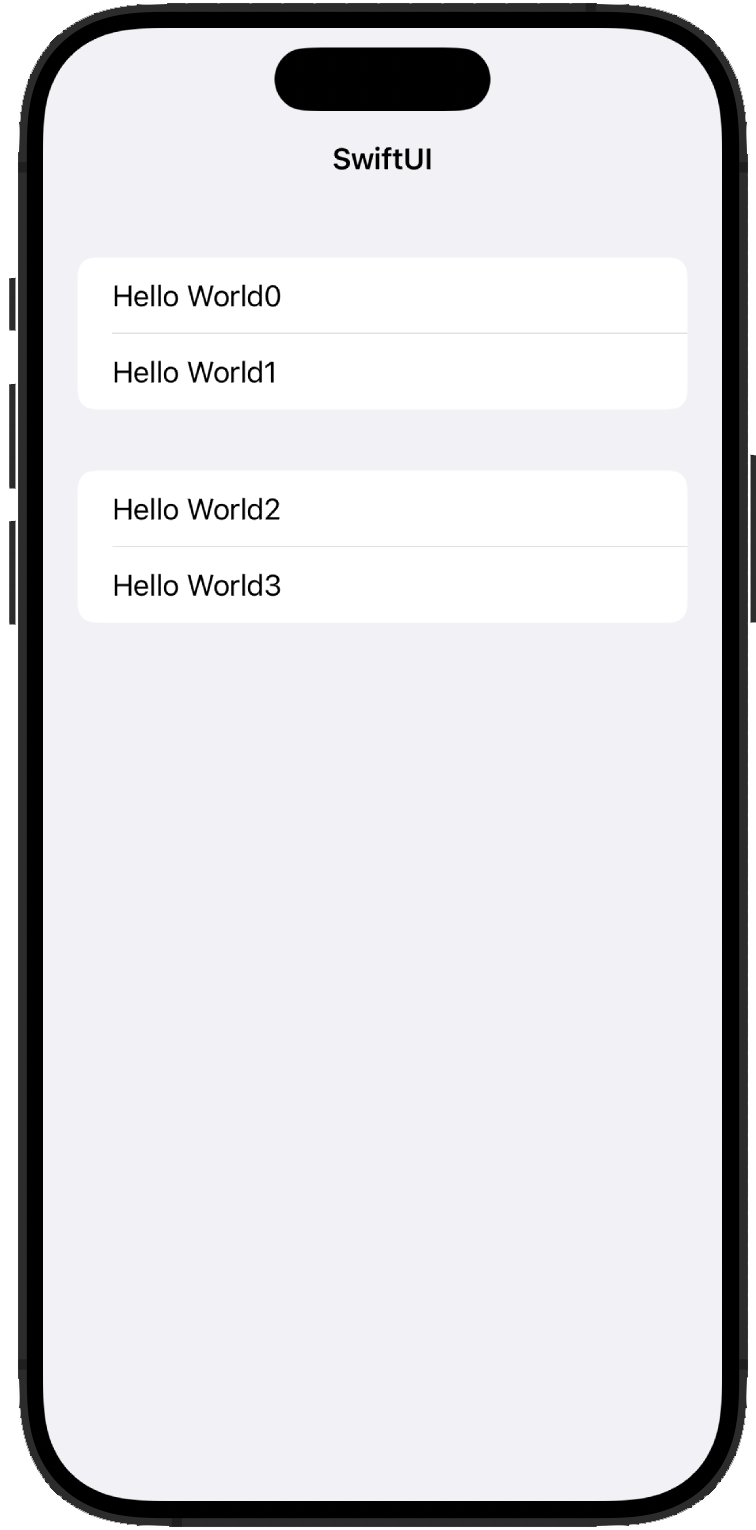
Container which allow the navigation between views. We surround our Form with a NavigationStack and add some properties to it applying them to the form.
|
 |
App state
What a view presents depends on its state.
In Swift, structs cannot change the value of their variables outsie mutating func so we cannot have something like this:
struct ContentView: View {
    var tapCount = 0

    var body: some View {
        Button("Tap count: \(tapCount)") {
           tapCount += 1
        }
    }
}
The solution is using a property wrapper for our varibale called State.
struct ContentView: View {
    @State var tapCount = 0

    var body: some View {
        Button("Tap count: \(tapCount)") {
           tapCount += 1
        }
    }
}
Binding
We want our user interface being able to change the state of our app. When we write a string as input of a TextField we can link it to a @State variable but that is not enough. We have to tell to SwiftUI that we are binding that state to the graphical element which will change. To do so, we pass $varName instead of varName
The dollar sign means: be able to read and change the value in the state variable.
struct ContentView: View {
    @State var name = ""

    var body: some View {
        Form {
            TextField("Enter your name", text: $name)
            Text("Hello \(name)!")
        }
    }
}
Loops
We can create views in a loop (maybe one for each iteration).
struct ContentView: View {
    @State var name = ""

    var body: some View {
        Form {
            ForEach(0..<100) { number in
                Text("Row \(number)")
            }
        }
    }
}
We can use it in a PickerView to select an element from a list.
struct ContentView: View {
    let students = ["John", "Mark", "Tim", "Steve"]
    @State private var name = ""

    var body: some View {
        NavigationStack {
            Form {
                Picker("Select your student", selection: $name) {
                    ForEach(students, id: \.self) {
                        Text($0)
                    }
                }
            }
        }
    }
}
We can see things are becoming complex:
- We define a
NavigationStack - Inseide the
NavigationStackwe insert aForm - Insider our
Formwe insert aPickerwhich has:- a label (“Select your student”)
- a varibale where store the selction (
$name) - a list of views (
Text) which represent the possible selections. This list is generated with aForEach“loop”- we iterate over
students - we tell to the
ForEachhow to uniquely identify each element (idparameter (we use\.selfwhich means each string)) - we create the view
Textwith text the first element of the closure (the string itself)
- we iterate over
Day 17
Let’s start developing our WeSplit application. First of all we need three state variable: checkAmount, numberOfPeople, and tipPercentage. Then we need an array of possible tip percentages. This is not a state variable because it will not change.
Finally, we declare the body computed variable which will be computed every time a state variable changes.
First iteration
struct ContentView: View {
    @State private var checkAmount = 0.0
    @State private var numberOfPeople = 2
    @State private var tipPercentage = 20

    let tipPercenteges = [10, 15, 20, 25, 0]

    var body: some View {
        Form {
            Section {
                TextField("Amount",
                            value: $checkAmount,
                            format: .currency(code: Locale.current.currency?.identifier ?? "USD"))
                    .keyboardType(.decimalPad)
            }

            Section {
                Text(checkAmount, format: .currency(code: Locale.current.currency?.identifier ?? "USD"))
            }
        }
    }
}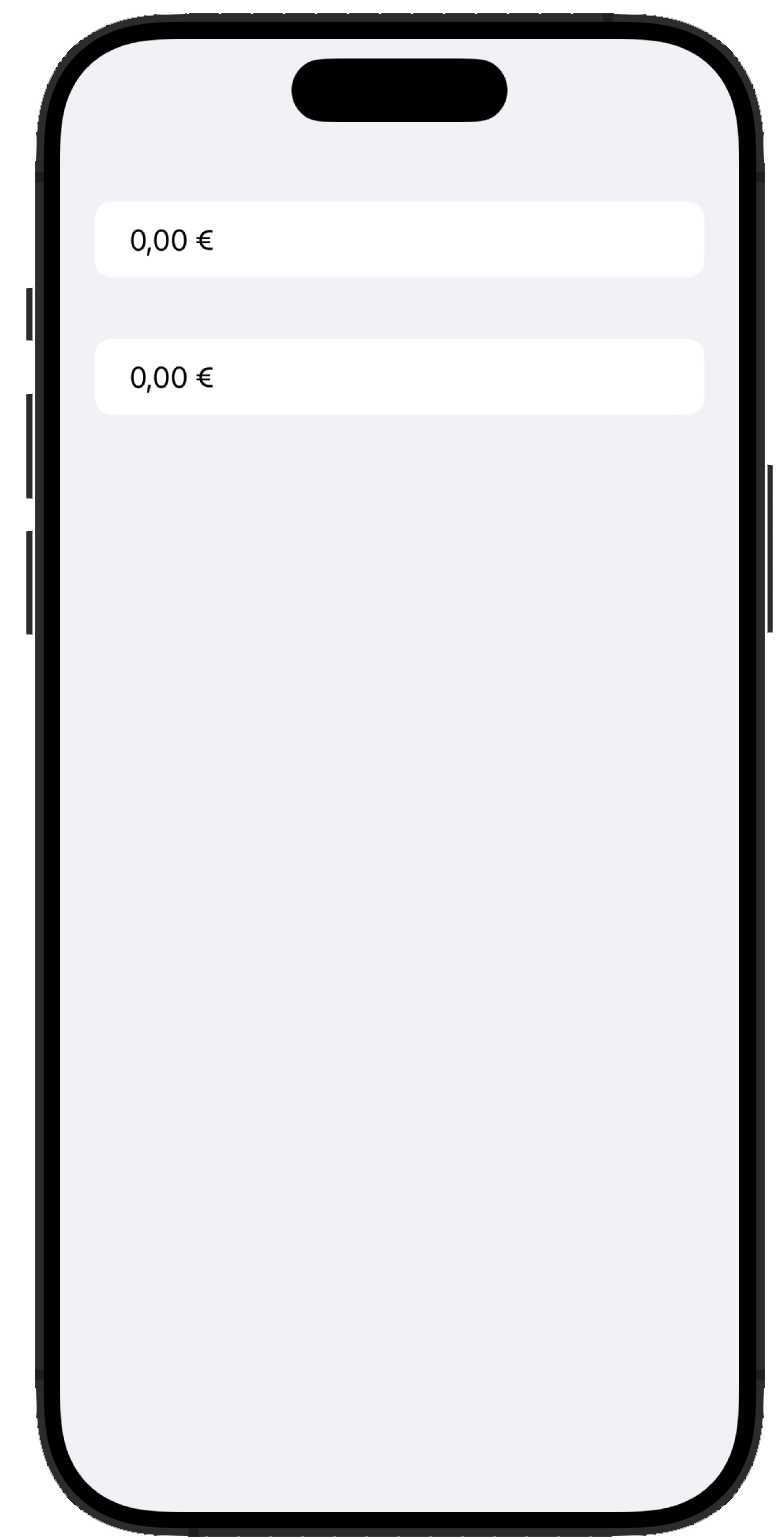
A new element is the access to some Locale value. It holds the identifier for the current currency (“EUR” in my case). It is handled with nil coalescing and a default in case of errors.
Another addition is the definition of the keyboardType to the TextField object.
Second iteration
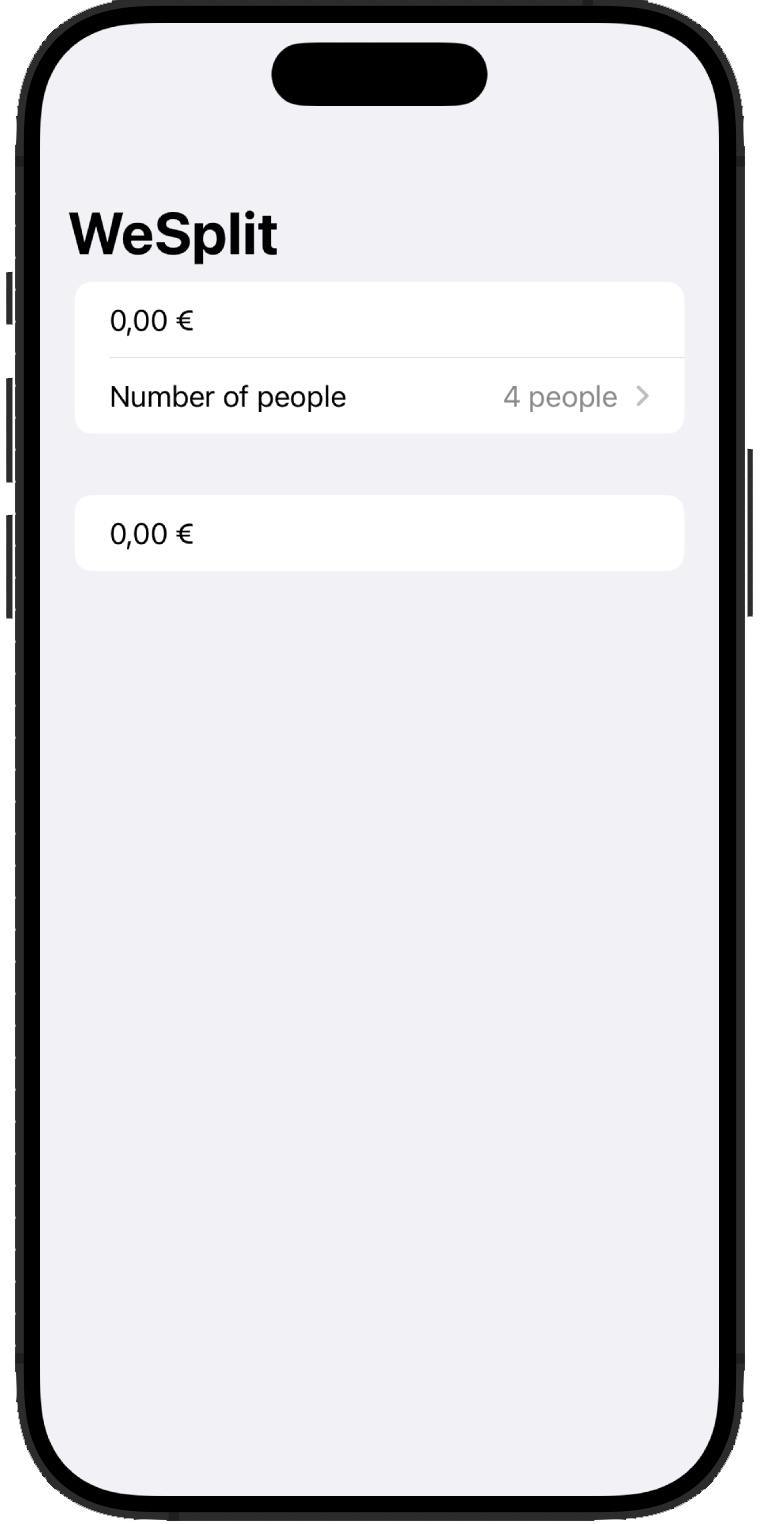
Next step is adding a picker for the number of people eating at out table.
We start declaring a Picker which will be binded to the numberOfPeople variable and will show # of people as text. In addition we can change how the view to select is shown. Adding a NavigationStack around our Form we can set the pickerStyle to .navigationLink to show a new “window”.
struct ContentView: View {
    @State private var checkAmount = 0.0
    @State private var numberOfPeople = 2
    @State private var tipPercentage = 20

    let tipPercenteges = [10, 15, 20, 25, 0]

    var body: some View {
        NavigationStack {
            Form {
                Section {
                    TextField("Amount", value: $checkAmount, format: .currency(code: Locale.current.currency?.identifier ?? "USD"))
                        .keyboardType(.decimalPad)

                    Picker("Number of people", selection: $numberOfPeople) {
                        ForEach(2..<100) {
                            Text("\($0) people")
                        }
                    }
                    .pickerStyle(.navigationLink)
                }

                Section {
                    Text(checkAmount, format: .currency(code: Locale.current.currency?.identifier ?? "USD"))
                }
            }
            .navigationTitle("WeSplit")
        }
    }
}
Third iteration
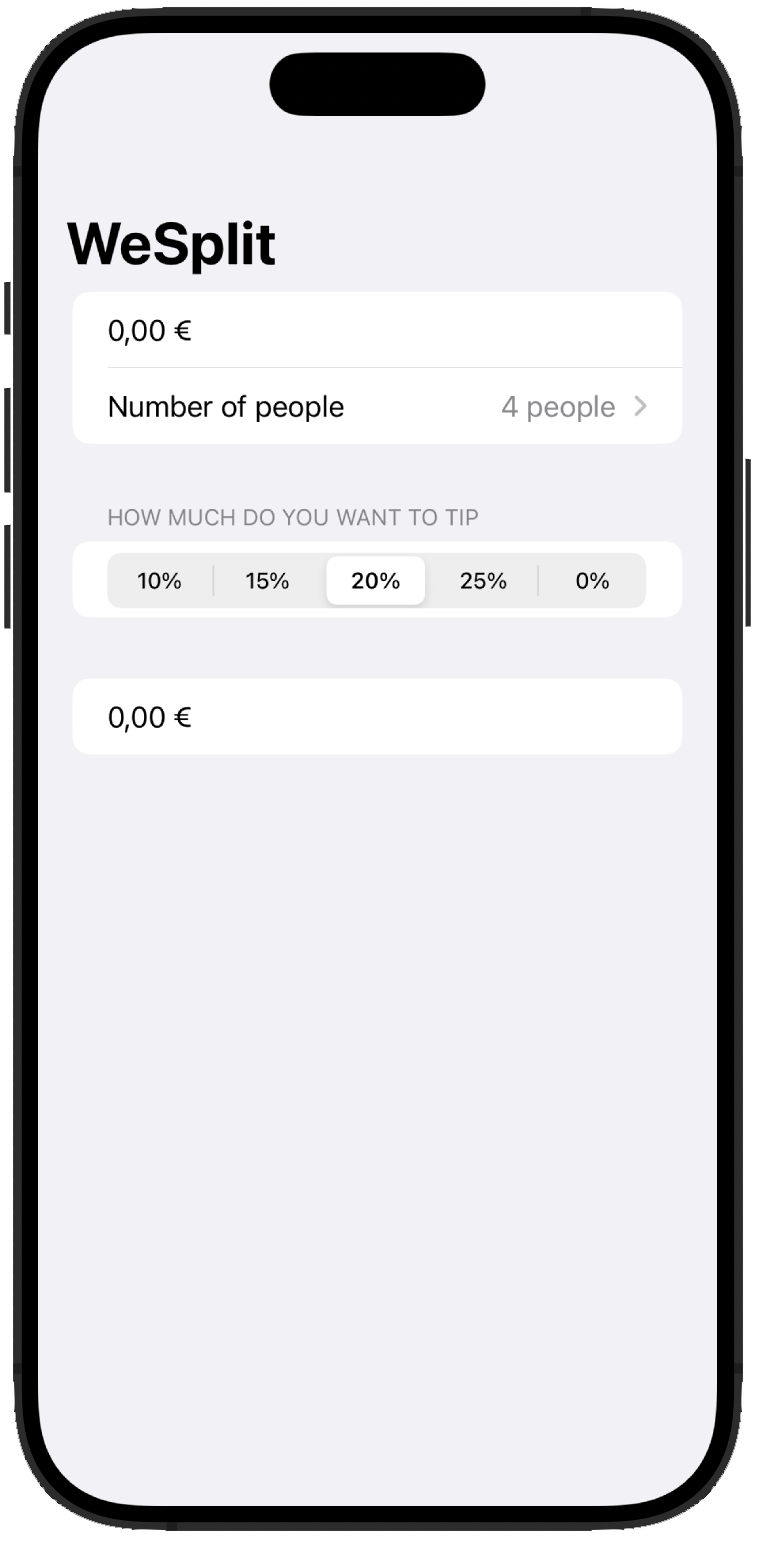
Then, we define our graphical element to input the tip percentage. We use again a Picker with the pickerStyle as .segmented. Moreover, we add a header text for the section holding this new picker to tell the users what they have to do
struct ContentView: View {
    @State private var checkAmount = 0.0
    @State private var numberOfPeople = 2
    @State private var tipPercentage = 20

    let tipPercenteges = [10, 15, 20, 25, 0]

    var body: some View {
        NavigationStack {
            Form {
                Section {
                    TextField("Amount", value: $checkAmount, format: .currency(code: Locale.current.currency?.identifier ?? "USD"))
                        .keyboardType(.decimalPad)

                    Picker("Number of people", selection: $numberOfPeople) {
                        ForEach(2..<100) {
                            Text("\($0) people")
                        }
                    }
                    .pickerStyle(.navigationLink)
                }

                Section("How much do you want to tip") {
                    Picker("Tip percentage", selection: $tipPercentage) {
                        ForEach(tipPercenteges, id: \.self) {
                            Text($0, format: .percent)
                        }
                    }
                    .pickerStyle(.segmented)
                }

                Section {
                    Text(checkAmount, format: .currency(code: Locale.current.currency?.identifier ?? "USD"))
                }
            }
            .navigationTitle("WeSplit")
        }
    }
}
Fourth iteration
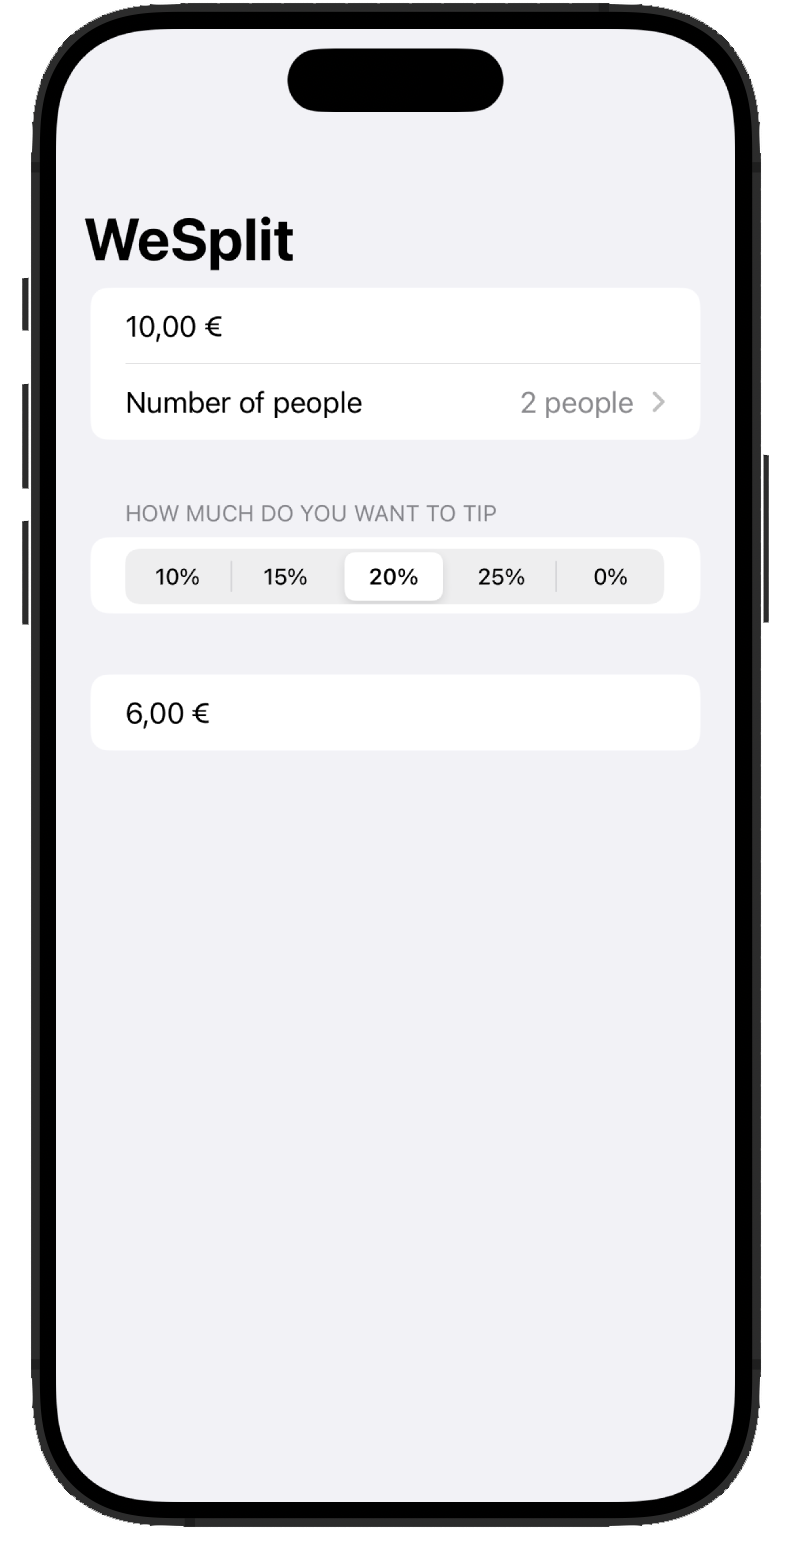
Finally, we compute the total per person. We create a new computer varible and inside it we add the computation which result will be shown in the last Text
struct ContentView: View {
    @State private var checkAmount = 0.0
    @State private var numberOfPeople = 2
    @State private var tipPercentage = 20

    let tipPercenteges = [10, 15, 20, 25, 0]

    private var totalPerPerson: Double {
        let peopleCount = Double(numberOfPeople + 2)
        let tipSelection = Double(tipPercentage)
        let tipValue = checkAmount / 100 * tipSelection
        let grandTotal = checkAmount + tipValue
        let amountPerPerson = grandTotal / peopleCount

        return amountPerPerson
    }

    var body: some View {
        NavigationStack {
            Form {
                Section {
                    TextField("Amount", value: $checkAmount, format: .currency(code: Locale.current.currency?.identifier ?? "USD"))
                        .keyboardType(.decimalPad)

                    Picker("Number of people", selection: $numberOfPeople) {
                        ForEach(2..<100) {
                            Text("\($0) people")
                        }
                    }
                    .pickerStyle(.navigationLink)

                }

                Section("How much do you want to tip") {
                    Picker("Tip percentage", selection: $tipPercentage) {
                        ForEach(tipPercenteges, id: \.self) {
                            Text($0, format: .percent)
                        }
                    }
                    .pickerStyle(.segmented)
                }

                Section {
                    Text(totalPerPerson, format: .currency(code: Locale.current.currency?.identifier ?? "USD"))
                }
            }
            .navigationTitle("WeSplit")
        }
    }
}
Fifth iteration
Let’s fix the “bug” of the keyboard not disapearing after we edited the check amount.
We add a boolean variable amountIsFocues and we mark it as FocusState. Then, we bind this variable to the focused property of the TextField which allows the user to input the amount. Finally, we add a toolbar to our Form (which will be showed in the NavigationStack) with a button to toggle the focus.
struct ContentView: View {
    @State private var checkAmount = 0.0
    @State private var numberOfPeople = 2
    @State private var tipPercentage = 20
    @FocusState private var amountIsFocused: Bool

    let tipPercenteges = [10, 15, 20, 25, 0]

    private var totalPerPerson: Double {
        let peopleCount = Double(numberOfPeople + 2)
        let tipSelection = Double(tipPercentage)
        let tipValue = checkAmount / 100 * tipSelection
        let grandTotal = checkAmount + tipValue
        let amountPerPerson = grandTotal / peopleCount

        return amountPerPerson
    }

    var body: some View {
        NavigationStack {
            Form {
                Section {
                    TextField("Amount", value: $checkAmount, format: .currency(code: Locale.current.currency?.identifier ?? "USD"))
                        .keyboardType(.decimalPad)
                        .focused($amountIsFocused)

                    Picker("Number of people", selection: $numberOfPeople) {
                        ForEach(2..<100) {
                            Text("\($0) people")
                        }
                    }
                    .pickerStyle(.navigationLink)

                }

                Section("How much do you want to tip") {
                    Picker("Tip percentage", selection: $tipPercentage) {
                        ForEach(tipPercenteges, id: \.self) {
                            Text($0, format: .percent)
                        }
                    }
                    .pickerStyle(.segmented)
                }

                Section {
                    Text(totalPerPerson, format: .currency(code: Locale.current.currency?.identifier ?? "USD"))
                }
            }
            .navigationTitle("WeSplit")
            .toolbar {
                if amountIsFocused {
                    Button("Done") {
                        amountIsFocused = false
                    }
                }
            }
        }
    }
}
Day 18
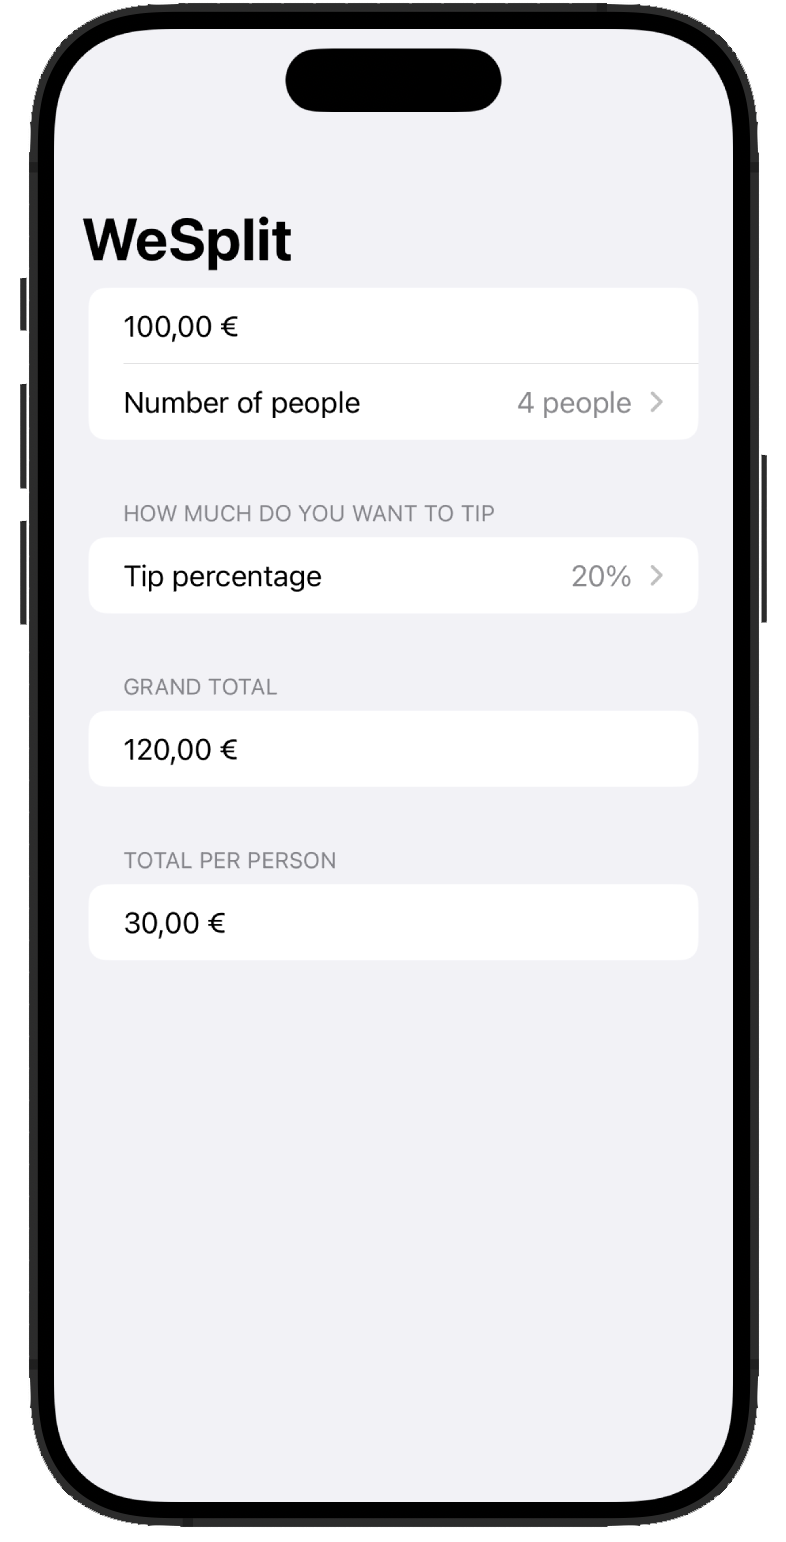
Today is focused on trying adding functionality to WeSplit without any help. The tasks are:
- Add a header for the last section
- Add another section with the grand total
- Change how the user select the tip percentage. From the segmented view to a list view (as the number of people)
struct ContentView: View {
    @State private var checkAmount = 0.0
    @State private var numberOfPeople = 2
    @State private var tipPercentage = 20
    @FocusState private var amountIsFocused: Bool

    //let tipPercenteges = [10, 15, 20, 25, 0]

    private var peopleCount: Double {
        Double(numberOfPeople + 2)
    }

    private var grandTotal: Double {
        let tipSelection = Double(tipPercentage)
        let tipValue = checkAmount / 100 * tipSelection
        let grandTotal = checkAmount + tipValue

        return grandTotal
    }

    private var totalPerPerson: Double {
        let amountPerPerson = grandTotal / peopleCount

        return amountPerPerson
    }

    var body: some View {
        NavigationStack {
            Form {
                Section {
                    TextField("Amount", value: $checkAmount, format: .currency(code: Locale.current.currency?.identifier ?? "USD"))
                        .keyboardType(.decimalPad)
                        .focused($amountIsFocused)

                    Picker("Number of people", selection: $numberOfPeople) {
                        ForEach(2..<100) {
                            Text("\($0) people")
                        }
                    }
                    .pickerStyle(.navigationLink)

                }

                Section("How much do you want to tip") {
                    Picker("Tip percentage", selection: $tipPercentage) {
                        ForEach(1..<101, id: \.self) {
                            Text($0, format: .percent)
                        }
                    }
                    .pickerStyle(.navigationLink)
                }

                Section("Grand total") {
                    Text(grandTotal, format: .currency(code: Locale.current.currency?.identifier ?? "USD"))
                }

                Section("Total per person") {
                    Text(totalPerPerson, format: .currency(code: Locale.current.currency?.identifier ?? "USD"))
                }
            }
            .navigationTitle("WeSplit")
            .toolbar {
                if amountIsFocused {
                    Button("Done") {
                        amountIsFocused = false
                    }
                }
            }
        }
    }
}
Day 19
Today we have built a unit converter app from scratch without any guide.
The task required to look back at the code wrote last days and study the Measurement library provided by Swift.
The result is an app which is capable of converting any type of lenght unit into another.
struct ContentView: View {

    @State private var inputMeasure = 0.0
    @State private var inputUnit = UnitLength.feet
    @State private var outputUnit = UnitLength.meters
    private var outputMeasure: Double {
        let input = Measurement(value: inputMeasure, unit: inputUnit)
        return input.converted(to: outputUnit).value
    }

    let possibleUnits: [UnitLength] = [.astronomicalUnits, .centimeters, .decameters, .decimeters, .fathoms, .feet, .furlongs, .hectometers, .inches, .kilometers, .lightyears, .megameters, .meters, .micrometers, .miles, .millimeters, .nanometers, .nauticalMiles, .parsecs, .picometers, .scandinavianMiles, .yards]

    var body: some View {
        NavigationStack {
            Form {
                Section("Input unit") {
                    Picker("Input unit", selection: $inputUnit) {
                        ForEach(possibleUnits, id: \.self) {
                            Text($0.symbol)
                        }
                    }
                    .pickerStyle(.navigationLink)
                    TextField("Input value", value: $inputMeasure, format: .number)
                        .keyboardType(.numberPad)
                }

                Section("Output") {
                    Picker("Output unit", selection: $outputUnit) {
                        ForEach(possibleUnits, id: \.self) {
                            Text($0.symbol)
                        }
                    }
                    .pickerStyle(.navigationLink)
                    Text("\(outputMeasure) (\(outputUnit.symbol))")
                }
            }
            .navigationTitle("Unit converter")
        }
    }
}
Day 20
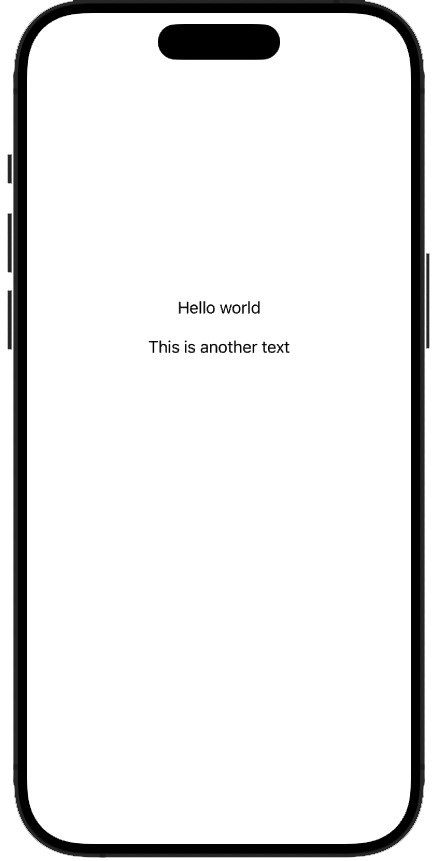
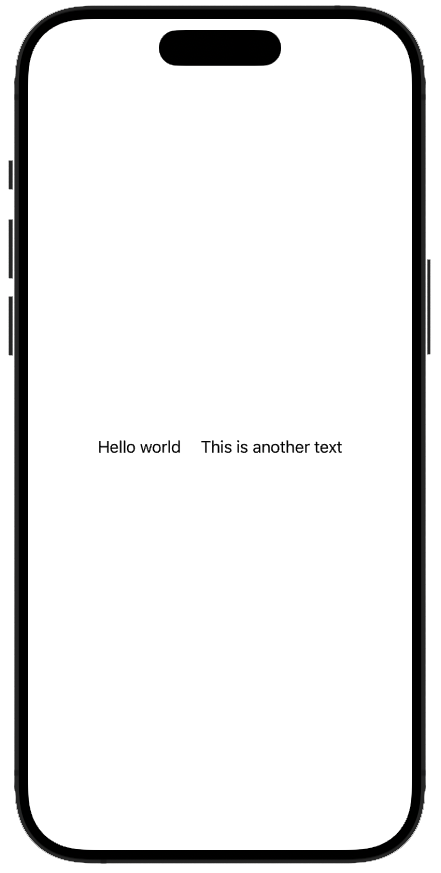
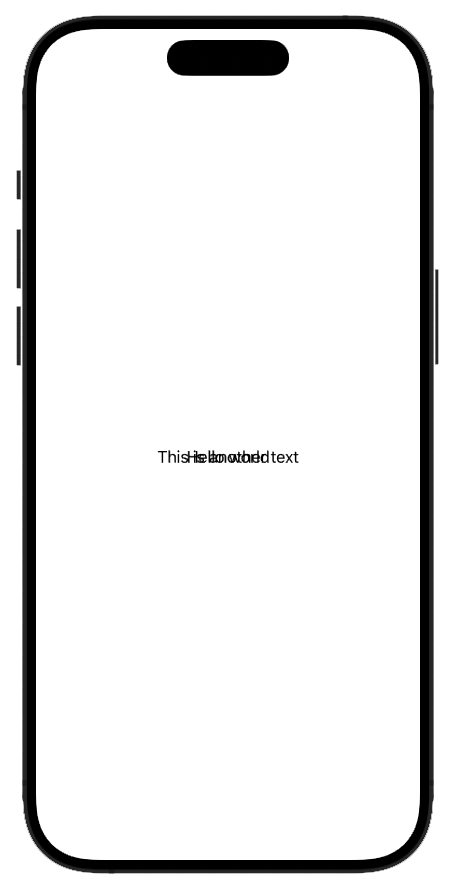
Stack
In SwiftUI, stacks are foundamental. There are three kind of them: VStack (vertical), HStack (horizontal), and ZStack (z-axis/deep).
They help us in aligning items in a direction. Moreover we can specify the spacing and the aligninment between the elements inisde.
In addtion to stacks, the Spacer has been introduced. It helps spacing element inside another view (a stack for example).
|
 |
|
 |
|
 |
Frames
In SwiftUI, frames are the geometry entity behind each graphical element shown on screen.
For each one, we can set the frame with width, height and min and max variants of them.
Color
The Color entity is the thing that allows us to make our apps colorfull. We can use predefined color (which can automatically switch when the user change from light to dark and vice versa), make our own color, or even use materials.
|
 |
Linked to colors, there are gradients. In SwiftUI we have three kind of gradients to use: LinearGradient, RadialGradient, AngularGradient. For each one of them we can specify the colors and also the stops for the gradient.
var body: some View {
    ZStack {
        LinearGradient(colors: [.red, .blue], startPoint: .top, endPoint: .bottom)

        Text("Your content")
            .foregroundStyle(.secondary)
            .padding(50)
            .background(.ultraThinMaterial)
    }
    .ignoresSafeArea()
}
Buttons
Buttons are what users interacts with. As simple as possible, a button is made of a string label and an action to perform when it is clicked. The action can be a method and not an anonymous function.
|
 |
Images
The way to show images in SwiftUI is using the Image element. It allows us to show an image present in the Assets folder or a systemImage from the SFSymbols app. We can declare if the image is just decorative (Image(decorative: "<imageName>")) to help screen reader in better understanding what they are reading.
Label
A Label is an object that can be used inside the label: {} view of a Button instad of Text. With Label, iOS is capable of performing changes if needed to it without the need to specify anything.
Alerts
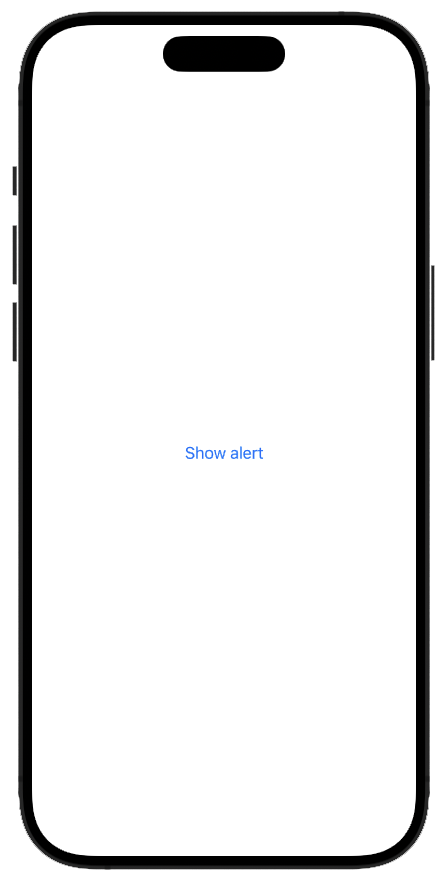
To show a message to the user we can use alerts. In SwiftUI we don’t declare a object of type Alert and the present it in someway. In SwiftUI we declare a State variable which will tell if we are in a state presenting the alert or not. Then we add to our view the property alert biding to it the state variable.
struct ContentView: View {
    @State private var showingAlert = false

    var body: some View {
        VStack {
            Button("Show alert") { showingAlert = true }
        }
        .alert("Hello from the alert", isPresented: $showingAlert) {
            Button("Ok") { showingAlert = false }
        } message: {
            Text("Please read this")
        }
    }
}
Day 21
Images from file
We can import images into our XCode project. More precisely, we import them into the Assets directory. Each image can have three dimesion: 1x, 2x, and 3x. We can automatically import all the images we want and XCode will understand their dimension based on the file name. fileName@2x and fileName@3x` will create a unique asset with two images (2x and 3x).
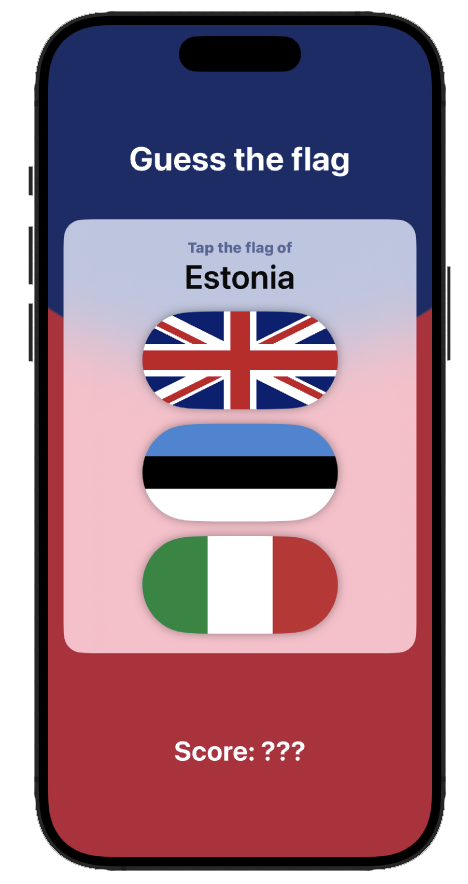
Guess the flag
Guess the flag is a simple game which asks to the user to indetify the correct flag among three options. Today’s effort is concentrated into creating the user interface and the simple logic of the game (except for storing the score).
In SwiftUI every bit of the user interface is made with code, which means that things get confused when a lot of different modifier are applied and the logic is, somehow, hidden.
struct ContentView: View {
    @State var countries = ["Estonia", "France", "Germany", "Ireland", "Italy", "Nigeria", "Poland", "Spain", "UK", "Ukraine", "US"].shuffled()
    @State var correctAnswer = Int.random(in: 0...2)

    @State private var showingScore = false
    @State private var scoreTitle = ""

    var body: some View {
        ZStack {
            RadialGradient(stops: [
                .init(color: Color(red: 0.1, green: 0.2, blue: 0.45), location: 0.3),
                .init(color: Color(red: 0.76, green: 0.15, blue: 0.26), location: 0.3)
            ], center: .top, startRadius: 200, endRadius: 700)
                .ignoresSafeArea()

            VStack {
                Spacer()

                Text("Guess the flag")
                    .font(.largeTitle.bold())
                    .foregroundStyle(.white)

                Spacer()

                VStack(spacing: 15) {
                    VStack {
                        Text("Tap the flag of")
                            .foregroundStyle(.secondary)
                            .font(.subheadline.weight(.heavy))

                        Text(countries[correctAnswer])
                            .font(.largeTitle.weight(.semibold))
                    }

                    ForEach(0..<3) { number in
                            Button {
                            flagTapped(number)
                        } label: {
                            Image(countries[number])
                                .clipShape(.capsule)
                                .shadow(radius: 5)
                        }
                    }
                }
                .frame(maxWidth: .infinity)
                .padding(.vertical, 20)
                .background(.regularMaterial)
                .clipShape(.rect(cornerSize: CGSize(width: 20, height: 20)))

                Spacer()
                Spacer()

                Text("Score: ???")
                    .foregroundStyle(.white)
                    .font(.title.bold())

                Spacer()
            }
            .padding()
        }
        .alert(scoreTitle, isPresented: $showingScore) {
            Button("Continue", action: askQuestion)
        } message: {
            Text("Your score is ???")
        }
    }

    func flagTapped(_ number: Int) {
        scoreTitle = number == correctAnswer ? "Correct" : "Wrong"
        showingScore = true
    }

    func askQuestion() {
        countries.shuffle()
        correctAnswer = Int.random(in: 0...2)
    }
}
Day 22
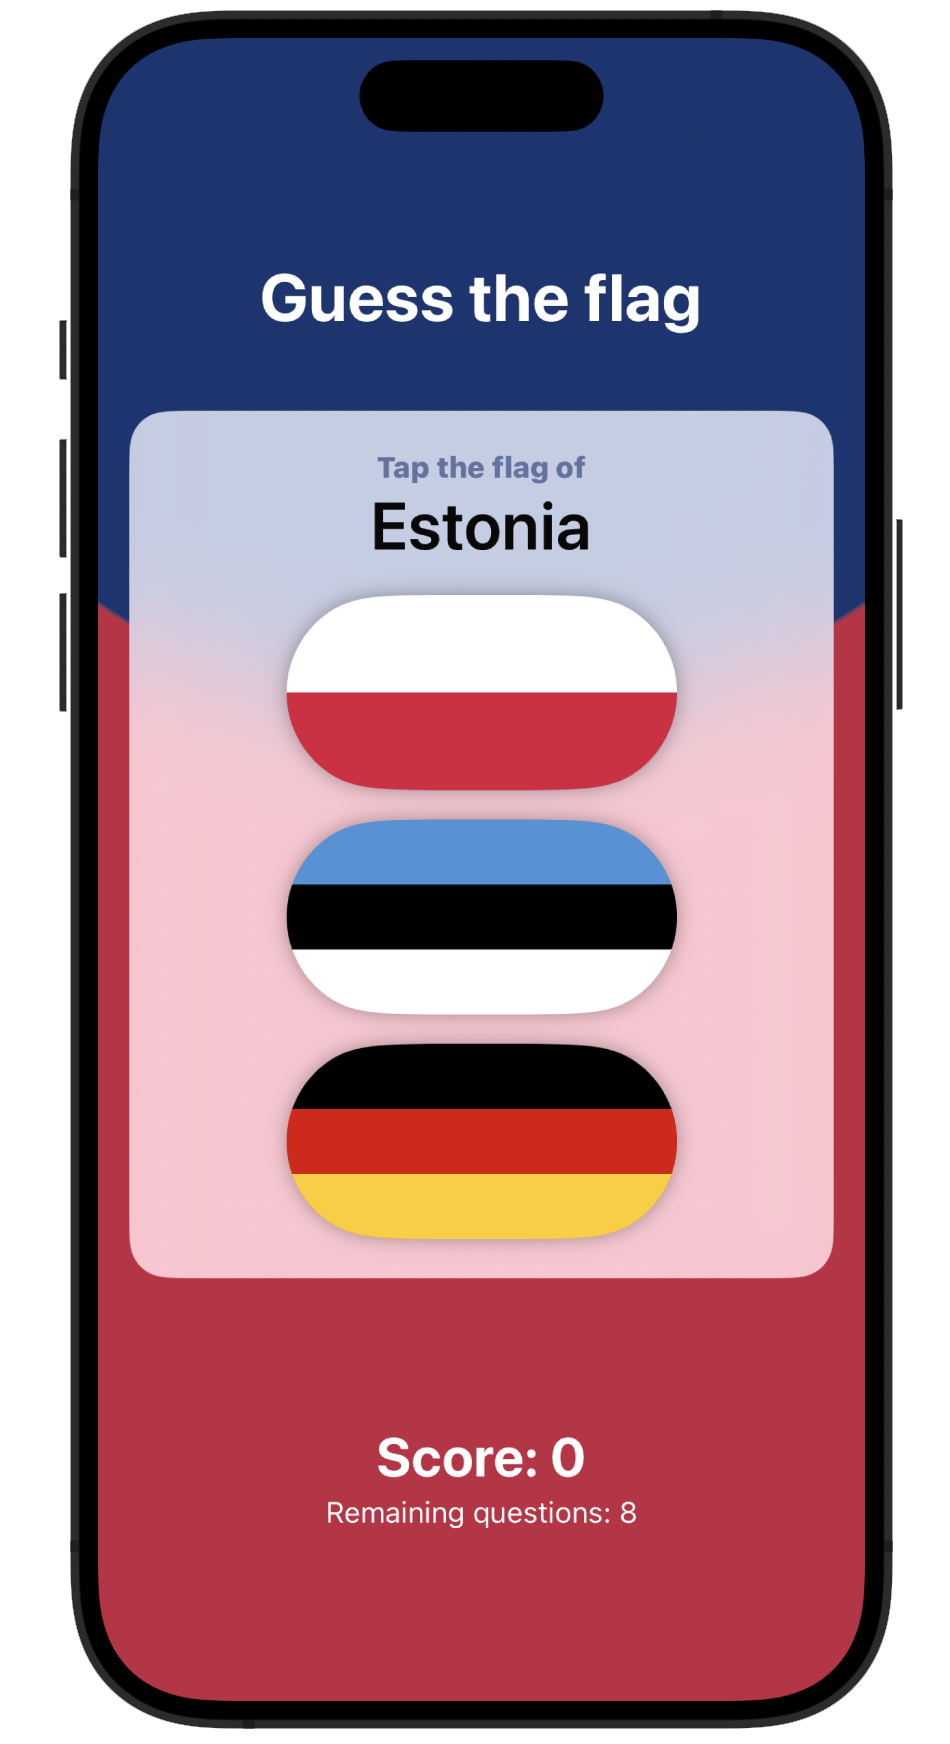
Today we have completed the “Guess the flag” app as a challenge. There were three tasks:
- Add a property to store the current score
- Have a more descriptive text when the user chooses the wrong answer. Telling them what was the flag they picked
- Create the concept of “game” which lasts for 8 attempts. Then, a final alert is shown when the number of attempts reaches zero.
The first task is trivial. We add a new @State private var score = 0 and update it in the flagTapped() function.
Then, we have to remeber if the user picked the wrong answer. The solution I tought is: having a state variable holidng if the user picked a wrong flag and, if so, which one. I implemented it with an optional int: @State private var wrongAnswer: Int? = nil. When the user select the wrong flag, in the flagTapped() function we save the number parameter in wrongAnswer and when we show the alert we check if wrongAnswer is not nil. Then, when we ask a new question, we reset the value to nil.
Finally, for the last task we need a new boolean variable to bind to a new alert and a counter to keep track of the number of attempts the user already tried. We updated both these two state variable in the flagTapped function paying attention at which showing variable we set ti true.
struct ContentView: View {
    @State var countries = ["Estonia", "France", "Germany", "Ireland", "Italy", "Nigeria", "Poland", "Spain", "UK", "Ukraine", "US"].shuffled()
    @State var correctAnswer = Int.random(in: 0...2)

    @State private var showingScore = false
    @State private var scoreTitle = ""
    @State private var wrongAnswer: Int? = nil

    @State private var score = 0
    @State private var attempts = 8
    @State private var showingFinalResutl = false

    var body: some View {
        ZStack {
            RadialGradient(stops: [
                .init(color: Color(red: 0.1, green: 0.2, blue: 0.45), location: 0.3),
                .init(color: Color(red: 0.76, green: 0.15, blue: 0.26), location: 0.3)
            ], center: .top, startRadius: 200, endRadius: 700)
                .ignoresSafeArea()

            VStack {
                Spacer()

                Text("Guess the flag")
                    .font(.largeTitle.bold())
                    .foregroundStyle(.white)

                Spacer()

                VStack(spacing: 15) {
                    VStack {
                        Text("Tap the flag of")
                            .foregroundStyle(.secondary)
                            .font(.subheadline.weight(.heavy))

                        Text(countries[correctAnswer])
                            .font(.largeTitle.weight(.semibold))
                    }

                    ForEach(0..<3) { number in
                        Button {
                            flagTapped(number)
                        } label: {
                            Image(countries[number])
                                .clipShape(.capsule)
                                .shadow(radius: 5)
                        }
                    }
                }
                .frame(maxWidth: .infinity)
                .padding(.vertical, 20)
                .background(.regularMaterial)
                .clipShape(.rect(cornerSize: CGSize(width: 20, height: 20)))

                Spacer()
                Spacer()

                Text("Score: \(score)")
                    .foregroundStyle(.white)
                    .font(.title.bold())

                Text("Remaining questions: \(attempts)")
                    .foregroundStyle(.white)
                    .font(.subheadline)

                Spacer()
            }
            .padding()
        }
        .alert(scoreTitle, isPresented: $showingScore) {
            Button("Continue", action: askQuestion)
        } message: {
            if let wrongAnswer = wrongAnswer {
                Text("Wrong, that is the flag of \(countries[wrongAnswer])")
            }
            Text("Your score is \(score)")
        }
        .alert("Game over", isPresented: $showingFinalResutl) {
            Button("Restart", action: restart)
        } message: {
            Text("Your final score is \(score)")
        }
    }

    func flagTapped(_ number: Int) {
        if number == correctAnswer {
            scoreTitle = "Correct"
            score += 1
        } else {
            scoreTitle = "Wrong"
            wrongAnswer = number
            score -= 1
        }

        attempts -= 1
        if attempts == 0 {
            showingFinalResutl = true
        } else {
            showingScore = true
        }
    }

    func askQuestion() {
        countries.shuffle()
        correctAnswer = Int.random(in: 0...2)
        wrongAnswer = nil
    }

    func restart() {
        score = 0
        attempts = 8
        askQuestion()
    }
}
Day 23
Today we deep dive into technical stuff answering some questions on why SwiftUI works like that.
Why structs?
Structs are simpler data structure than classes. They forbid inheritance, which means that they cannot grow without bounds inheriting “useless” attributes. We built from scratch every view we want to show to the user composing it with other views (present in SwiftUI or made by us).
Modifiers order
When we apply some modifiers to our views the order is important and is red from top to bottom.
|
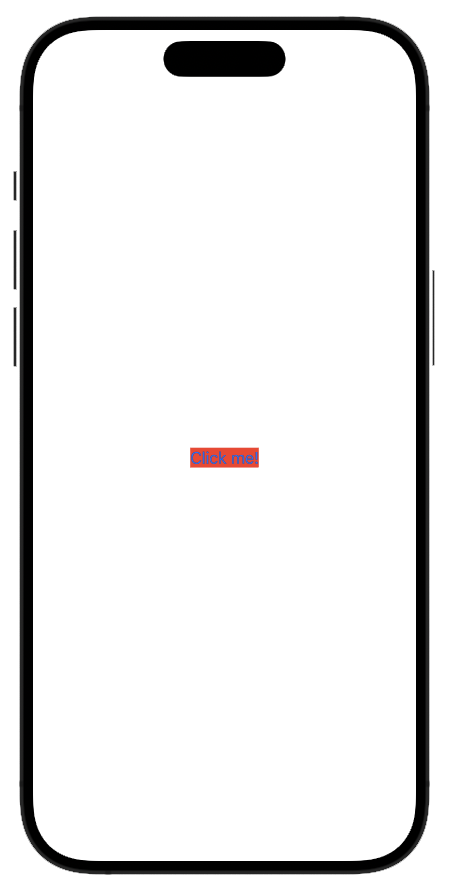 |
|
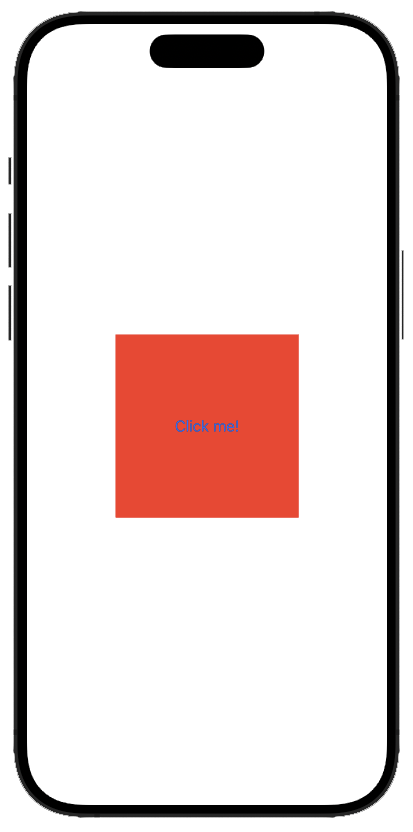 |
Moreover, modifiers stack on top of each other.
|
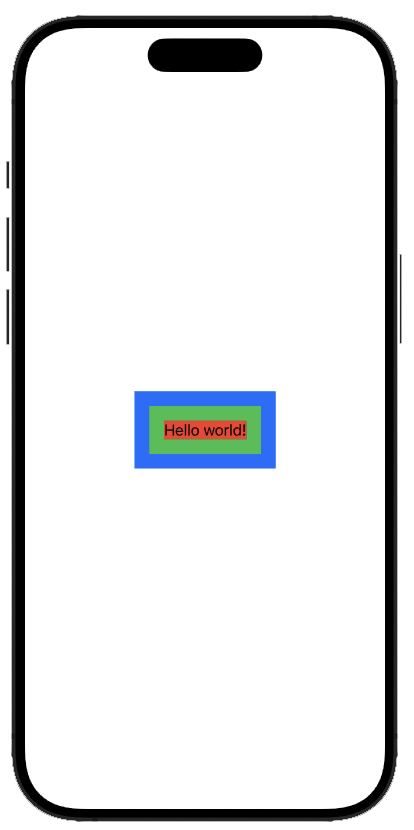 |
Why some View?
We don’t want to specify which specific type of view the body variable has. That’s because its runtime type is pretty complex.
var body: some View {
    Button("Click me!") {
        print(type(of: self.body))
    }
    .frame(width: 200, height: 200)
    .background(.red)
}
When run in a simulator in a simulator and the output of print is ModifiedContent<ModifiedContent<Button<Text>, _FrameLayout>, _BackgroundStyleModifier<Color>>. This is a complex type we don’t want to specify (and change as soon as we change a modifier).
Conditional modifiers
In our body variable we can have if-then-else statement to declare different elements but when we cannot use it to declare different modifiers. The solution is using the ternary operator (<condition> ? <true value> : <false value>).
Apply modifiers to all child element
We can apply a modifier to an “environment”. For example a set of Texts inside a VStack can be modified applying an environment modifier to the VStack. It is important to notice that not every modifier are environment modifier.
View as constants
We can declare views as let aViee = Text("Some Text") and use aView in our body variable. Keep in mind that binding in this case could be tricky and we have to create a stack or a Group if we want to add multiple elements inside our attribute. A possible solution is creating a computed variable with the @ViewBuilder attribute.
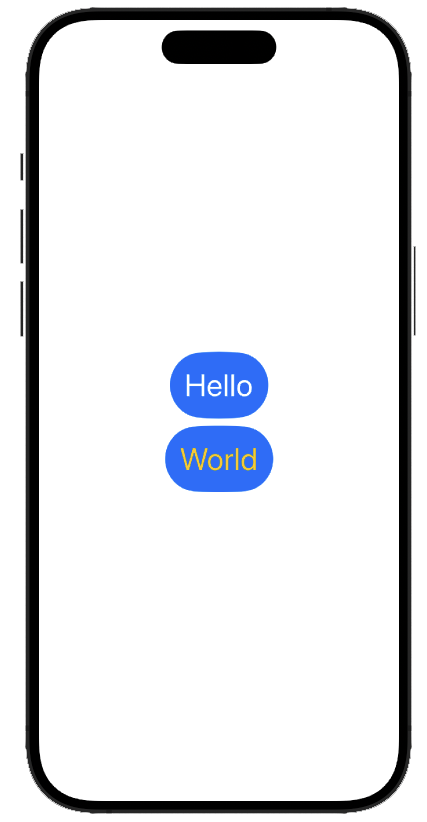
Extract and compose views
We can define our own views and use them anywhere.
struct CapsuleText: View {
    var text: String

    var body: some View {
        Text(text)
            .font(.largeTitle)
            .padding()
            .background(.blue)
            .clipShape(.capsule)
    }
}

struct ContentView: View {
    var body: some View {
        CapsuleText(text: "Hello")
            .foregroundStyle(.white)
        CapsuleText(text: "World")
            .foregroundStyle(.yellow)
    }
}
Custom modifiers
We can declare structs which implemnt the ViewModifier protocol to create our own modifier. Then we can apply them to any view passing an object of that struct to the modifier modifier. To make things easier we can define a function which apply our modifier in an extension of View.
struct Title: ViewModifier {
    func body(content: Content) -> some View {
        content
            .font(.largeTitle)
            .padding()
            .foregroundStyle(.white)
            .background(.blue)
            .clipShape(.capsule)
    }
}

extension View {
    func titleStyle() -> some View {
        modifier(Title())
    }
}

struct ContentView: View {
    var body: some View {
        Text("Hello")
            .modifier(Title())
        Text("World")
            .titleStyle()
    }
}
Custom containers
We can even define our stack. For example we define a struct representing a GridStack. It is a bit more complex than everything else seen so far but it is understandable.
struct GridStack<Content: View>: View {
    let rows: Int
    let columns: Int
    @ViewBuilder let content: (Int, Int) -> Content

    var body: some View {
        VStack {
            ForEach(0..<rows, id:\.self) { row in
                HStack {
                    ForEach(0..<columns, id: \.self) { col in
                        content(row, col)
                            .padding()
                    }
                }
            }
        }
    }
}

struct ContentView: View {
    var body: some View {
        GridStack(rows: 4, columns: 3) { row, col in
            Image(systemName: "\(row * 3 + col).circle")
            Text("\(row) \(col)")
        }
    }
}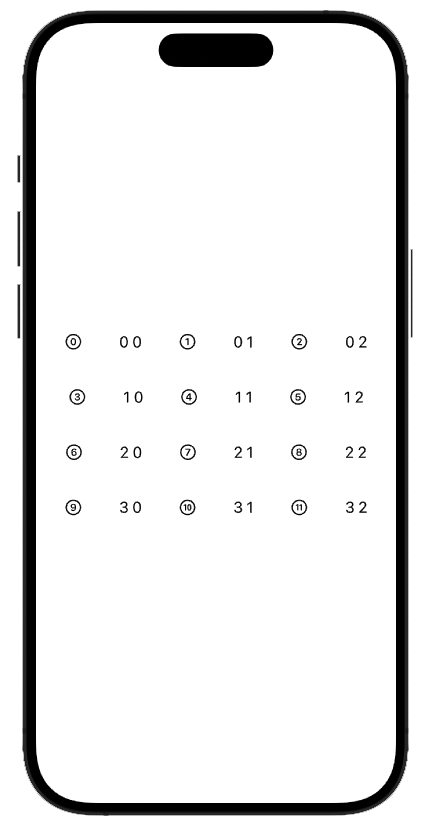
There are a couple of things which are worthy to notice:
-
GridStack<Content: View>is the definition of a generic or template. Thecontentclosure will return a something which implementsView -
@ViewBuildermeans that the resulting view will be build taking into consideration every declared element. That is important because we can avoid to embedd theImageand theTextinside a container in ourContentView. It is worth noticing that thepaddingmodifier applied to content will be applied to bothImageandText
Day 24
Today, three challenges await us. We have to modify our previous projects with what we learned yesterday
WeSplit with conditional modifier
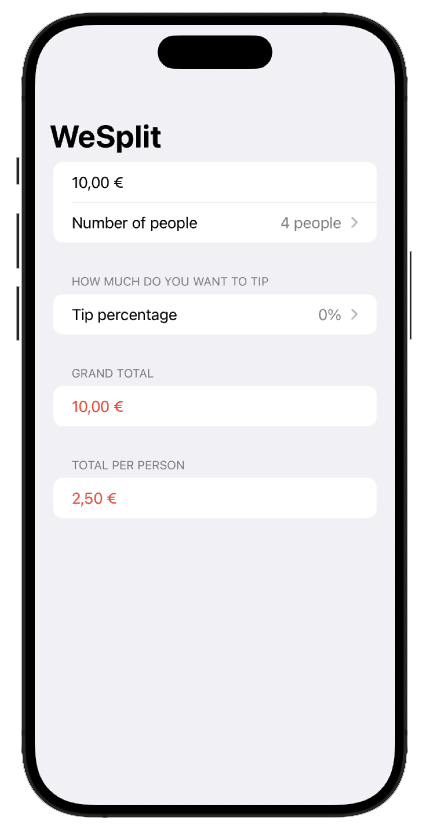
The first challenge is changing the color of the totals in WeSplit. We want a red tint when we select a 0% for tip.
struct ContentView: View {
    @State private var checkAmount = 0.0
    @State private var numberOfPeople = 2
    @State private var tipPercentage = 20
    @FocusState private var amountIsFocused: Bool

    //let tipPercenteges = [10, 15, 20, 25, 0]

    private var peopleCount: Double {
        Double(numberOfPeople + 2)
    }

    private var grandTotal: Double {
        let tipSelection = Double(tipPercentage)
        let tipValue = checkAmount / 100 * tipSelection
        let grandTotal = checkAmount + tipValue

        return grandTotal
    }

    private var totalPerPerson: Double {
        let amountPerPerson = grandTotal / peopleCount

        return amountPerPerson
    }

    var body: some View {
        NavigationStack {
            Form {
                Section {
                    TextField("Amount", value: $checkAmount, format: .currency(code: Locale.current.currency?.identifier ?? "USD"))
                        .keyboardType(.decimalPad)
                        .focused($amountIsFocused)

                    Picker("Number of people", selection: $numberOfPeople) {
                        ForEach(2..<100) {
                            Text("\($0) people")
                        }
                    }
                    .pickerStyle(.navigationLink)

                }

                Section("How much do you want to tip") {
                    Picker("Tip percentage", selection: $tipPercentage) {
                        ForEach(0..<101, id: \.self) {
                            Text($0, format: .percent)
                        }
                    }
                    .pickerStyle(.navigationLink)
                }

                Section("Grand total") {
                    Text(grandTotal, format: .currency(code: Locale.current.currency?.identifier ?? "USD"))
                        .foregroundStyle(tipPercentage == 0 ? .red : .primary)
                }

                Section("Total per person") {
                    Text(totalPerPerson, format: .currency(code: Locale.current.currency?.identifier ?? "USD"))
                        .foregroundStyle(tipPercentage == 0 ? .red : .primary)
                }
            }
            .navigationTitle("WeSplit")
            .toolbar {
                if amountIsFocused {
                    Button("Done") {
                        amountIsFocused = false
                    }
                }
            }
        }
    }
}
Custom view for flag image in GuessTheFlag
The second challenge is creating a FlagImage struct to represent our flag images with the several modifier to make it fancy.
struct FlagImage: View {
    let country: String

    var body: some View {
        Image(country)
            .clipShape(.capsule)
            .shadow(radius: 5)
    }
}

struct ContentView: View {
    @State var countries = ["Estonia", "France", "Germany", "Ireland", "Italy", "Nigeria", "Poland", "Spain", "UK", "Ukraine", "US"].shuffled()
    @State var correctAnswer = Int.random(in: 0...2)

    @State private var showingScore = false
    @State private var scoreTitle = ""
    @State private var wrongAnswer: Int? = nil

    @State private var score = 0
    @State private var attempts = 8
    @State private var showingFinalResutl = false

    var body: some View {
        ZStack {
            RadialGradient(stops: [
                .init(color: Color(red: 0.1, green: 0.2, blue: 0.45), location: 0.3),
                .init(color: Color(red: 0.76, green: 0.15, blue: 0.26), location: 0.3)
            ], center: .top, startRadius: 200, endRadius: 700)
                .ignoresSafeArea()

            VStack {
                Spacer()

                Text("Guess the flag")
                    .font(.largeTitle.bold())
                    .foregroundStyle(.white)

                Spacer()

                VStack(spacing: 15) {
                    VStack {
                        Text("Tap the flag of")
                            .foregroundStyle(.secondary)
                            .font(.subheadline.weight(.heavy))

                        Text(countries[correctAnswer])
                            .font(.largeTitle.weight(.semibold))
                    }

                    ForEach(0..<3) { number in
                        Button {
                            flagTapped(number)
                        } label: {
                            FlagImage(country: countries[number])
                        }
                    }
                }
                .frame(maxWidth: .infinity)
                .padding(.vertical, 20)
                .background(.regularMaterial)
                .clipShape(.rect(cornerSize: CGSize(width: 20, height: 20)))

                Spacer()
                Spacer()

                Text("Score: \(score)")
                    .foregroundStyle(.white)
                    .font(.title.bold())

                Text("Remaining questions: \(attempts)")
                    .foregroundStyle(.white)
                    .font(.subheadline)

                Spacer()
            }
            .padding()
        }
        .alert(scoreTitle, isPresented: $showingScore) {
            Button("Continue", action: askQuestion)
        } message: {
            if let wrongAnswer = wrongAnswer {
                Text("Wrong, that is the flag of \(countries[wrongAnswer])")
            }
            Text("Your score is \(score)")
        }
        .alert("Game over", isPresented: $showingFinalResutl) {
            Button("Restart", action: restart)
        } message: {
            Text("Your final score is \(score)")
        }
    }

    func flagTapped(_ number: Int) {
        if number == correctAnswer {
            scoreTitle = "Correct"
            score += 1
        } else {
            scoreTitle = "Wrong"
            wrongAnswer = number
            score -= 1
        }

        attempts -= 1
        if attempts == 0 {
            showingFinalResutl = true
        } else {
            showingScore = true
        }
    }

    func askQuestion() {
        countries.shuffle()
        correctAnswer = Int.random(in: 0...2)
        wrongAnswer = nil
    }

    func restart() {
        score = 0
        attempts = 8
        askQuestion()
    }
}
Custom modifier for a large blue title
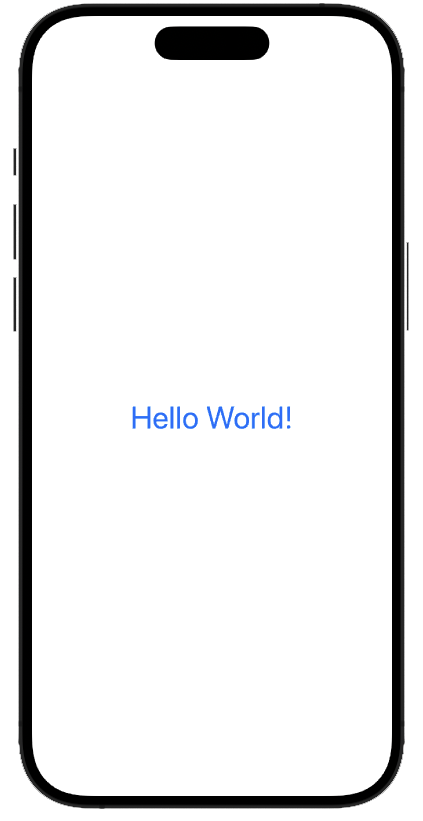
Last challenge is creating a custom modifier to create a large blue view.
struct LargeBlue: ViewModifier {
    func body(content: Content) -> some View {
        content
            .font(.largeTitle)
            .foregroundStyle(.blue)
    }
}

extension View {
    func largeBlue() -> some View {
        modifier(LargeBlue())
    }
}

struct ContentView: View {
    var body: some View {
        Text("Hello World!")
            .largeBlue()
    }
}
Day 25
Recap day. Today we consolidate what we learned so far and add some small bits to it.
Custom bindings
We have seen how bindings works ($varName). What SwiftUi is creating a Binding object for us which bheaviour is the following
struct ContentView: View {
    @State var myVar = 0

    var body: some View {
        let binding = Binding(
            get: { myVar },
            set: { myVar = $0 }
        )

        return TextField("Input", value: binding)
    }
}
Challenge - RockPaperScissors
The 25th day challenge is a rock-paper-scissors game. The task are:
- Each turn the CPU randomly choose between the three options
- Then the player tap on their choose
- An alert show if they won or loose
- The score is stored. A win is a +1 and a loose is a -1
- The game lasts for 10 rounds. Then the final score is shown and everything resets
enum Symbol {
    case rock, paper, scissors

    var symbolString: String {
        switch self {
        case .rock:
            "Rock"
        case .paper:
            "Paper"
        case .scissors:
            "Scissors"
        }
    }
}

extension Symbol: Comparable {
    static func < (lhs: Symbol, rhs: Symbol) -> Bool {
        switch lhs {
        case .rock:
            switch rhs {
            case .rock:
                true
            case .paper:
                true
            case .scissors:
                false
            }
        case .paper:
            switch rhs {
            case .rock:
                false
            case .paper:
                true
            case .scissors:
                true
            }
        case .scissors:
            switch rhs {
            case .rock:
                true
            case .paper:
                false
            case .scissors:
                true
            }
        }
    }

    static func == (lhs: Symbol, rhs: Symbol) -> Bool {
        return lhs.hashValue == rhs.hashValue
    }
}

struct SymbolModifier: ViewModifier {
    let symbol: Symbol

    private var symbolBackground: Color {
        switch symbol {
        case .rock:
                .brown
        case .paper:
                .yellow
        case .scissors:
                .gray
        }
    }

    func body(content: Content) -> some View {
        content
            .padding()
            .background(symbolBackground)
            .foregroundStyle(.white)
            .clipShape(.rect(cornerRadius: 20))
    }
}

extension View {
    func setSymbol(_ symbol: Symbol) -> some View{
        modifier(SymbolModifier(symbol: symbol))
    }
}

struct ContentView: View {
    let symbols: [Symbol] = [.paper, .rock, .scissors]

    @State private var cpuChoice: Symbol = [.paper, .rock, .scissors][Int.random(in: 0...2)]
    @State private var score = 0
    @State private var userPicked = false
    @State private var roundMessage = ""
    @State private var isRoundFinished = false
    @State private var attempsRemainig = 10
    @State private var isShowingGameFinished = false

    func symbolTapped(_ symbol: Symbol) {
        userPicked = true

        if symbol > cpuChoice {
            score += 1
            roundMessage = "You won"
        } else if symbol == cpuChoice {
            roundMessage = "Tie"
        } else {
            score -= 1
            roundMessage = "You loose"
        }

        attempsRemainig -= 1

        if attempsRemainig == 0 {
            isShowingGameFinished = true
        } else {
            isRoundFinished = true
        }
    }

    func resetRound() {
        userPicked = false
        cpuChoice = symbols[Int.random(in: 0...2)]
    }

    func resetGame() {
        attempsRemainig = 10
        resetRound()
    }

    var body: some View {
        VStack {
            Text("Rock-Paper-Scissors")
                .font(.largeTitle)

            Spacer()

            HStack {
                Text("CPU choose: ")
                if userPicked {
                    Text(cpuChoice.symbolString)
                        .setSymbol(cpuChoice)

                } else {
                    Text("Hidden")
                        .padding()
                        .clipShape(.rect(cornerRadius: 20))
                        .blur(radius: 3.0)
                }
            }

            HStack {
                Button("Rock") {
                    symbolTapped(.rock)
                }
                .setSymbol(.rock)

                Button("Paper") {
                    symbolTapped(.paper)
                }
                .setSymbol(.paper)

                Button("Scissors") {
                    symbolTapped(.scissors)
                }
                .setSymbol(.scissors)
            }
            .disabled(isRoundFinished)

            Button("Next round") {
                isRoundFinished = false
                resetRound()
            }
            .padding()
            .disabled(!isRoundFinished)

            Spacer()

            if isRoundFinished {
                Text(roundMessage)
            }

            Text("Score: \(score)")
                .font(.title)

            Text("Round remaining: \(attempsRemainig)")
                .font(.subheadline)
        }
        .alert("Game over", isPresented: $isShowingGameFinished) {
            Button("Restart") {
                isShowingGameFinished = false
                resetGame()
            }
        } message: {
            Text("Your score is: \(score)")
        }
    }
}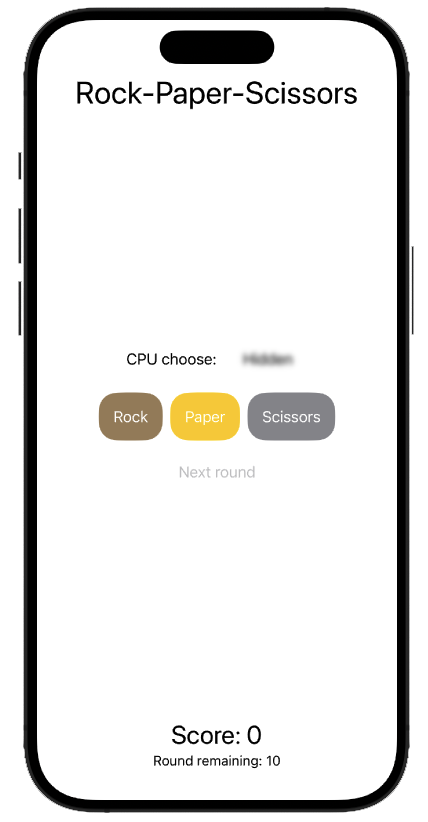
My solution is, maybe. a bit overpower. I wanted to just test if a symbol (rock, paper, and scissors) is greater than another to see who won. To do it in this way I implemented the protocol Comparable for the Symbol enum.
Day 26
Today we start a new project. An app which uses machine learning (ML) to suggeest at what time the user should go to sleep given some inputs. Before entering the ML world in Swift with CoreML we have to setup our app user interface.
Stepper
Stepper is a new graphical element which allows the user to input a number incrementing or decrementing it. The following code will generete a stepper binded to sleepAmount, which can range between 4 and 12, and each step is 0.25.
Stepper("\(sleepAmount.formatted()) hours", value: $sleepAmount, in: 4...12, step: 0.25)DatePicker
Another element is the usefull to let the user select a date and/or time.
DatePicker("Please enter your date", selection: $wakeUp, displayedComponents: .hourAndMinute)We can also add a range in between the date can be selected. And the range can also be an open range (to select only future or past date for example)
DatePicker("Please enter your date", selection: $wakeUp, in: Date.now...) // Only future date
DatePicker("Please enter your date", selection: $wakeUp, in: ...Date.now) // Only past date
Date components
It is worth deeping dive into date components (DateComponent() objects). They are objects holding info about hours, minutes, etc. etc. inside a date. They can be used to build a date from scratch Calendar.current.date(from: component) or can be retrieved from a date (as optional value) Calendar.current.dateComponent([.hour, .minutes], from: .now).hour.
Create the ML model
Our app will predict the time at which the user should go to sleep with a ML model. First of all, we want to create such model to be used later in our app.
To create a ML model for CoreML we can use CreateML, a MacOS app that let us to create ML models through a graphical user interface.
It let us to choose among many types of ML models. We are interested in a Tabular regression because from a dataset in a tabular form we want to forecast a value. Then we setup our parameters (input dataset, target value, features, …) and finally, we just click the Train button.
What we get from CreateML is a .mlmodel file that can be used in our iOS app.
Day 27
Today we use our ML model in the BetterRest app. It is very simple:
- Import the
.mlmodelfile into our project - Reference it as any other Swift class
Behind the courtain, XCode automatically creates a class for each model in our project.
Using this class is very simple:
- Create a variable holding some configuration (it can be empty)
- Create an instance of our model passing the configuration
- Call the method
.predictionand pass the input data necessary for the model
In our BetterRest app, we do a bunch of stuff on top of the three points to parse the dates and showing an alert. It works in this way:
import MLCore

func calculateBedTime() {
    do {
        let config = MLModelConfiguration()
        let model = try SleepCalculator(configuration: config)

        let components = Calendar.current.dateComponents([.hour, .minute], from: wakeUp)
        let hour = (components.hour ?? 0) * 60 * 60
        let minute = (components.minute ?? 0) * 60

        let prediction = try model.prediction(wake: Double(hour + minute), estimatedSleep: sleepAmount, coffee: Double(coffeeAmount))

        let sleepTime = wakeUp - prediction.actualSleep
        alertTitle = "Your ideal bedtime is..."
        alertMessage = sleepTime.formatted(date: .omitted, time: .shortened)
    } catch {
        alertTitle = "Error"
        alertMessage = "Sorry, there was a problem calculating your bedtime"
    }

    showingAlert = true
}
After improving the user expierence and the user interface the final result is:
import CoreML
import SwiftUI

struct ContentView: View {
    @State private var sleepAmount = 8.0
    @State private var wakeUp = defaultWakeupTime
    @State private var coffeeAmount = 1

    @State private var alertTitle = ""
    @State private var alertMessage = ""
    @State private var showingAlert = false

    static var defaultWakeupTime: Date {
        var components = DateComponents()
        components.hour = 7
        components.minute = 0
        return Calendar.current.date(from: components) ?? .now
    }

    var body: some View {
        NavigationStack {
            Form {
                VStack(alignment: .leading, spacing: 0) {
                    Text("When do you want to wake up?")
                        .font(.headline)
                    DatePicker("Please enter your date", selection: $wakeUp, displayedComponents: .hourAndMinute)
                        .labelsHidden()
                }

                VStack(alignment: .leading, spacing: 0) {
                    Text("Desired amount of sleep")
                        .font(.headline)
                    Stepper("\(sleepAmount.formatted()) hours", value: $sleepAmount, in: 4...12, step: 0.25)
                }

                VStack(alignment: .leading, spacing: 0) {
                    Text("How much coffee do you drink?")
                        .font(.headline)
                    Stepper("^[\(coffeeAmount) cups](inflect: true)", value: $coffeeAmount, in: 1...20)
                }
            }
            .navigationTitle("BetterRest")
            .toolbar {
                Button("Calculate", action: calculateBedTime)
            }
            .alert(alertTitle, isPresented: $showingAlert) {
                Button("Ok") {}
            } message: {
                Text(alertMessage)
            }
        }
    }

    func calculateBedTime() {
        do {
            let config = MLModelConfiguration()
            let model = try SleepCalculator(configuration: config)

            let components = Calendar.current.dateComponents([.hour, .minute], from: wakeUp)
            let hour = (components.hour ?? 0) * 60 * 60
            let minute = (components.minute ?? 0) * 60

            let prediction = try model.prediction(wake: Double(hour + minute), estimatedSleep: sleepAmount, coffee: Double(coffeeAmount))

            let sleepTime = wakeUp - prediction.actualSleep
            alertTitle = "Your ideal bedtime is..."
            alertMessage = sleepTime.formatted(date: .omitted, time: .shortened)
        } catch {
            alertTitle = "Error"
            alertMessage = "Sorry, there was a problem calculating your bedtime"
        }

        showingAlert = true
    }
}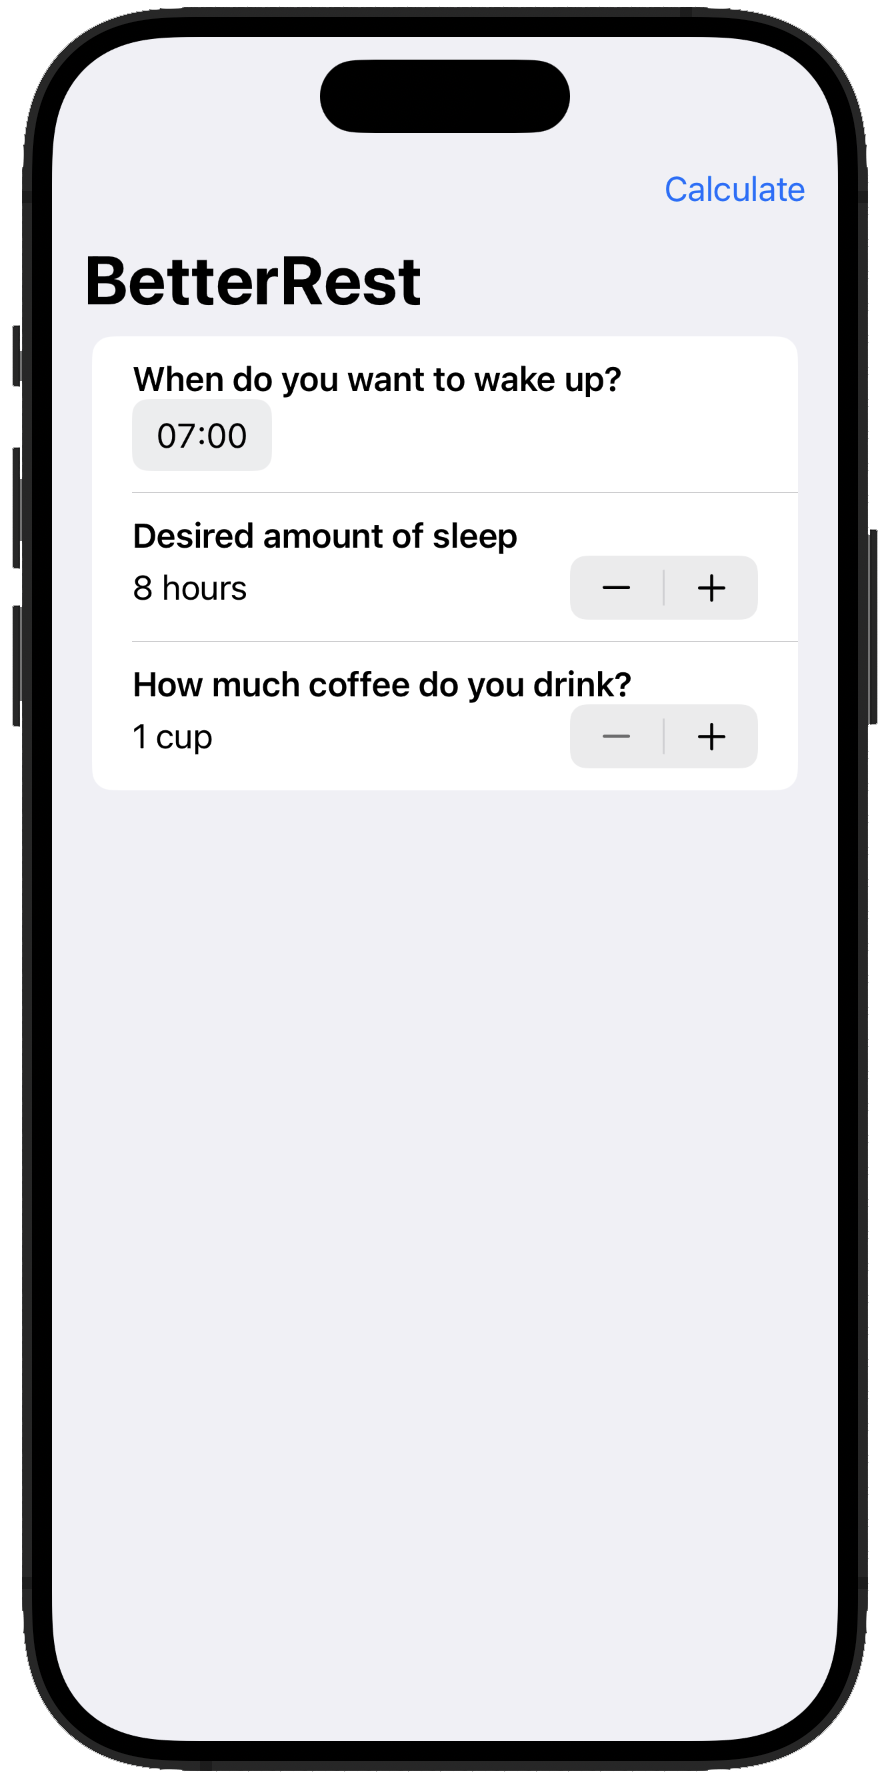
Day 28
Today, we have three things to do to improve BetterRest:
- Replace the
VStacks withSections - Replace the
Stepperto select the number of cups of coffee with aPicker - Remove the calculate
Buttonand automatically show the predicted bedtime
It is worth noticing that this new layout works great also with the dark mode activated (see image 4).
import CoreML
import SwiftUI

struct ContentView: View {
    @State private var sleepAmount = 8.0
    @State private var wakeUp = defaultWakeupTime
    @State private var coffeeAmountIndex = 0
    private var coffeeAmount: Int {
        coffeeAmountIndex + 1
    }


    @State private var alertTitle = ""
    @State private var alertMessage = ""
    @State private var showingAlert = false

    private var bedTime: Date? {
        do {
            let config = MLModelConfiguration()
            let model = try SleepCalculator(configuration: config)

            let components = Calendar.current.dateComponents([.hour, .minute], from: wakeUp)
            let hour = (components.hour ?? 0) * 60 * 60
            let minute = (components.minute ?? 0) * 60

            let prediction = try model.prediction(wake: Double(hour + minute), estimatedSleep: sleepAmount, coffee: Double(coffeeAmount))

            let sleepTime = wakeUp - prediction.actualSleep
            return sleepTime
        } catch {
            showingAlert = true
            alertTitle = "Error"
            alertMessage = "Sorry, there was a problem calculating your bedtime"
            return nil
        }
    }

    static var defaultWakeupTime: Date {
        var components = DateComponents()
        components.hour = 7
        components.minute = 0
        return Calendar.current.date(from: components) ?? .now
    }

    var body: some View {
        NavigationStack {
            VStack {
                Form {
                    Section("When do you want to wake up?") {
                        DatePicker("Wakeup time", selection: $wakeUp, displayedComponents: .hourAndMinute)
                    }

                    Section("Desired amount of sleep") {
                        Stepper("\(sleepAmount.formatted()) hours", value: $sleepAmount, in: 4...12, step: 0.25)
                    }

                    Section("How much coffee do you drink?") {
                        Picker("Number of cups", selection: $coffeeAmountIndex) {
                            ForEach(1..<21) {
                                Text("\($0)")
                            }
                        }
                    }
                }

                ZStack {
                    RoundedRectangle(cornerRadius: 25)
                        .fill(.fill)

                    VStack {
                        Text("Your bedtime is...")
                            .font(.subheadline)
                            .foregroundStyle(.secondary)
                        Text("\(bedTime?.formatted(date: .omitted, time: .shortened) ?? "?")")
                            .font(.title)
                            .foregroundStyle(.primary)
                    }
                }
                .padding(20)
            }
            .navigationTitle("BetterRest")
            .alert(alertTitle, isPresented: $showingAlert) {
                Button("Ok") {}
            } message: {
                Text(alertMessage)
            }
        }
    }
}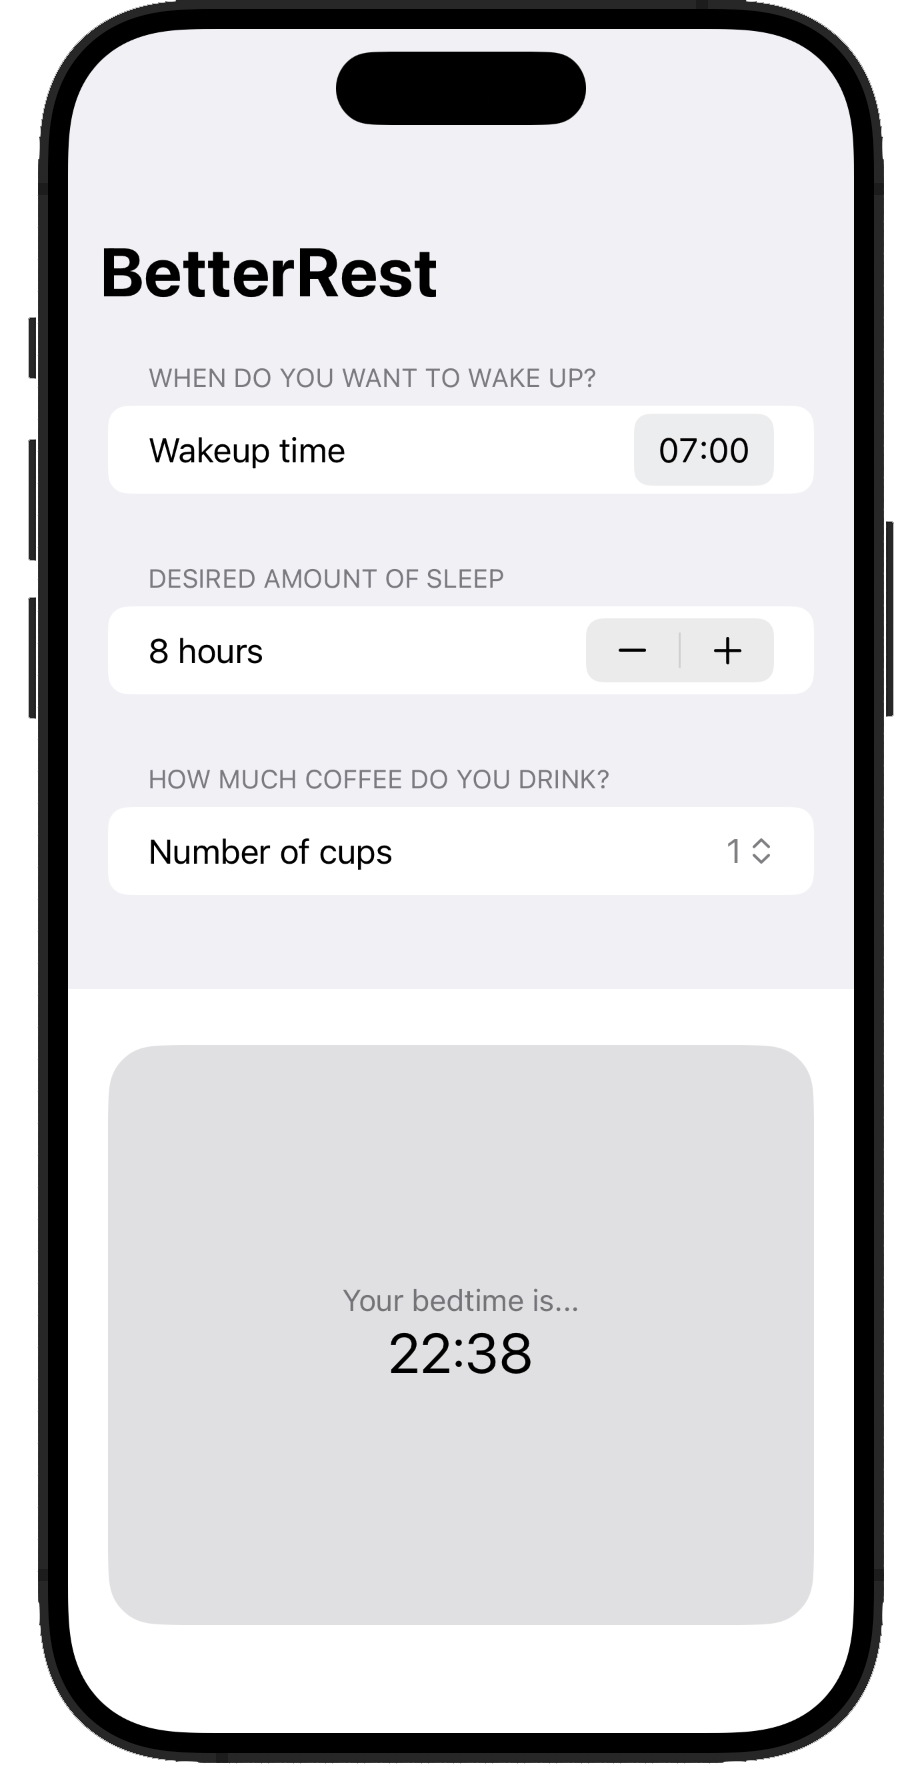
Day 29
New day, new project: the WordScramble app presents a word to the user which has to find other words inside it.
Maybe more important than the app itself, there is a new graphical element: List. It allows to present (in both static and dynamic way) some content to the user in a list view. If you think about it, almost every app you use everyday has at least one list inside it.
List
A List is similar to a Form (at least its basic functions) with the possibility to create it from a array:
struct ContentView: View {
    let people = ["Finn", "Mark", "Luke", "Duke"]

    var body: some View {
        List(people, id: \.self) {
           Text("Hey \($0)!")
        }
    }
}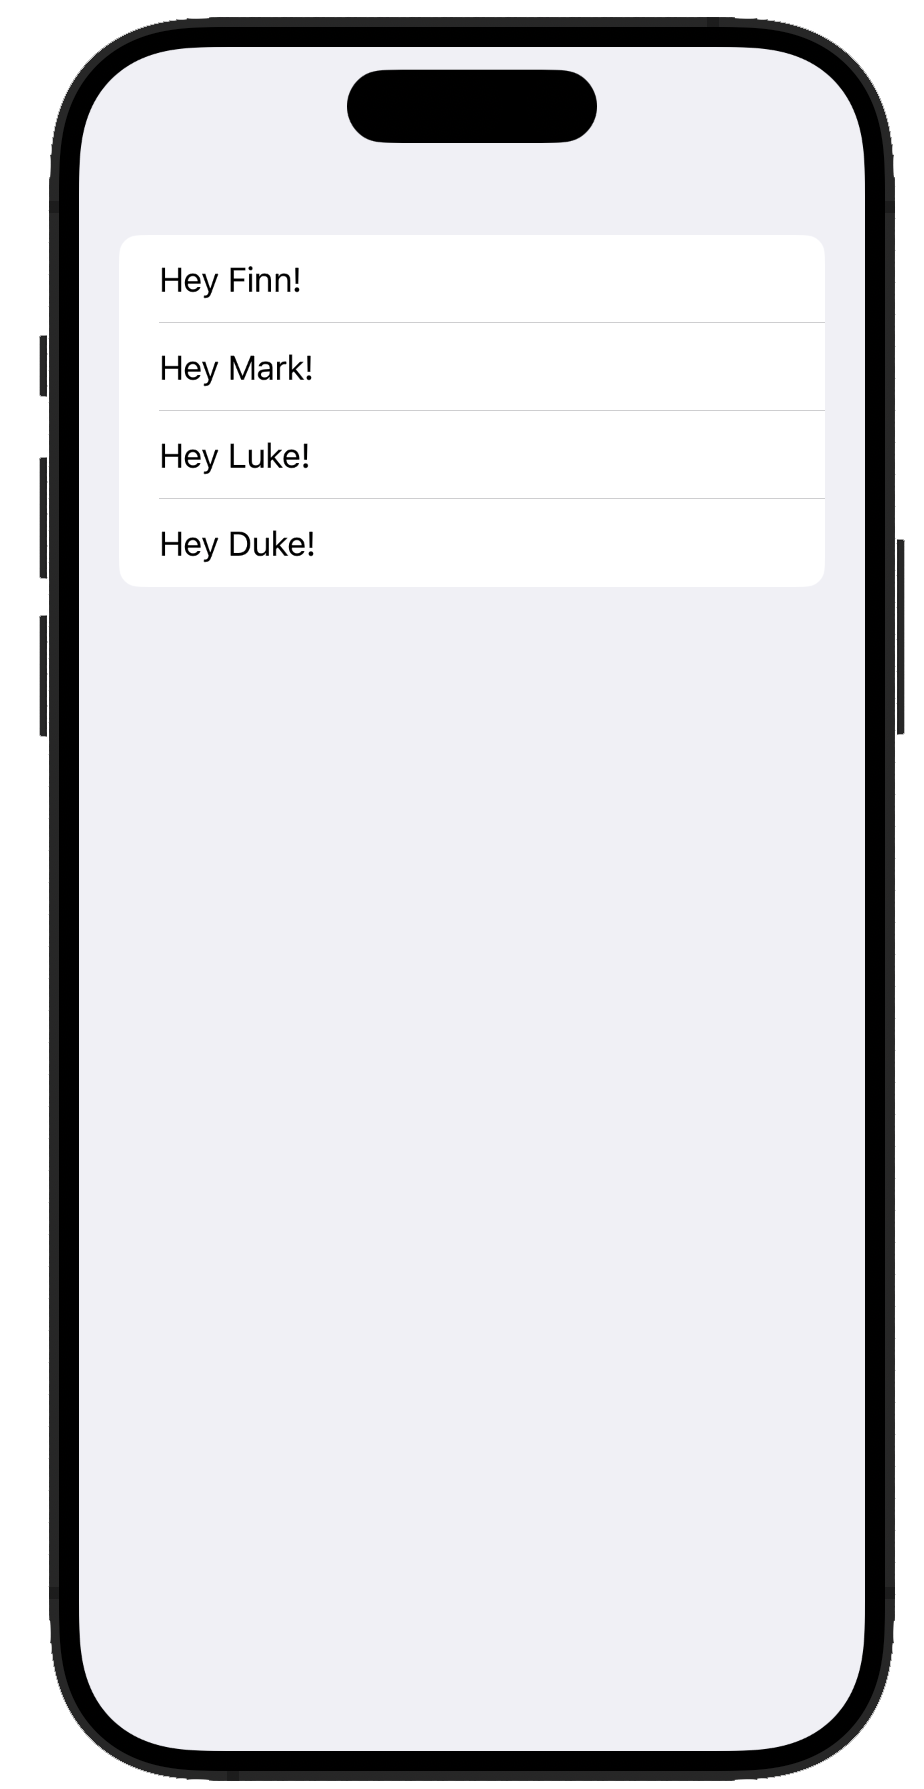
Bundle
Every app lives inside a container and, usually, every app uses some static files (no source code). To access those files we have to get the file path where our app is located. We don’t want (and can’t) try decoding the actual path to our directory. Apple gives us an access to them through the Bundle class.
func testBundles() {
        if let fileURL = Bundle.main.url(forResource: "someFile", withExtension: "txt") {
            // File found

            if let fileContent = try? String(contentsOf: fileURL) {
                // File content is into fileContent
            }
        }
    }
String utils
In this project we are going to work with strings. We already saw some methods for strings but, for this instance the next one will come in handy:
-
.components(separatedBy: )return a list of strings each one was separated by some other string in the initial string -
.trimmingCharacters(in: )return a string without the characters passed as input
In addition, we will use the iOS’ spellchecker. It is an “old” piece of code written in Objective-C and it uses some nasty types. I leave here the example:
let word = "Swift"
let checker = UITextChecker()

let range = NSRange(location: 0, length: word.utf16.count)

let mispelledRange = checker.rangeOfMisspelledWord(in: word, range: range, startingAt: 0, wrap: false, language: "en") // No optional because from Objective-C

let allGood = mispelledRange.location == NSNotFound
Day 30
We start building the user interface for our new app. First of all we declare a List with two Sections. The first one is a static row with an input field for the new words user can insert, and the second one is the dynamic part with rows which replicate what the user added. We also add an action when the user press the submit key on a keyboard defining the attribute onSubmit and passing an action to add a word. Moreover, when we add a new word, we embrace the .insert method inside a withAnimation method, This creates the animation of insertion automatically for us.
struct ContentView: View {
    @State private var usedWords: [String] = []
    @State private var rootWord = ""
    @State private var newWord = ""

    var body: some View {
        NavigationStack {
            List {
                Section {
                    TextField("Enter your word", text: $newWord)
                        .textInputAutocapitalization(.never)
                }

                Section {
                    ForEach(usedWords, id: \.self) {word in
                        HStack {
                            Image(systemName: "\(word.count).circle")
                            Text(word)
                        }
                    }
                }
            }
            .navigationTitle(rootWord)
            .onSubmit(addNewWord)
        }
    }


    func addNewWord() {
        let answer = newWord.lowercased().trimmingCharacters(in: .whitespacesAndNewlines)

        guard answer.count > 0 else {return}

        withAnimation {
            usedWords.insert(answer, at: 0)
        }
        newWord = ""
    }
}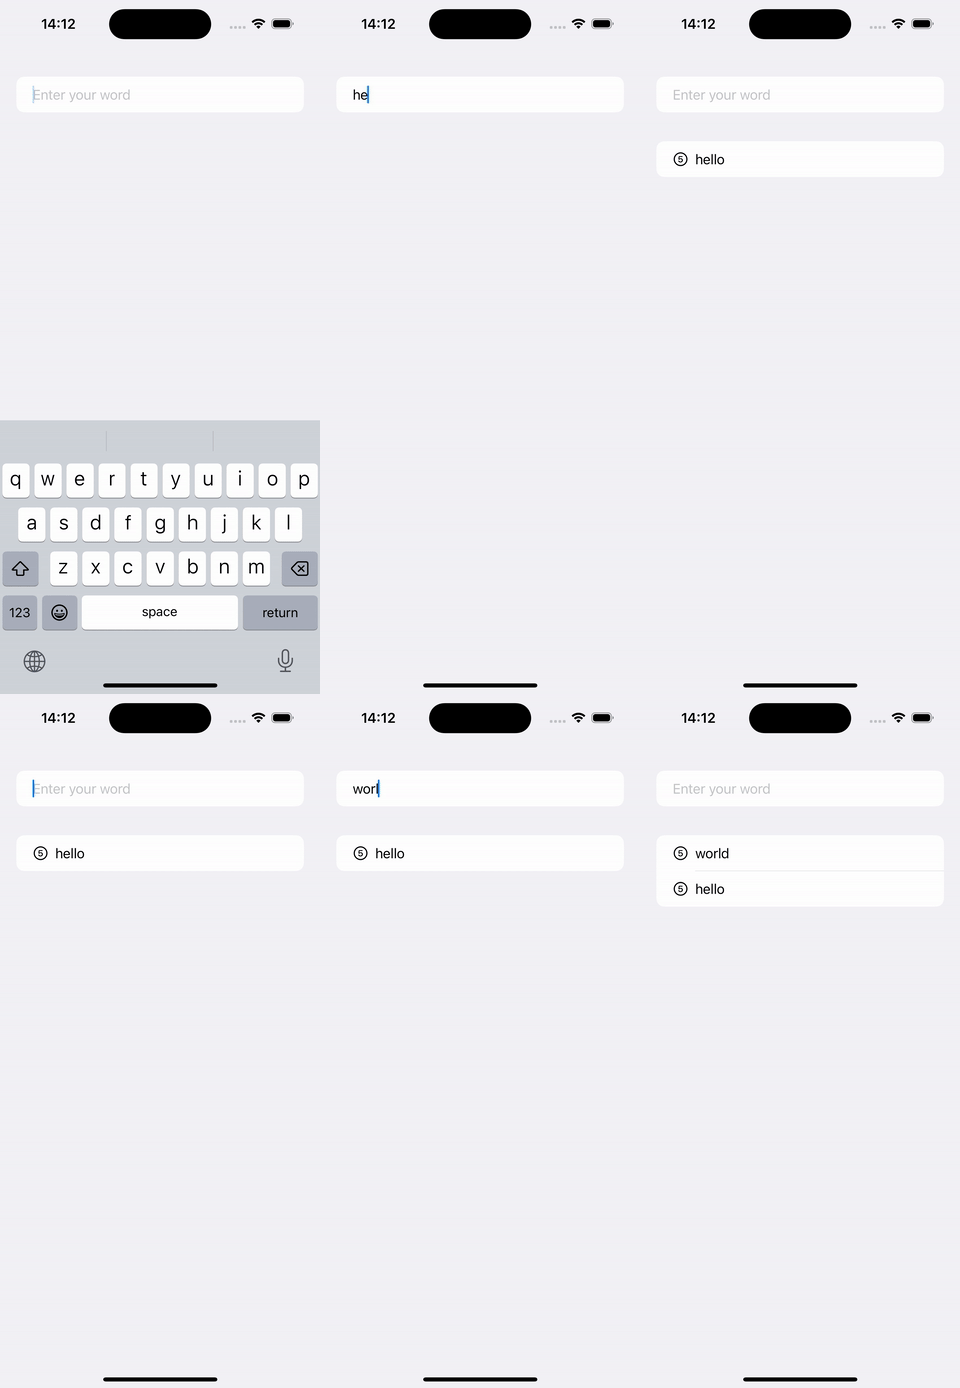
Load file from bundle at startup
We want to load a txt file from our bundle at the startup of our app. We saw yeaterday how to read files from our app’s bundle and today we put that in practice:
func startGame() {
    if let startWordURL = Bundle.main.url(forResource: "start", withExtension: "txt") {
        if let startWords = try? String(contentsOf: startWordURL) {
            let allWordsArray = startWords.components(separatedBy: .newlines)
            rootWord = allWordsArray.randomElement()!
            return
        }
    }

    fatalError("Could not load start.txt from bundle")
}
To execute this method when our view appear we can add another attribute to our List view: .onAppear(perform: startGame).
Word validation
Next step is validate words give by the user. We have to check three conditions:
- is a new word (i.e. not already added)
- is a word made of letters from the root word
- is a real word from the english dictionary
We write a method for each check plus an utility method to show an error message if something fails and we add the checks before adding the new word.
struct ContentView: View {
    @State private var usedWords: [String] = []
    @State private var rootWord = ""
    @State private var newWord = ""

    @State private var errorTitle = ""
    @State private var errorMessage = ""
    @State private var showingError = false

    var body: some View {
        NavigationStack {
            List {
                Section {
                    TextField("Enter your word", text: $newWord)
                        .textInputAutocapitalization(.never)
                }

                Section {
                    ForEach(usedWords, id: \.self) {word in
                        HStack {
                            Image(systemName: "\(word.count).circle")
                            Text(word)
                        }
                    }
                }
            }
            .navigationTitle(rootWord)
            .onSubmit(addNewWord)
            .onAppear(perform: startGame)
            .alert(errorTitle, isPresented: $showingError) {
                Button("Ok") {}
            } message: {
                Text(errorMessage)
            }
        }
    }


    func addNewWord() {
        let answer = newWord.lowercased().trimmingCharacters(in: .whitespacesAndNewlines)

        guard answer.count > 0 else {return}

        guard isOriginal(word: answer) else {
            wordError(title: "Word used already", message: "Be more original!")
            return
        }

        guard isPossible(word: answer) else {
            wordError(title: "Word not possible", message: "You can't spell that word from \(rootWord)!")
            return
        }

        guard isReal(word: answer) else {
            wordError(title: "Word not recognized", message: "You can't just make them up, you know!")
            return
        }

        withAnimation {
            usedWords.insert(answer, at: 0)
        }
        newWord = ""
    }

    func startGame() {
        if let startWordURL = Bundle.main.url(forResource: "start", withExtension: "txt") {
            if let startWords = try? String(contentsOf: startWordURL) {
                let allWordsArray = startWords.components(separatedBy: .newlines)
                rootWord = allWordsArray.randomElement()!
                return
            }
        }

        fatalError("Could not load start.txt from bundle")
    }

    func isOriginal(word: String) -> Bool {
        !usedWords.contains(word)
    }

    func isPossible(word: String) -> Bool {
        var tmpWord = rootWord

        for letter in word {
            if let pos = tmpWord.firstIndex(of: letter) {
                tmpWord.remove(at: pos)
            } else {
                return false
            }
        }

        return true
    }

    func isReal(word: String) -> Bool {
        let checker = UITextChecker()

        let range = NSRange(location: 0, length: word.utf16.count)

        let mispelledRange = checker.rangeOfMisspelledWord(in: word, range: range, startingAt: 0, wrap: false, language: "en")

        return mispelledRange.location == NSNotFound
    }

    func wordError(title: String, message: String) {
        errorTitle = title
        errorMessage = message
        showingError = true
    }
}
Day 31
As always, at the end of a project, a small challenge is in front of us:
- Disallow answers shorter than three letters
- Add a restart button
- Compute a score/points
These three challenges are nothing new:
struct ContentView: View {
    @State private var usedWords: [String] = []
    @State private var rootWord = ""
    @State private var newWord = ""

    @State private var errorTitle = ""
    @State private var errorMessage = ""
    @State private var showingError = false

    private var points: Int {
        return usedWords.map { $0.count }.reduce(0) { partialResult, el in
            partialResult + el
        }
    }

    var body: some View {
        NavigationStack {
            List {
                Section {
                    TextField("Enter your word", text: $newWord)
                        .textInputAutocapitalization(.never)
                }

                Section {
                    ForEach(usedWords, id: \.self) {word in
                        HStack {
                            Image(systemName: "\(word.count).circle")
                            Text(word)
                        }
                    }
                }
            }
            .navigationTitle(rootWord)
            .onSubmit(addNewWord)
            .onAppear(perform: startGame)
            .alert(errorTitle, isPresented: $showingError) {
                Button("Ok") {}
            } message: {
                Text(errorMessage)
            }
            .toolbar {
                Button("Restart", action: startGame)
            }

            ZStack {
                RoundedRectangle(cornerRadius: 25)
                    .fill(.fill)
                VStack {
                    Text("Your score is")
                        .font(.subheadline)
                    Text("\(points)")
                        .font(.title)

                }
            }
        }
    }


    func addNewWord() {
        let answer = newWord.lowercased().trimmingCharacters(in: .whitespacesAndNewlines)

        guard answer.count > 0 else {return}

        guard isLongEnough(word: answer, length: 3) else {
            wordError(title: "Word is too short", message: "Think something more complex")
            return
        }

        guard isOriginal(word: answer) else {
            wordError(title: "Word used already", message: "Be more original!")
            return
        }

        guard isPossible(word: answer) else {
            wordError(title: "Word not possible", message: "You can't spell that word from \(rootWord)!")
            return
        }

        guard isReal(word: answer) else {
            wordError(title: "Word not recognized", message: "You can't just make them up, you know!")
            return
        }

        withAnimation {
            usedWords.insert(answer, at: 0)
        }
        newWord = ""
    }

    func startGame() {
        if let startWordURL = Bundle.main.url(forResource: "start", withExtension: "txt") {
            if let startWords = try? String(contentsOf: startWordURL) {
                let allWordsArray = startWords.components(separatedBy: .newlines)
                rootWord = allWordsArray.randomElement()!
                return
            }
        }

        fatalError("Could not load start.txt from bundle")
    }

    func isOriginal(word: String) -> Bool {
        !usedWords.contains(word)
    }

    func isPossible(word: String) -> Bool {
        var tmpWord = rootWord

        for letter in word {
            if let pos = tmpWord.firstIndex(of: letter) {
                tmpWord.remove(at: pos)
            } else {
                return false
            }
        }

        return true
    }

    func isReal(word: String) -> Bool {
        let checker = UITextChecker()

        let range = NSRange(location: 0, length: word.utf16.count)

        let mispelledRange = checker.rangeOfMisspelledWord(in: word, range: range, startingAt: 0, wrap: false, language: "en")

        return mispelledRange.location == NSNotFound
    }

    func isLongEnough(word: String, length: Int) -> Bool{
        return word.count > length
    }


    func wordError(title: String, message: String) {
        errorTitle = title
        errorMessage = message
        showingError = true
    }
}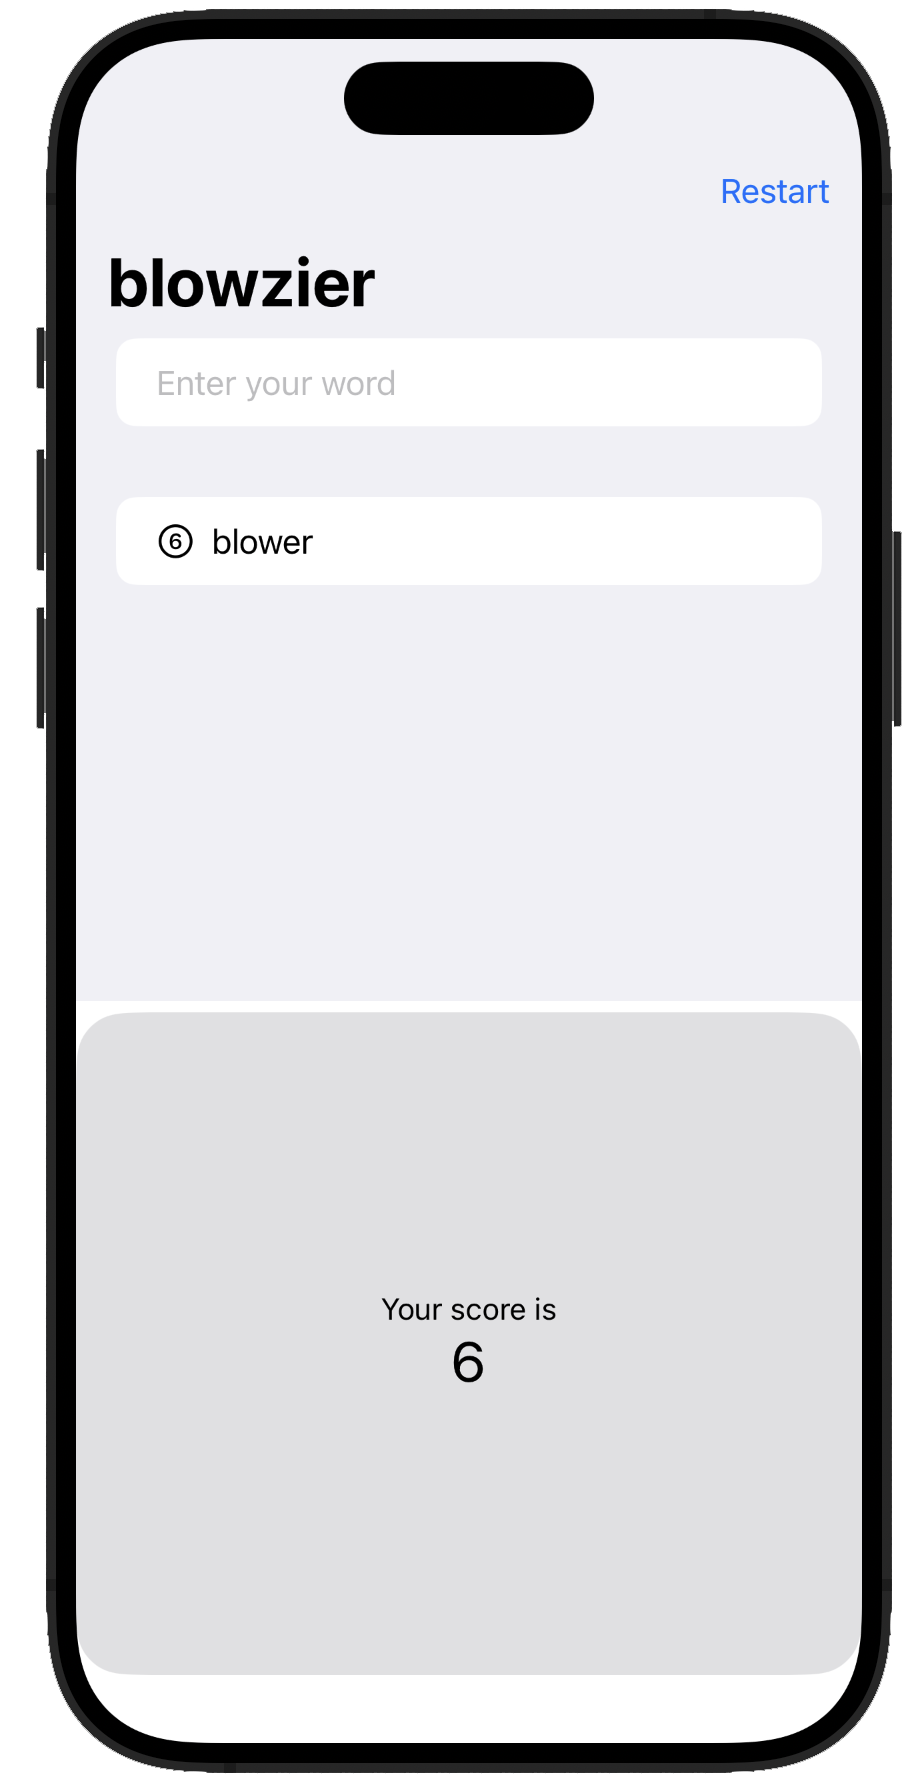
Day 32
Today we start looking into animations.
Thanks to SwiftUI we can automatically animate any element in a simple way
struct ContentView: View {
    @State private var animationAmount = 1.0

    var body: some View {
        Button("Tap me") {
            animationAmount += 1
        }
        .padding(50)
        .background(.red)
        .foregroundStyle(.white)
        .clipShape(.circle)
        .scaleEffect(animationAmount) // Modifier
        .blur(radius: (animationAmount-1) * 3) // Modifier
        .animation(.default, value: animationAmount) // Applied to all modifiers
    }
}
This snippet of code creates a button and define a State property (animationAmount) which is used in two modifier: scaleEffect and .blur. The ,animation property listen for changes in animationAmount and automatically creates an animation for us. The change happens when the user tap on the button (animation += 1).
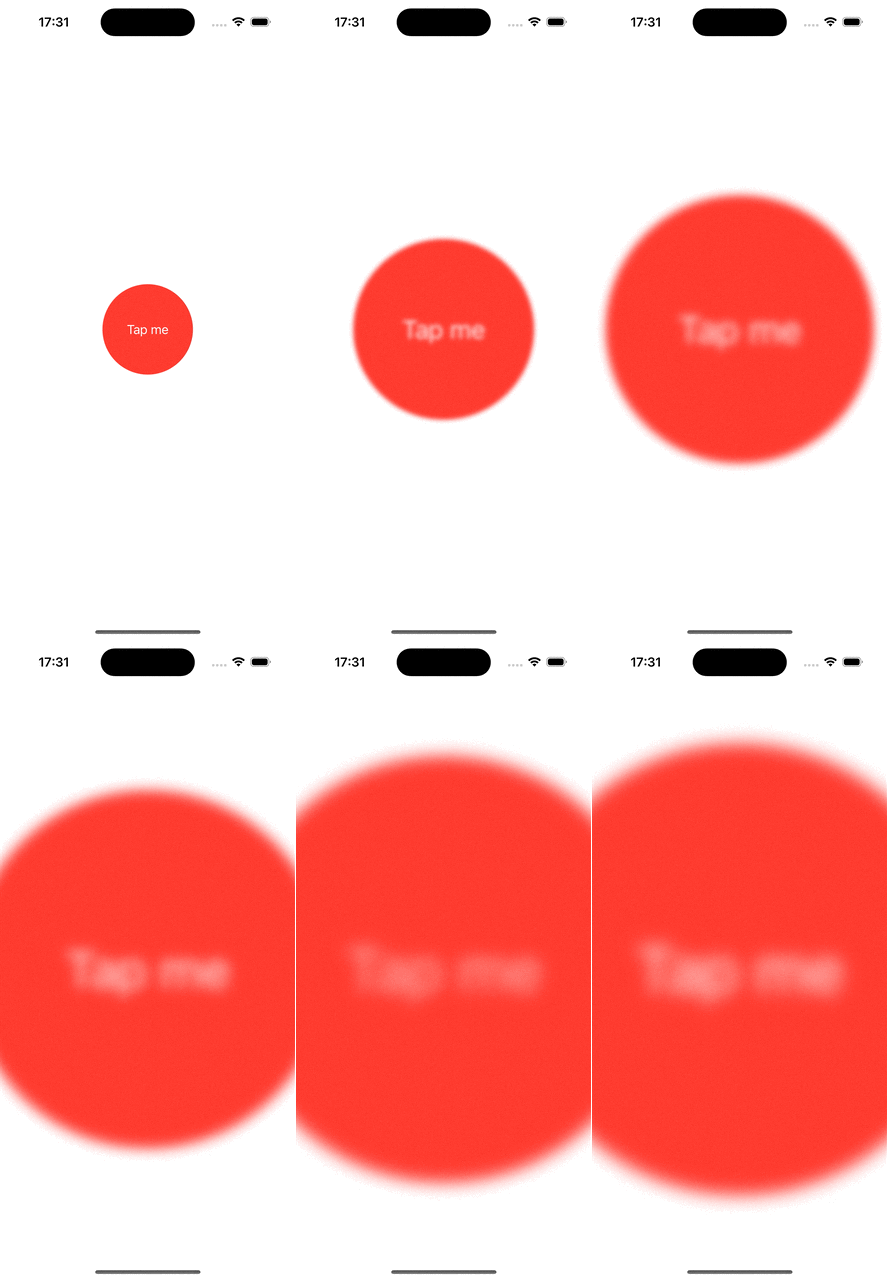
We can make even more complex animations adding modifiers to our .animation’s style:
struct ContentView: View {
    @State private var animationAmount = 1.0

    var body: some View {
        Button("Tap me") {

        }
        .padding(50)
        .background(.red)
        .foregroundStyle(.white)
        .clipShape(.circle)
        .overlay(
            Circle()
                .stroke(.red)
                .scaleEffect(animationAmount)
                .opacity(2-animationAmount)
                .animation(.easeOut(duration: 1)
                                .repeatForever(autoreverses: false),
                           value: animationAmount
                )
        )
        .onAppear {
            animationAmount = 2
        }
    }
}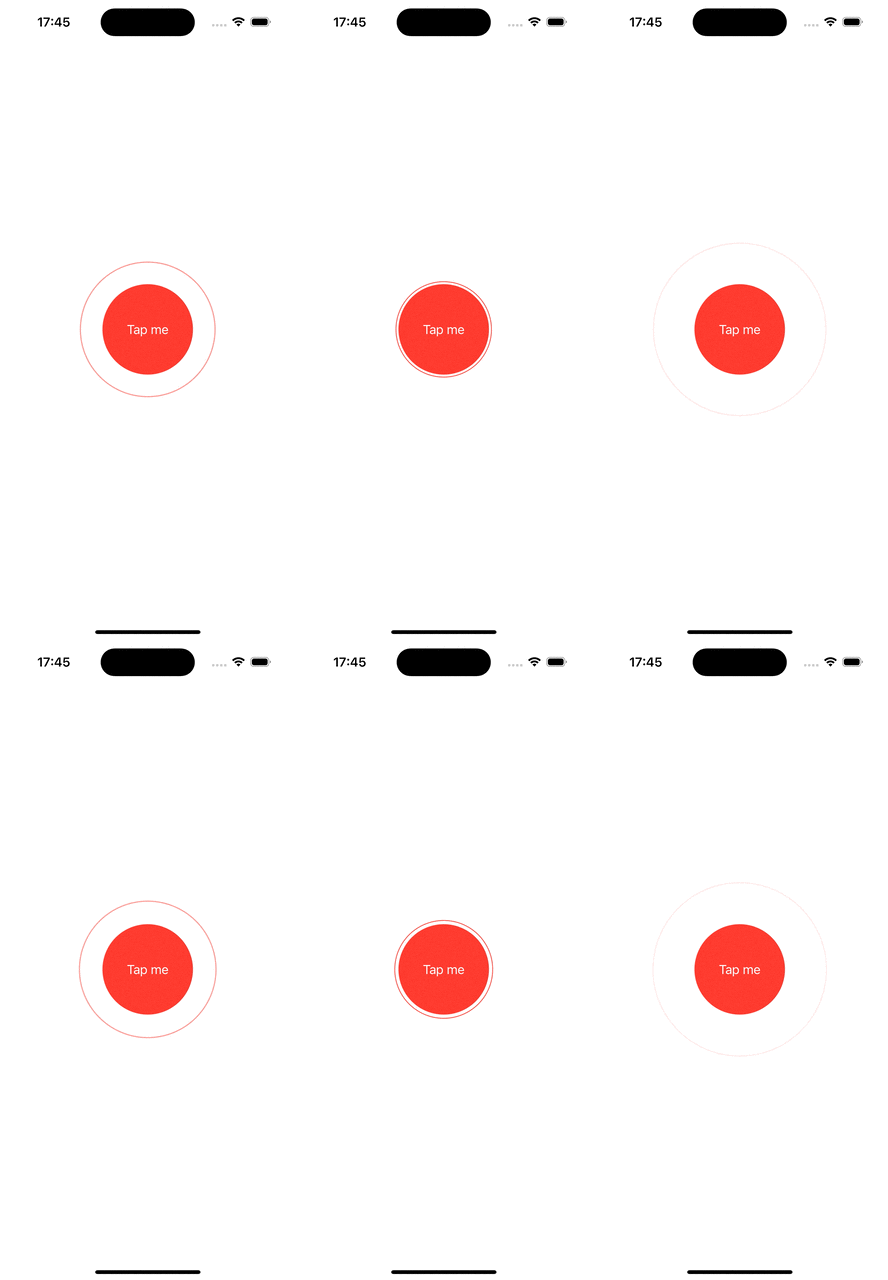
Animated bindings
We can animate an element binding the property which trigger the animation to another element:
struct ContentView: View {
    @State private var animationAmount = 1.0

    var body: some View {
        VStack {
            Stepper("Scale amount",
                    value: $animationAmount.animation(
                                .easeInOut(duration: 1)
                                    .repeatCount(3)
                            ),
                    in: 1...10)

            Spacer()

            Button("Tap me") {
                animationAmount += 1 // It will not trigger the animation
            }
            .padding(40)
            .background(.red)
            .foregroundStyle(.white)
            .clipShape(.circle)
            .scaleEffect(animationAmount)
        }
    }
}
Explicit animations
We can also say which value changes we want to animate sourraunding the value change within the withAnimation method
struct ContentView: View {
    @State private var animationAmount = 0.0

    var body: some View {
        Button("Tap me") {
            withAnimation(.spring(duration: 1, bounce: 0.5)) {
                animationAmount += 360
            }
        }
        .padding(50)
        .background(.red)
        .foregroundStyle(.white)
        .clipShape(.circle)
        .rotation3DEffect(
            .degrees(animationAmount),
            axis: (x: 0.0, y: 1.0, z: 0.0)
        )
    }
}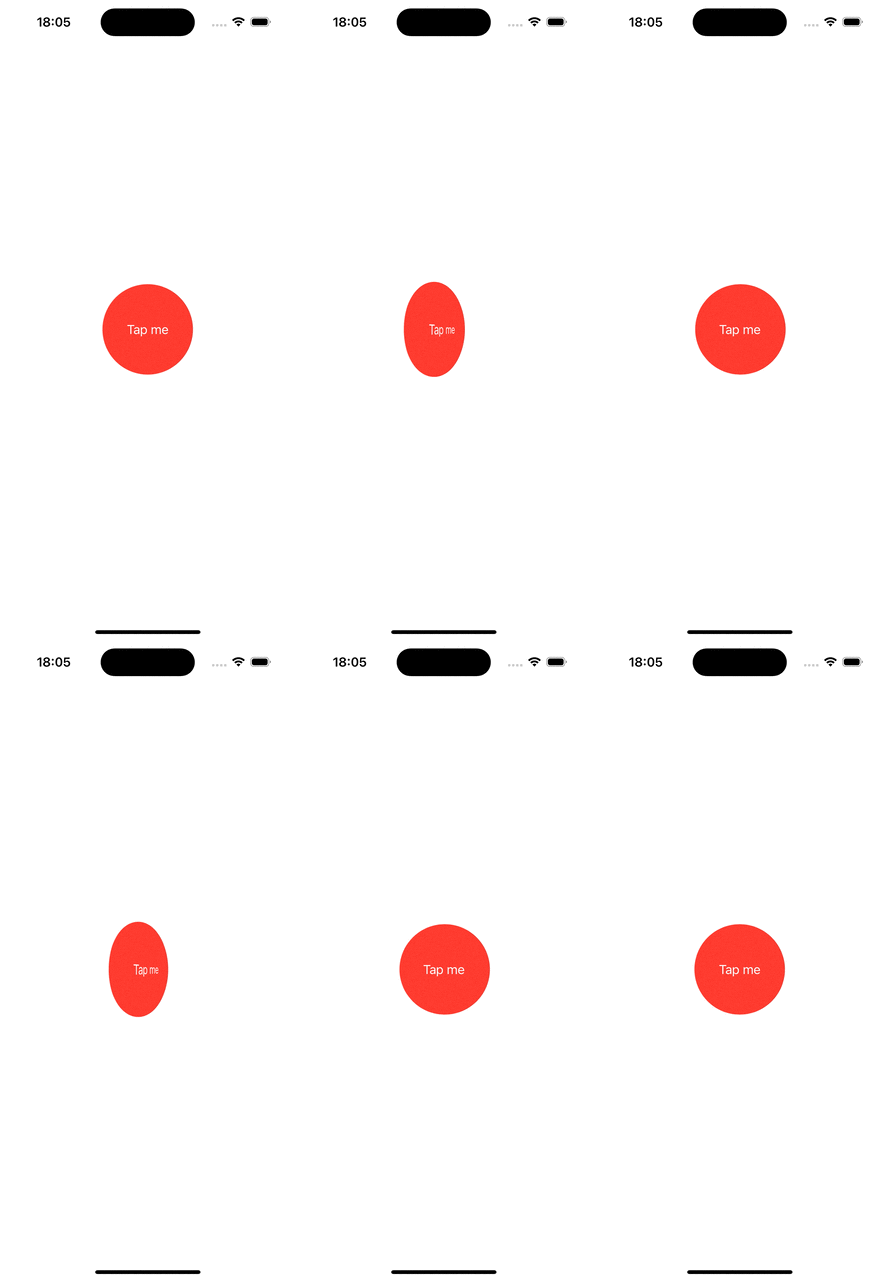
Day 33
We continue studying animation. Some days ago we learned that the order of modifiers matter. It is the same for the .animation modifier. It will animate only the other modifiers declared above it. This allow for a fine controll of the “animation stack”. In the example below we apply two different kind of animation (a .default and a .spring) to two different modifiers:
struct ContentView: View {
    @State private var enabled = false

    var body: some View {
        Button("Tap me") {
            enabled.toggle()
        }
        .frame(width: 200, height: 200)
        .background(enabled ? .blue : .red)
        .foregroundStyle(.white)
        .animation(.default, value: enabled) // Animates only modifiers before it
        .clipShape(.rect(cornerRadius: enabled ? 60 : 0))
        .animation(.spring(duration: 1, bounce: 0.9), value: enabled)
    }
}
We can even animate gestures (that’s a bit of a foreshadow)
struct ContentView: View {
    @State private var dragAmount = CGSize.zero

    var body: some View {
        LinearGradient(colors: [.yellow, .red], startPoint: .topLeading, endPoint: .bottomTrailing)
            .frame(width: 300, height: 200)
            .clipShape(.rect(cornerRadius: 10))
            .offset(dragAmount)
            .gesture(DragGesture()
                .onChanged { dragAmount = $0.translation }
                .onEnded { _ in
                    withAnimation(.bouncy) {
                        dragAmount = .zero
                    }
                }
            )
    }
}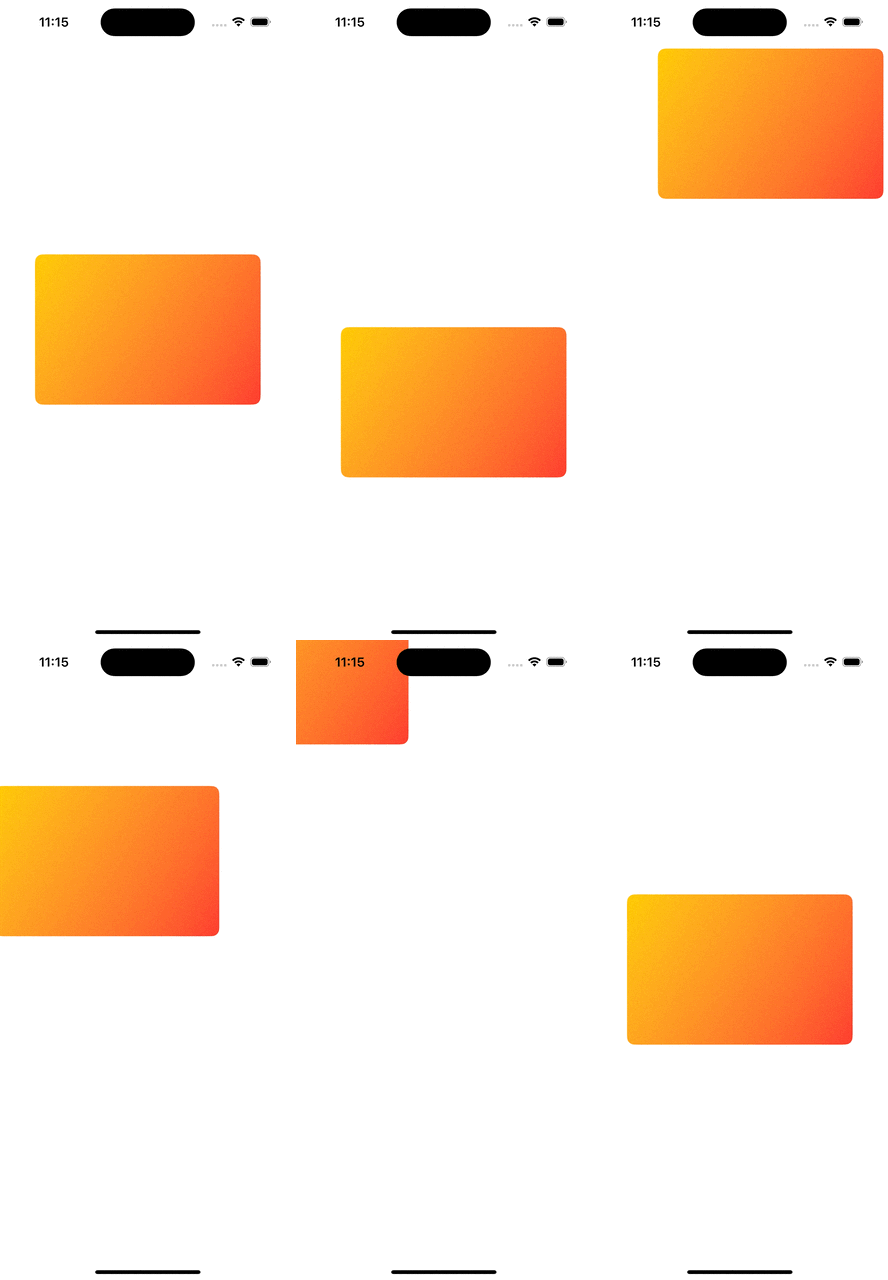
We can create also quite complex animations:
struct ContentView: View {
    let letters = Array("Hello World!")

    @State private var enabled = false
    @State private var dragAmount = CGSize.zero

    var body: some View {
        HStack(spacing:0) {
            ForEach(0..<letters.count, id: \.self) {num in
                    Text(String(letters[num]))
                    .padding(5)
                    .font(.title)
                    .background(enabled ? .blue : .red)
                    .offset(dragAmount)
                    .animation(.linear.delay(Double(num) / 20), value: dragAmount)
            }
        }
        .gesture(DragGesture()
            .onChanged { dragAmount = $0.translation }
            .onEnded{ _ in
                dragAmount = .zero
                enabled.toggle()
            }
        )
    }
}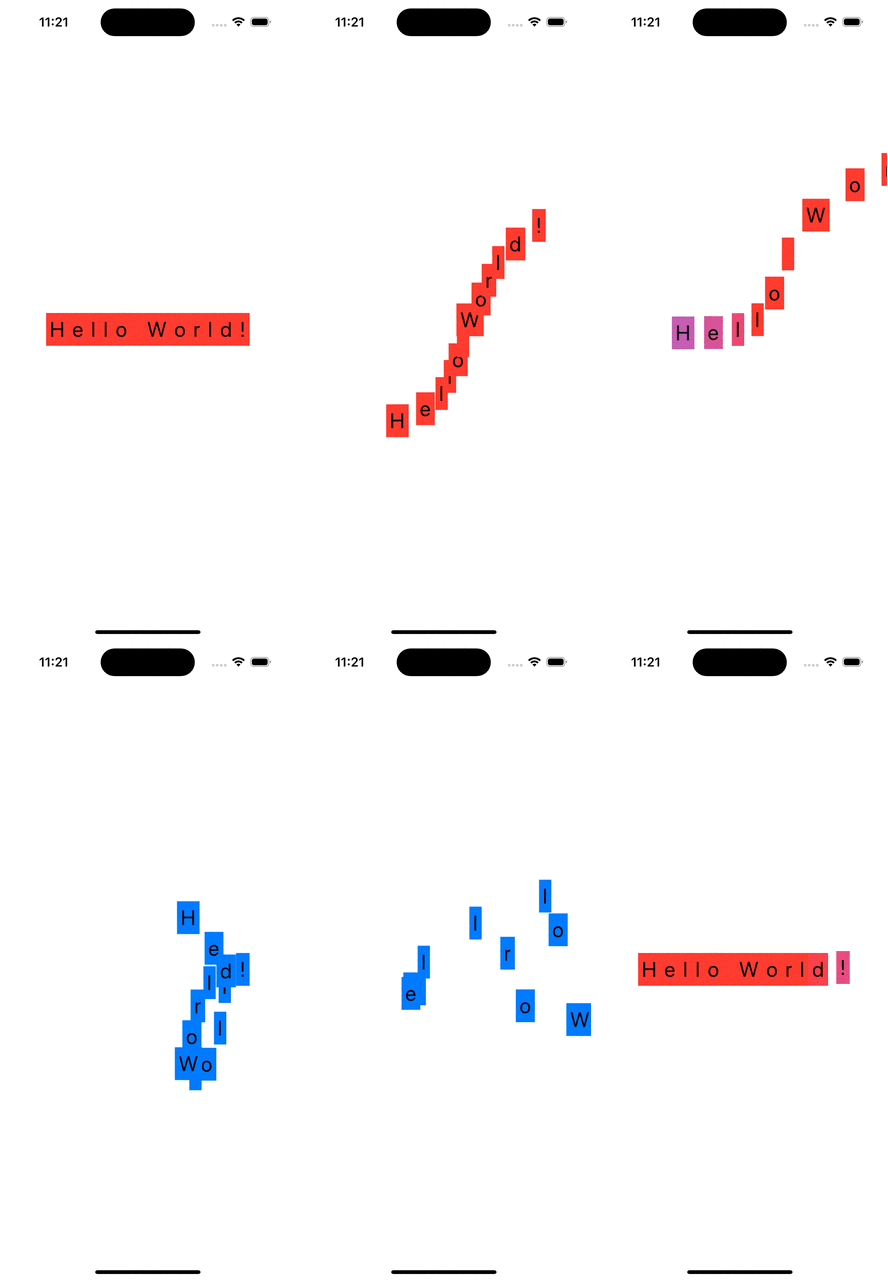
We can also present our elements with some animation. By default we have a fade-in and fade-out but, we can specify the .transition modifier to tell SwiftUI how we want our view to appear:
struct ContentView: View {

    @State private var isShowingRed = false

    var body: some View {
        VStack {
            Button("Tap me!") {
                withAnimation {
                    isShowingRed.toggle()
                }
            }

            if isShowingRed {
                Rectangle()
                    .fill(.red)
                    .frame(width: 200, height: 200)
                    .transition(.scale)
            }
        }
    }
}
We can go further and create our own transition style. A transition style is an object of type AnyTransition and it uses ViewModifiers to specifiy the active and identify status.
struct CornerRotateModfier: ViewModifier {
    let amount: Double
    let anchor: UnitPoint

    func body(content: Content) -> some View {
        content
            .rotationEffect(.degrees(amount), anchor: anchor)
            .clipped()
    }
}

extension AnyTransition {
    static var pivot: AnyTransition {
        .modifier(active: CornerRotateModfier(amount: -90, anchor: .topLeading), identity: CornerRotateModfier(amount: 0, anchor: .topLeading))
    }
}

struct ContentView: View {
    @State private var isShowingRed = false

    var body: some View {
        VStack {
            Button("Tap me!") {
                withAnimation {
                    isShowingRed.toggle()
                }
            }

            if isShowingRed {
                Rectangle()
                    .fill(.red)
                    .frame(width: 200, height: 200)
                    .transition(.pivot)
            }
        }
    }
}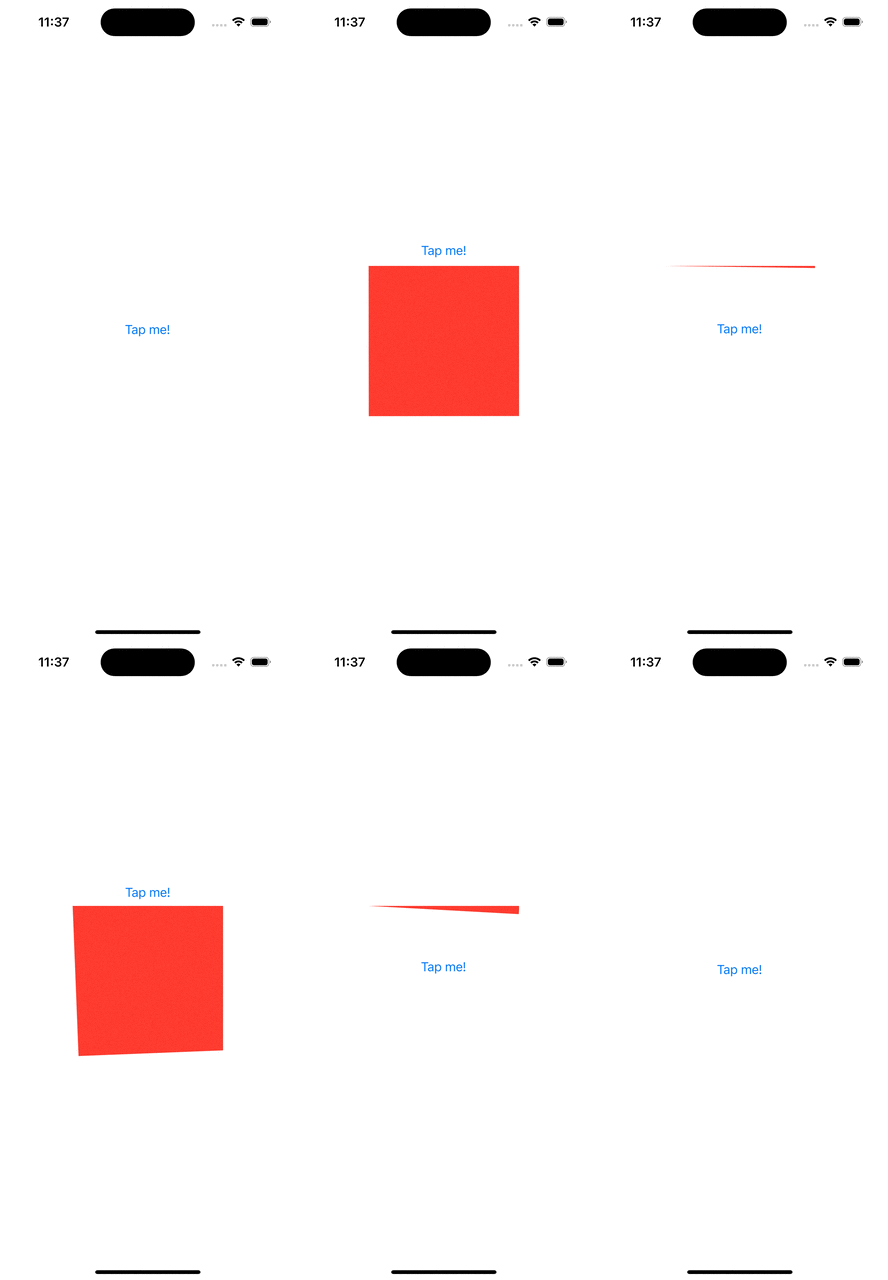
Day 34
As challenge, today, we add some animation to GuessTheFlag. We have to:
- Add a spinning effect to the selected flag
- Add a fading effect to the not choosen flags
- Add a scale-out effect to the not choosen flags
To reach these targets we have to change our code from day 22. In particula we define three State property which contains the value for our animations:
@State private var spinningAnimationValue = [0.0, 0.0, 0.0]
@State private var fadeAnimationValue = [1.0, 1.0, 1.0]
@State private var scaleAnimationValue = [1.0, 1.0, 1.0]
I used an array to hold this information because values change based on which flag the user tap (0, 1, or 3)
Then, we add some modifiers to our flag-buttons and change the correct value in our arrays:
 Button {
    spinningAnimationValue[number] += 360
    withAnimation {
        fadeAnimationValue[(number + 1) % 3] = 0.25
        fadeAnimationValue[(number + 2) % 3] = 0.25

        scaleAnimationValue[(number + 1) % 3] = 0.0
        scaleAnimationValue[(number + 2) % 3] = 0.0
    }
    flagTapped(number)
} label: {
    Image(countries[number])
        .clipShape(.capsule)
        .shadow(radius: 5)
        .rotation3DEffect(.degrees(spinningAnimationValue[number]), axis: (x: 0.0, y: 1.0, z: 0.0))
        .opacity(fadeAnimationValue[number])
        .scaleEffect(scaleAnimationValue[number])
        .animation(.default, value: spinningAnimationValue[number])
}
Finally we reset the values of fadeAnimationValue and scaleAnimationValue in the askQuestion method:
func askQuestion() {
    countries.shuffle()
    correctAnswer = Int.random(in: 0...2)
    wrongAnswer = nil
    fadeAnimationValue = [1.0, 1.0, 1.0]
    scaleAnimationValue = [1.0, 1.0, 1.0]
}
The final result is shown in the gif below.
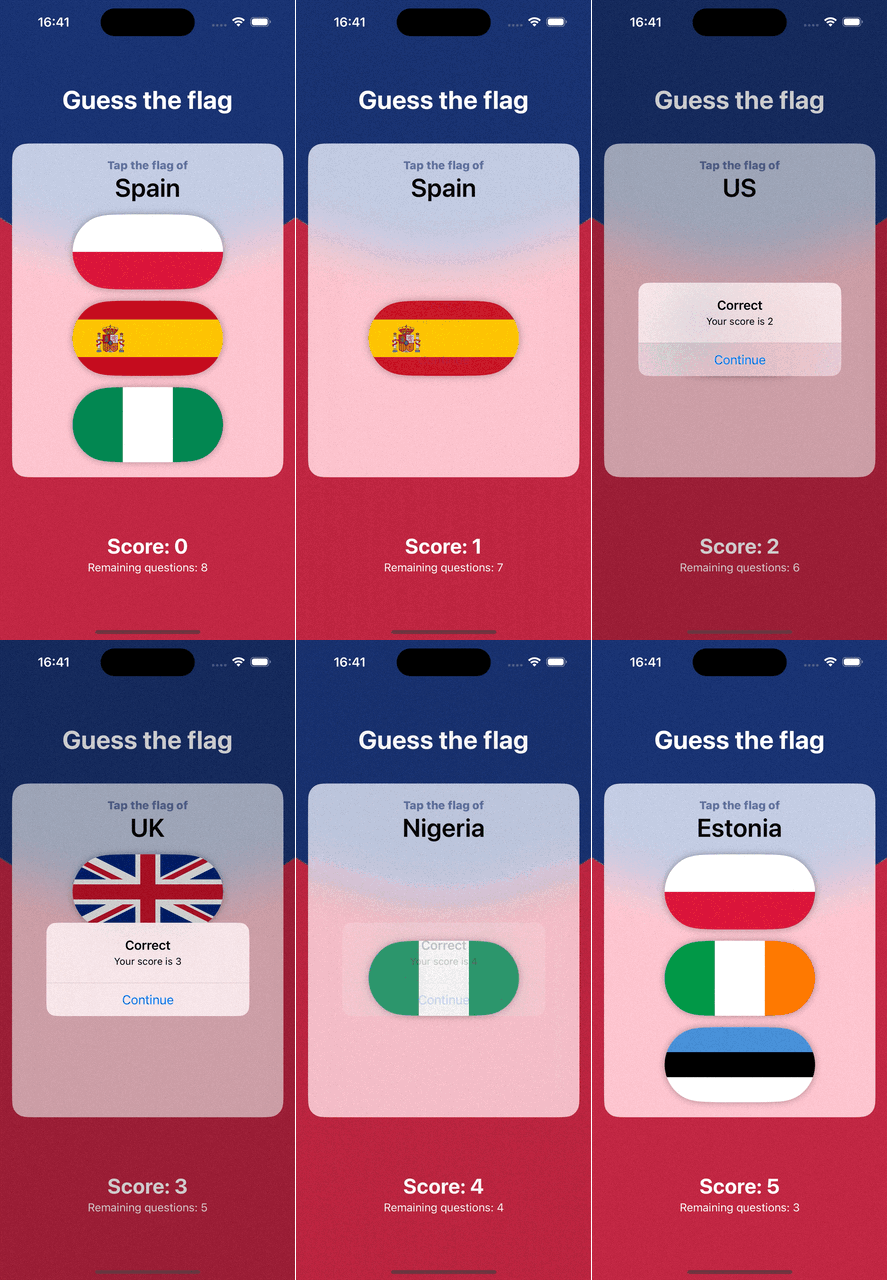
Day 35
Today we are on our own. We have to build an app from scratch. The requirements are:
- User can insert a number representing the multiplication table they want to study
- User can insert the number of question which the system will propose
- The system presents to the user the questions
- The system presents the final score (correct answer over number of questions) to the user
To tackle this problem I started from defining a view with some states representing the data the user will insert, and a gameStatus which can be either settings or paly. Then, based on this gameStatus the app present two view:
-
FormSettingsViewwhich require to the user some settings to play and a button to start playing (switch thegameStatustoplay) -
PlayViewwhich presents to the user the questions and keeps track of the score.
enum GameStatus {
case settings, play
}

struct FormSettingsView: View {
    @Binding var multiplicationTableFactor: Int
    @Binding var numberOfQuestions: Int
    @Binding var gameStatus: GameStatus

    @Binding var finalMessage: String?

    var body: some View {
        Form {
            Stepper("Multiplication table of \(multiplicationTableFactor)", value: $multiplicationTableFactor, in: 1...12)
            Stepper("^[\(numberOfQuestions) questions](inflect:true)", value: $numberOfQuestions, in: 1...100)
            HStack {
                Spacer()
                Button("Start") {
                    print("toggle game status")
                    gameStatus = .play
                }
                Spacer()
            }
            .padding()
        }
        if let finalMessage = finalMessage {
            ZStack {
                RoundedRectangle(cornerRadius: 25)
                    .fill(.fill)
                Text(finalMessage)
                    .font(.title)
            }
        }
    }
}

struct Question {
    let question: String
    let answer: Int
}

struct PlayView: View {
    @Binding var multiplicationTableFactor: Int
    @Binding var numberOfQuestions: Int
    @Binding var gameStatus: GameStatus

    @State private var currentQuestion = 1
    private var currentQuestionIndex: Int {
        currentQuestion - 1
    }
    @State private var currentAnswer = 0
    var questions: [Question]

    @State private var score = 0
    @Binding var finalMessage: String?

    var body: some View {
        VStack {
            Text("Question \(currentQuestion)")
                .font(.headline)
            Text(questions[currentQuestionIndex].question)
                .font(.title)
            HStack {
                Spacer()
                TextField("Your answer", value: $currentAnswer, format: .number)
                    .padding()
                    .border(.primary)
                Spacer()
            }
        }
        .onSubmit {
            if questions[currentQuestionIndex].answer == currentAnswer {
                score += 1
            }

            currentAnswer = 0
            currentQuestion += 1

            if currentQuestion > numberOfQuestions {
                finalMessage = "Your last result is: \(score)/\(numberOfQuestions)"
                gameStatus = .settings
            }
        }
    }
}

struct ContentView: View {
    @State private var multiplicationTableFactor = 2
    @State private var numberOfQuestions = 1
    @State private var gameStatus: GameStatus = .settings
    @State private var finalMessage: String? = nil

    var body: some View {
        switch gameStatus {
        case .settings:
            FormSettingsView(multiplicationTableFactor: $multiplicationTableFactor,
                             numberOfQuestions: $numberOfQuestions,
                             gameStatus: $gameStatus,
                             finalMessage: $finalMessage)
        case .play:
            PlayView(multiplicationTableFactor: $multiplicationTableFactor,
                     numberOfQuestions: $numberOfQuestions,
                     gameStatus: $gameStatus,
                     questions: Array(1...numberOfQuestions+1).map({_ in getRandomQuestion()}),
                     finalMessage: $finalMessage
            )
        }
    }

    func getRandomQuestion() -> Question {
        let randomFactor = Int.random(in: 1...10)
        return Question(question: "\(multiplicationTableFactor) x \(randomFactor)", answer: multiplicationTableFactor*randomFactor)
    }
}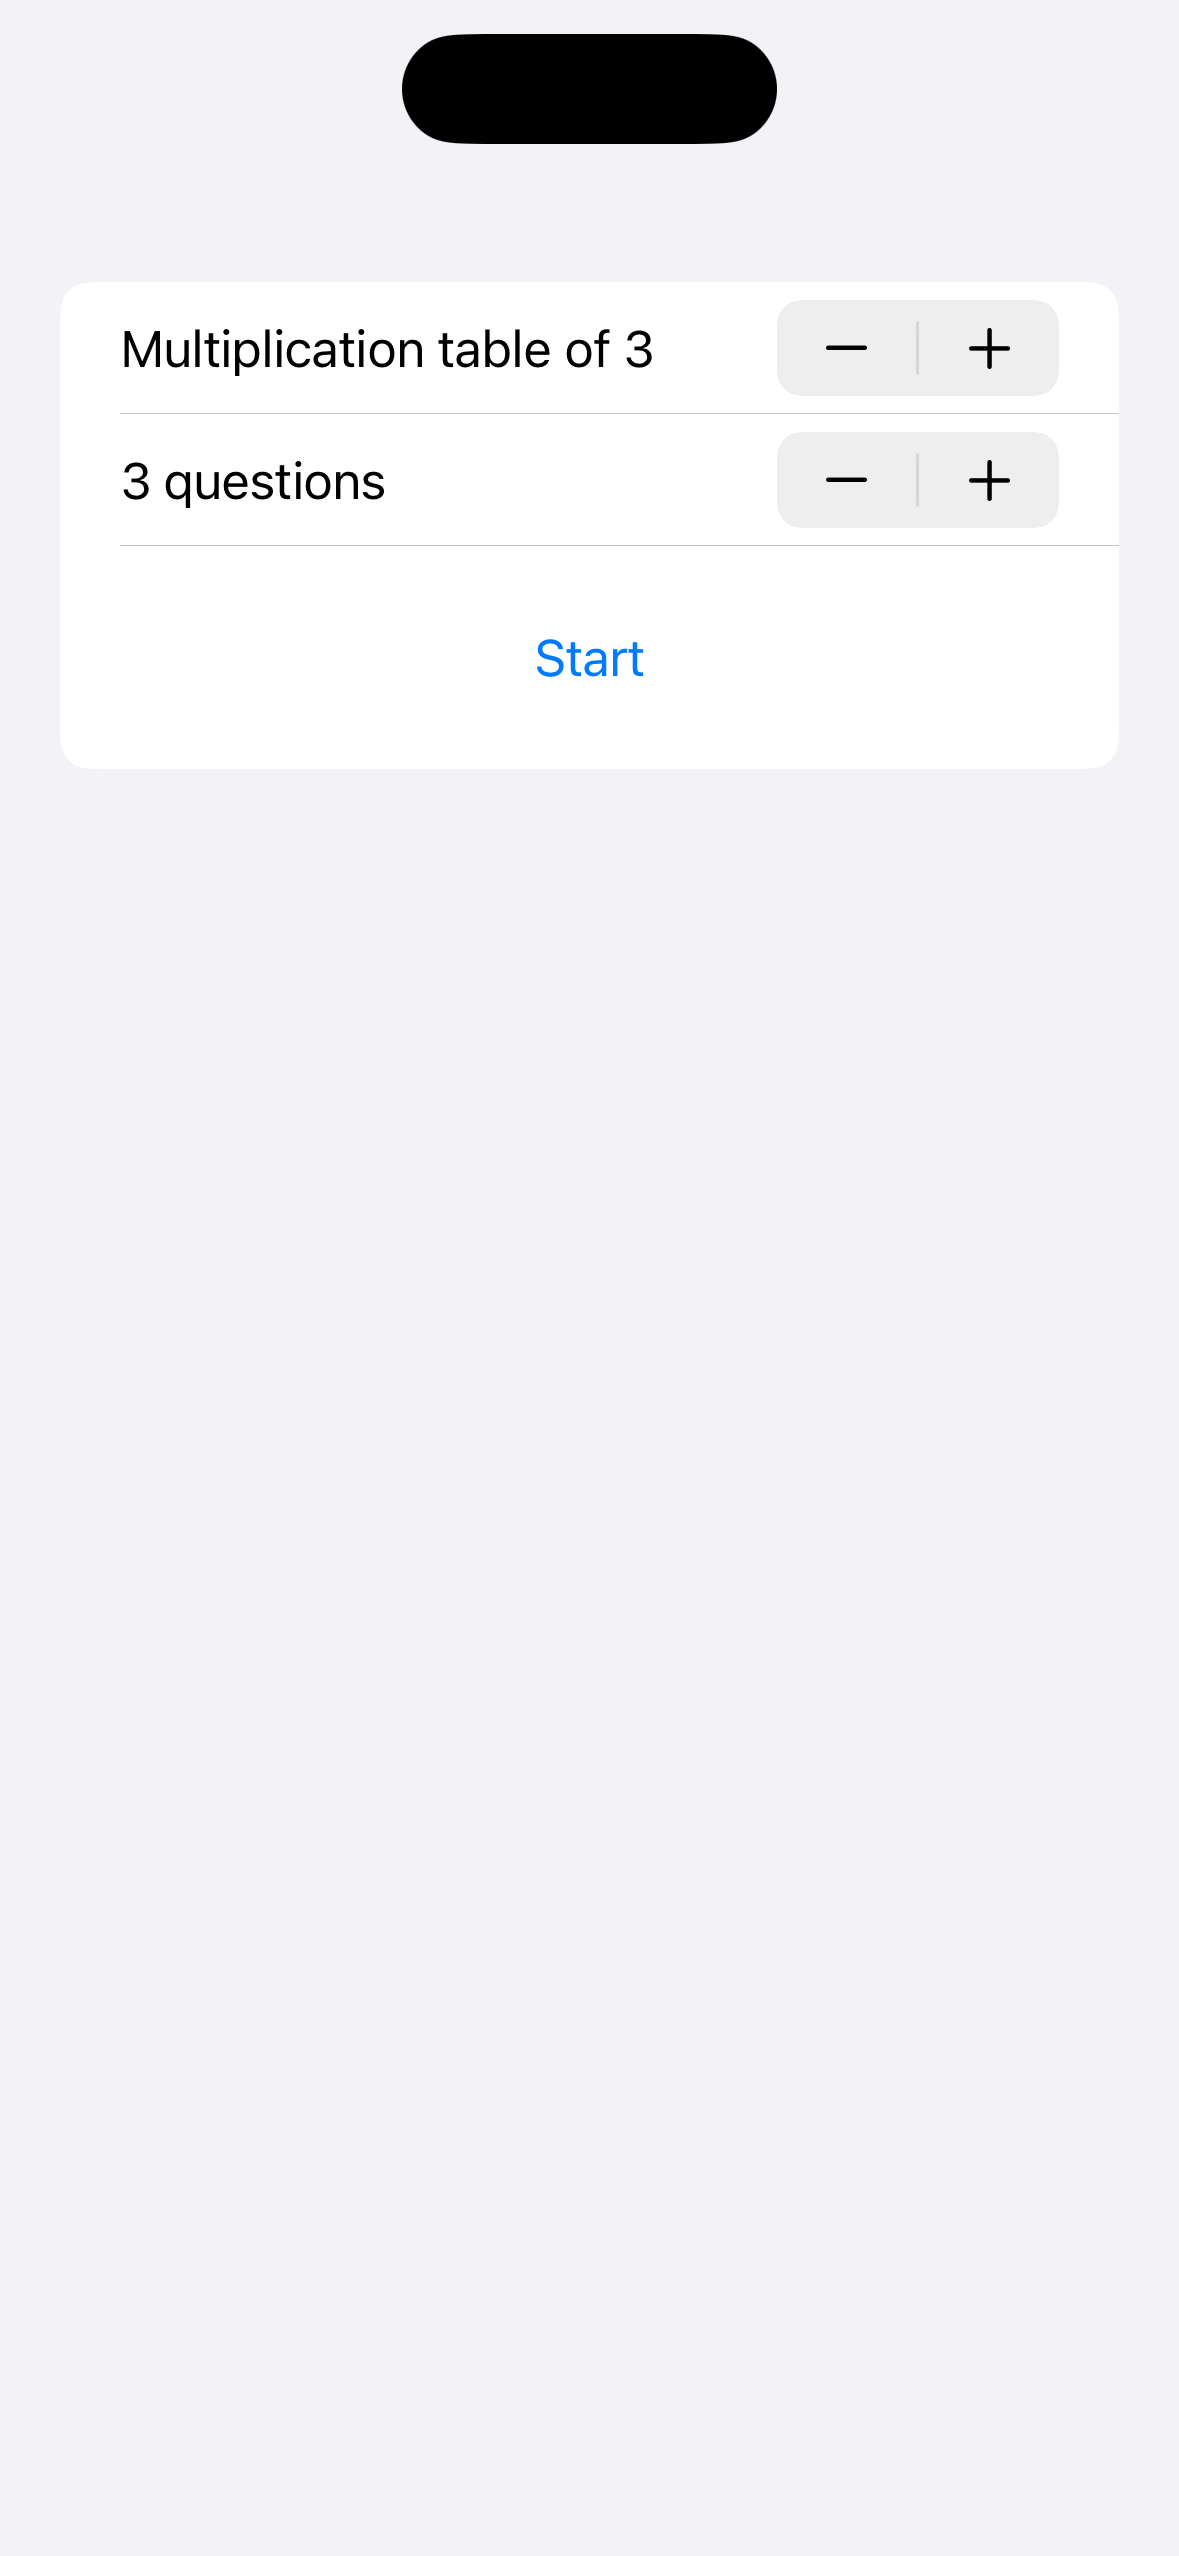
Day 36
Today we start learning how to build more complex apps.
Observable objects
Let’s start seeing how to handle set of data holds together with structs and classes.
dict User {
    var firstName = "Bilbo"
    var lastName = "Beggins"
}

struct ContentView: View {
    @State private var user = User()

    var body: some View {
        VStack {
            Text("Your name is \(user.firstName) \(user.lastName)")

            TextField("First name", text: $user.firstName)
            TextField("Laast name", text: $user.lastName)
        }
        .padding()
    }
}
In this first example everything works as expected. We can change the value of firstName and lastName and the view will change accordingly. There is a problem with this approach: we cannot share the user variable with any other view because it is an instance of a struct. The solution is easy: change struct with class.
class User {
    var firstName = "Bilbo"
    var lastName = "Beggins"
}

struct ContentView: View {
    @State private var user = User()

    var body: some View {
        VStack {
            Text("Your name is \(user.firstName) \(user.lastName)")

            TextField("First name", text: $user.firstName)
            TextField("Laast name", text: $user.lastName)
        }
        .padding()
    }
}
But now, it is not reactive anymore. If we try changing the first name or the last name, our view does not change. That’s because we are not recreacting a new object when we make a change (that was happening with the struct).
Fixing this issue is easy. We add @Observable above the clas declaration:
@Observable
class User {
    var firstName = "Bilbo"
    var lastName = "Beggins"
}
@Observable tells swiftUI to keep track of changes happening inside the class and reload the view which depends on that class. @Observable is a macro which “rewrite” our code before compiling it to give us some fuctionality.
Presenting new views
We can present new view in a similar way we present alerts. Ataching the .sheet modifier to our view and returing the view we want to show in the content parameter. We can obviously pass data to this new view and to dismiss it there are two ways: swipe down the view and call the dismiss() function given to us by @Environmen(\.dismiss) property wrapper.
struct SecondView: View {
    @Environment(\.dismiss) var dismiss
    let name: String

    var body: some View {
        Text("Hello \(name)")
        Button("Dismiss") {
            dismiss()
        }
    }
}

struct ContentView: View {
    @State private var showingSheet = false

    var body: some View {
        Button("Show the sheet") {
            showingSheet.toggle()
        }
        .sheet(isPresented: $showingSheet, content: {
            SecondView(name: "Marco")
        })
    }
}
Deleting items from a list
Next thing to step up our apps are the deletion of items from a list. It is achieved by adding the modifier onDelete to the ForEach insider a List which accept a function which takes as input an IndexSet representing the offset from where delete the item (which can be conveniently passed to remove(atOffset: ) method of an array). We can even add the “Edit/Done” button in a simple way.
struct ContentView: View {
    @State private var numbers: [Int] = []
    @State private var currentNumber = 1

    var body: some View {
        NavigationStack {
            VStack {
                List {
                    ForEach(numbers, id: \.self) {
                        Text("Row \($0)")
                    }
                    .onDelete(perform: removeRows)
                }

                Button("Add number") {
                    numbers.append(currentNumber)
                    currentNumber += 1
                }
            }
            .toolbar(content: {
                EditButton()
            })
        }
    }

    func removeRows(at offset: IndexSet) {
        numbers.remove(atOffsets: offset)
    }
}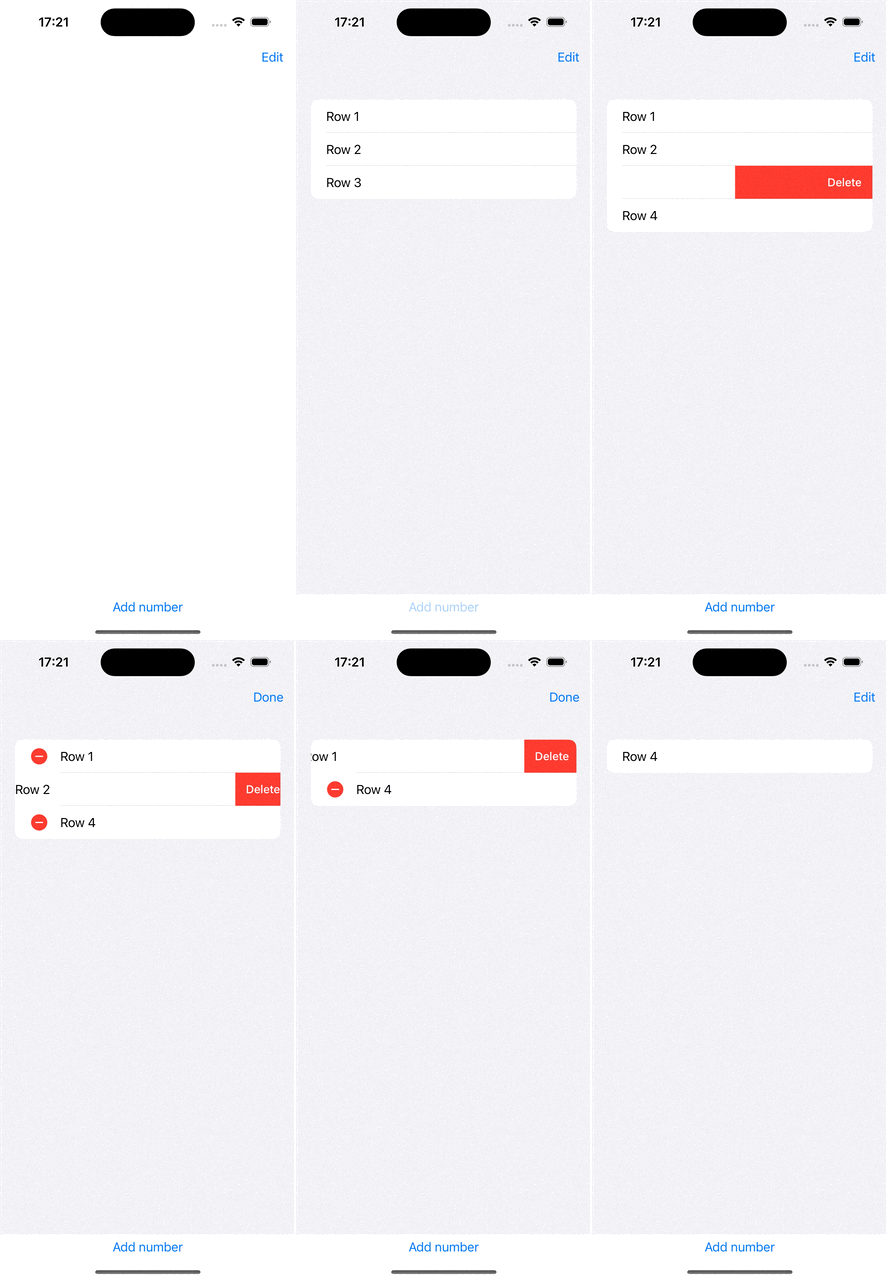
AppStorage (or UserDefaults)
A way to store user data is using the @AppStorage wrapper (which is a wrapper itself around UserDefaults). This allow to remember soma data even if the app is closed.
struct ContentView: View {
    @AppStorage("tapCount") private var tapCount = 0

    var body: some View {
        Button("Tap count: \(tapCount)") {
            tapCount += 1
        }
    }
}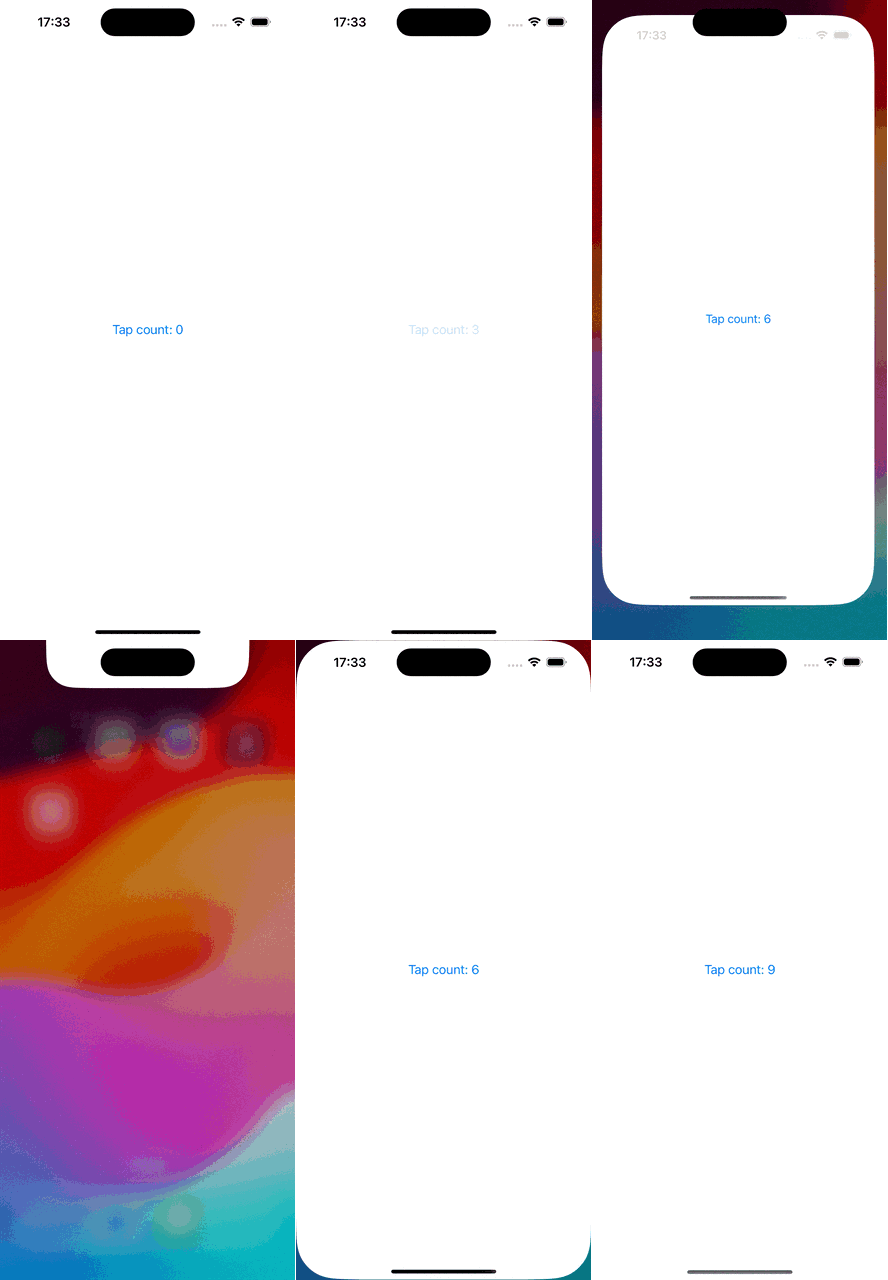
Keep in mind that AppStorage is good to storage small amount of data and not big object.
Encode and decode data
We can save more complex data in UserDefaults. We just have to convert it in a string format (JSON for example). As long as we want to store simple structs (made by strings, integers, booleans, doubles, …) we can just add the Codable protocol to our string and invoke the encode method of the JSONEncoder class.
struct User: Codable {
    let firstName: String
    let lastName: String
}

struct ContentView: View {
    @State private var user = User(firstName: "Tim", lastName: "Lee")

    var body: some View {
        Button("Save user") {
            let encoder = JSONEncoder()

            if let data = try? encoder.encode(user) {
                UserDefaults.standard.set(data, forKey: "UserData")
            }
        }
    }
}
Day 37
Today we start building the iExpense app for real. We need:
- A list to show our expense
- A form to insert new expenses
Let’s start with task number one: we can define a new struct which holds our expense data:
struct ExpenseItem: Identifiable {
    let id = UUID()
    let name: String
    let type: String
    let amount: Double
}
There a couple of new things here:
-
: Identifiablemeans that our view conforms the theIdentifiableprotocol -
id = UUID()is necessary to conform to theIdentifiableprotocol. TheUUID()generates a uniqui identifier for each instance of our struct.
Then we need a class which encapsulate our list of expenses:
@Observable
class Expenses {
    var items: [ExpenseItem] = []
}
And the we can define our ContentView:
struct ContentView: View {
    @State private var expenses = Expenses()

    @State private var showingAddExpense = false


    var body: some View {
        NavigationStack {
            List {
                ForEach(expenses.items) { item in
                    HStack {
                        VStack(alignment: .leading) {
                            Text(item.name)
                                .font(.headline)
                            Text(item.type)
                        }

                        Spacer()

                        Text(item.amount, format: .currency(code: "EUR"))
                    }
                }
                .onDelete(perform: removeItems)
            }
            .navigationTitle("iExpense")
            .toolbar {
                Button("Add expense", systemImage: "plus") {
                    showingAddExpense = true
                }
            }
            .sheet(isPresented: $showingAddExpense, content: {
                AddView(expenses: expenses)
            })
        }
    }

    func removeItems(at offset: IndexSet) {
        expenses.items.remove(atOffsets: offset)
    }
}
It is worth noticing that in the ForEach statement to build the list we haven’t declared the id: . That’s because our ExpenseItems conform to the Identifiable protocol.
Moreover, we added the logic to present our AddView. The AddView is a view we have declared in another file (AddView.swift)
struct AddView: View {
    @Environment(\.dismiss) var dismiss

    @State private var name = ""
    @State private var type = "Personal"
    @State private var amount = 0.0

    var expenses: Expenses

    let types = ["Business", "Personal"]

    var body: some View {
        NavigationStack {
            Form {
                TextField("Name", text: $name)

                Picker("Type", selection: $type) {
                    ForEach(types, id: \.self) {
                        Text($0)
                    }
                }

                TextField("Amount", value: $amount, format: .currency(code: "EUR"))
                    .keyboardType(.decimalPad)
            }
            .navigationTitle("Add new expense")
            .toolbar {
                Button("Save") {
                    let item = ExpenseItem(name: name, type: type, amount: amount)
                    expenses.items.append(item)
                    dismiss()
                }
            }
        }
    }
}

#Preview {
    AddView(expenses: Expenses())
}
This implementation “works” but it is missing of a key requirement: data persistency.
To achieve data persistence we have to change our models (ExpenseItem and Expenses)
struct ExpenseItem: Identifiable, Codable {
    var id = UUID()
    let name: String
    let type: String
    let amount: Double
}

@Observable
class Expenses {
    var items: [ExpenseItem] = [] {
        didSet {
            if let encoded = try? JSONEncoder().encode(items) {
                UserDefaults.standard.set(encoded, forKey: "Items")
            }
        }
    }

    init() {
        if let savedItems = UserDefaults.standard.data(forKey: "Items") {
            if let decodedItems = try? JSONDecoder().decode([ExpenseItem].self, from: savedItems) {
                items = decodedItems
                return
            }
        }

        items = []
    }
}
The ExpenseItem has to conform to the Codable protocol in order to be encoded and decoded automatically.
Moreover, we change our Expenses class in order to:
- Automatically save the
itemseach time it is modified - Initialize from the data saved in the
UserDefaults
Day 38
Three challenges lie ahead for today:
- Use the user’s preferred currency instead of the hardcoded
"EUR" - Change how the amount is shown: green if below
10, yello if below100, and red otherwise - Split the list in two sections: “Personal” and “Business”
The first two challenges have been quite easy. They required the application of something we have already seen other days. The last one required some more thinking. My solution modifies the removeItems method called on onDelete. Now it requires the type of the section and then convert the offset to the expenses and then remove the expenses which match.
struct ContentView: View {
    @State private var expenses = Expenses()

    @State private var showingAddExpense = false


    var body: some View {
        NavigationStack {
            List {
                Section("Personal") {
                    ForEach(expenses.items.filter({$0.type == "Personal"})) { item in
                        ExpenseListItem(item: item)
                    }
                    .onDelete(perform: {removeItems(at: $0, for: "Personal")})
                }

                Section("Business") {
                    ForEach(expenses.items.filter({$0.type == "Business"})) { item in
                        ExpenseListItem(item: item)
                    }
                    .onDelete(perform: {removeItems(at: $0, for: "Business")})
                }
            }
            .navigationTitle("iExpense")
            .toolbar {
                Button("Add expense", systemImage: "plus") {
                    showingAddExpense = true
                }
            }
            .sheet(isPresented: $showingAddExpense, content: {
                AddView(expenses: expenses)
            })
        }
    }

    func removeItems(at offsets: IndexSet, for type: String) {
        let expensesToDelete = offsets.map { expenses.items.filter({ $0.type == type})[$0] }

        for expense in expensesToDelete {
            expenses.items.removeAll(where: {$0.id == expense.id})
        }
    }
}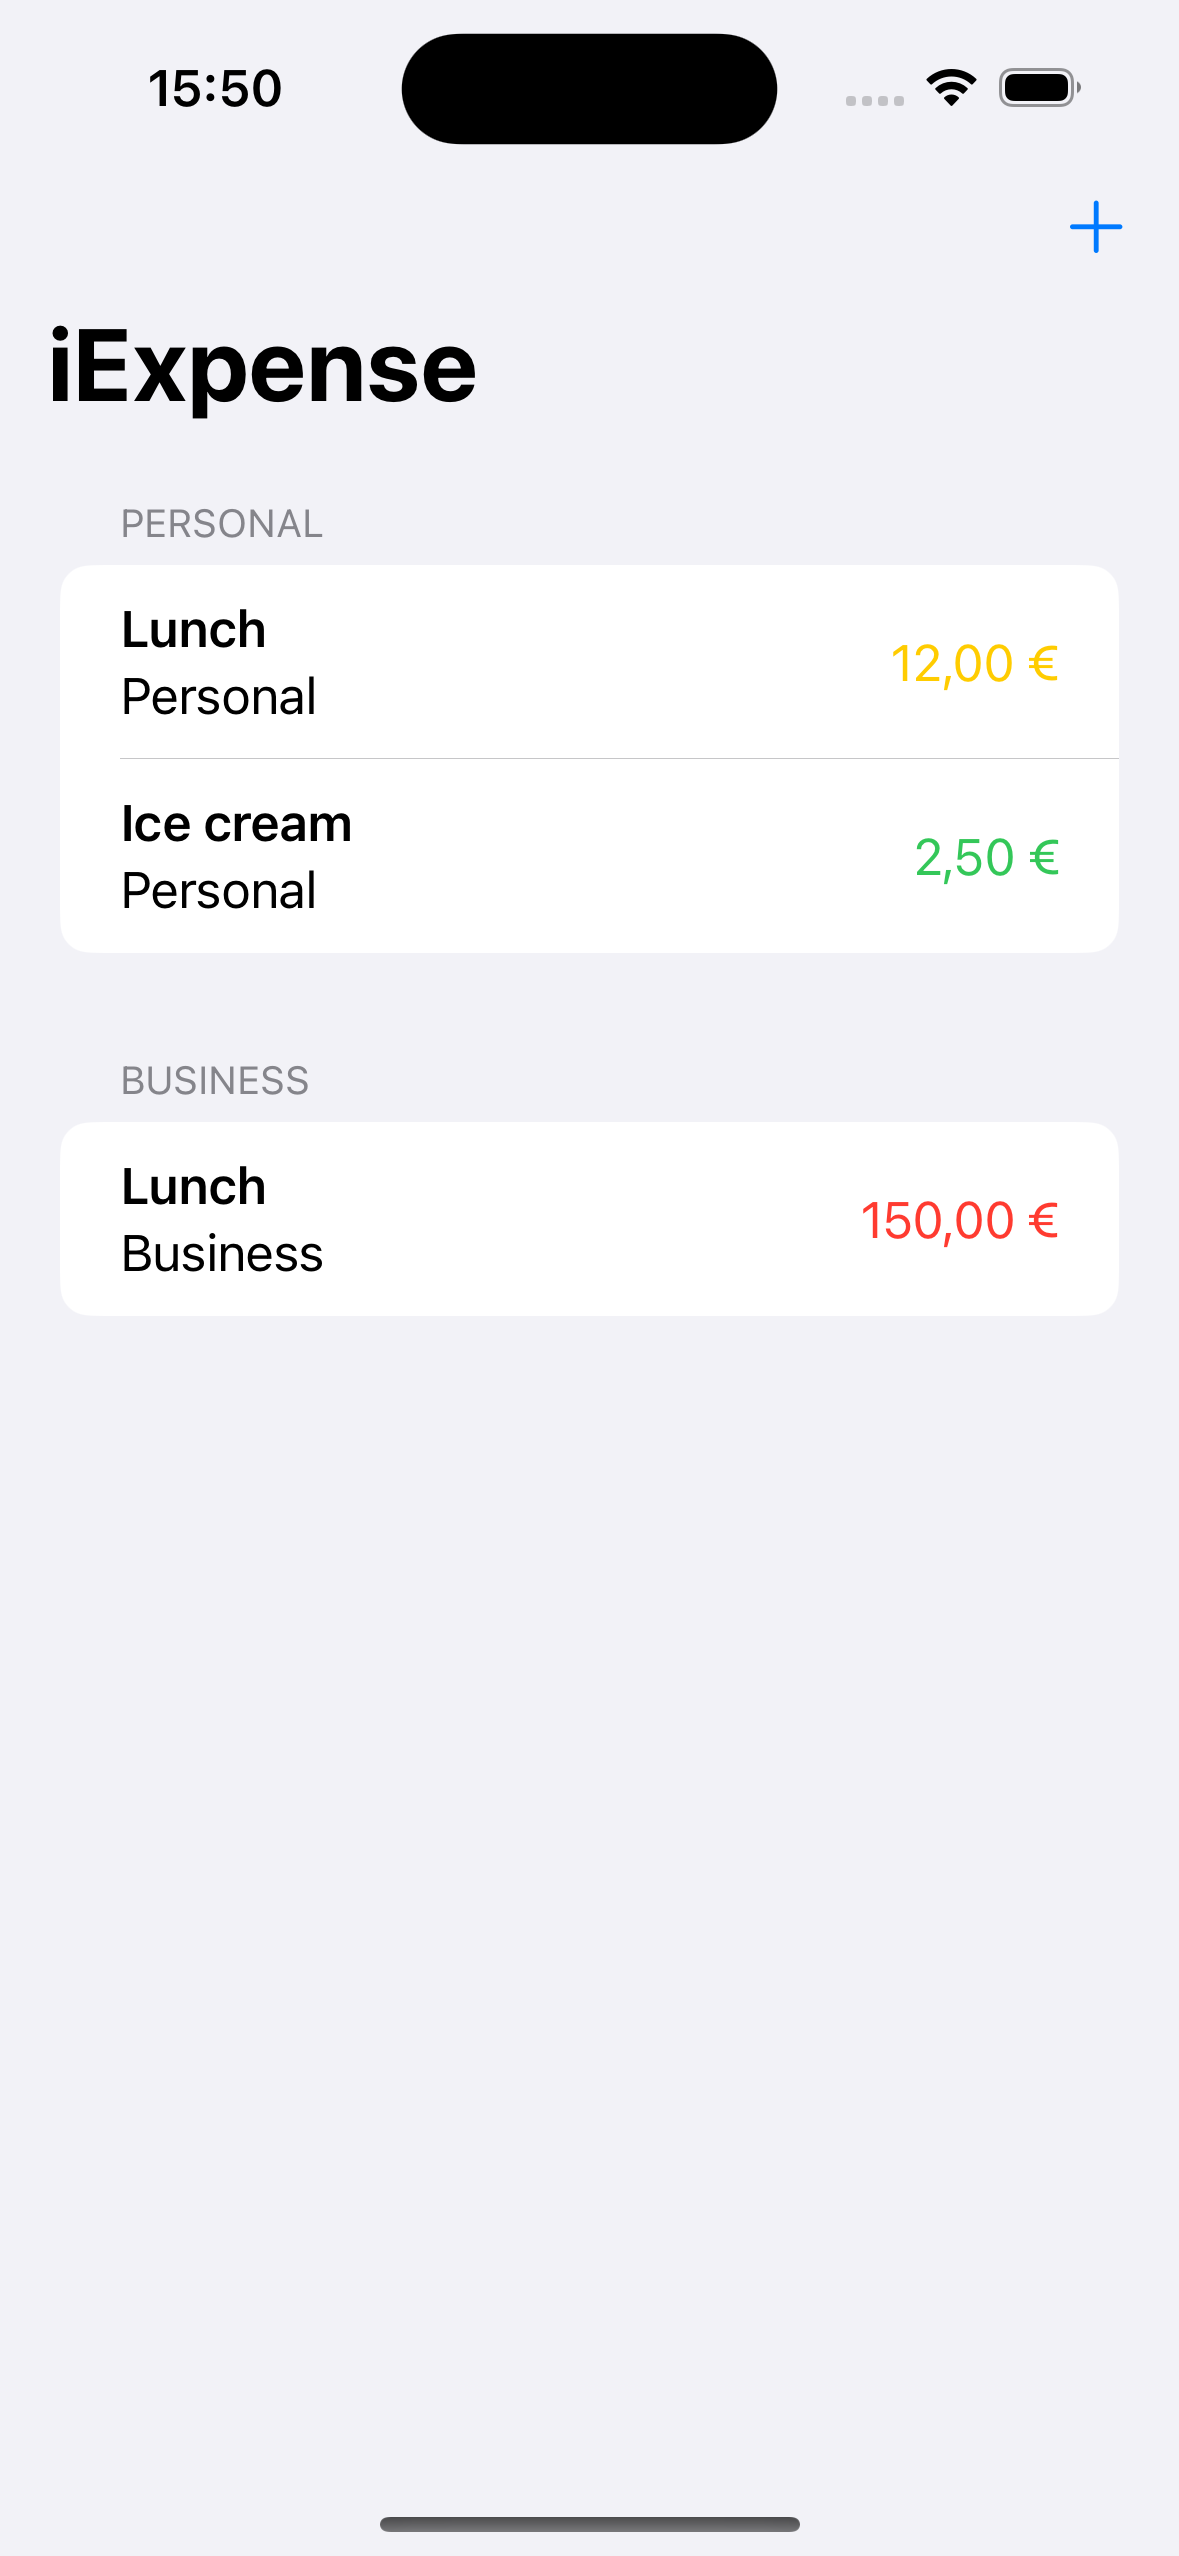
Day 39
Today we start a new project but, as usual, we learn some new stuff before starting our real project.
Images
First of all, we start learning how resize images. There are a couple of modifiers to change how the user sees an image:
resizable()clipped()scaleToFit()scaleToFill()containerRelativeFrame(...) {size, axis in ...}
ScrollView and LazyStacks
A ScrollView is a viw that can be scrolled by the user. It always has a stack inside which can be Lazy if you want that each view is built just before appearing on the screen. Otherwise, every view will be built at the instatiation of the ScrollView.
ScrollView {
    VStack {
        ForEach(0..<100) {
            Text("Element \($0)")
        }
    }
}
ScrollView {
LazyVStack {
ForEach(0..<100) {
Text("Element \($0)")
}
}
}ScrollView(.horizontal) {
HStack {
ForEach(0..<100) {
Text("Element \($0)")
}
}
}ScrollView(.horizontal) {
LazyHStack {
ForEach(0..<100) {
Text("Element \($0)")
}
}
}NavigationStack and NavigationLink
We can use the NavigationStack view to build element which “open” new views. Inside a NavigationStack we can add a NavigationLink to create a cliccable element which create a new View and push it on top of the NavigationStack automatically builidng the “back” button.
struct ContentView: View {
    var body: some View {
        NavigationStack {
            List(0..<100) {row in
                NavigationLink("Row \(row)") {
                    Text("Detial \(row)")
                }
            }
            .navigationTitle("SwiftUI")
        }
    }
}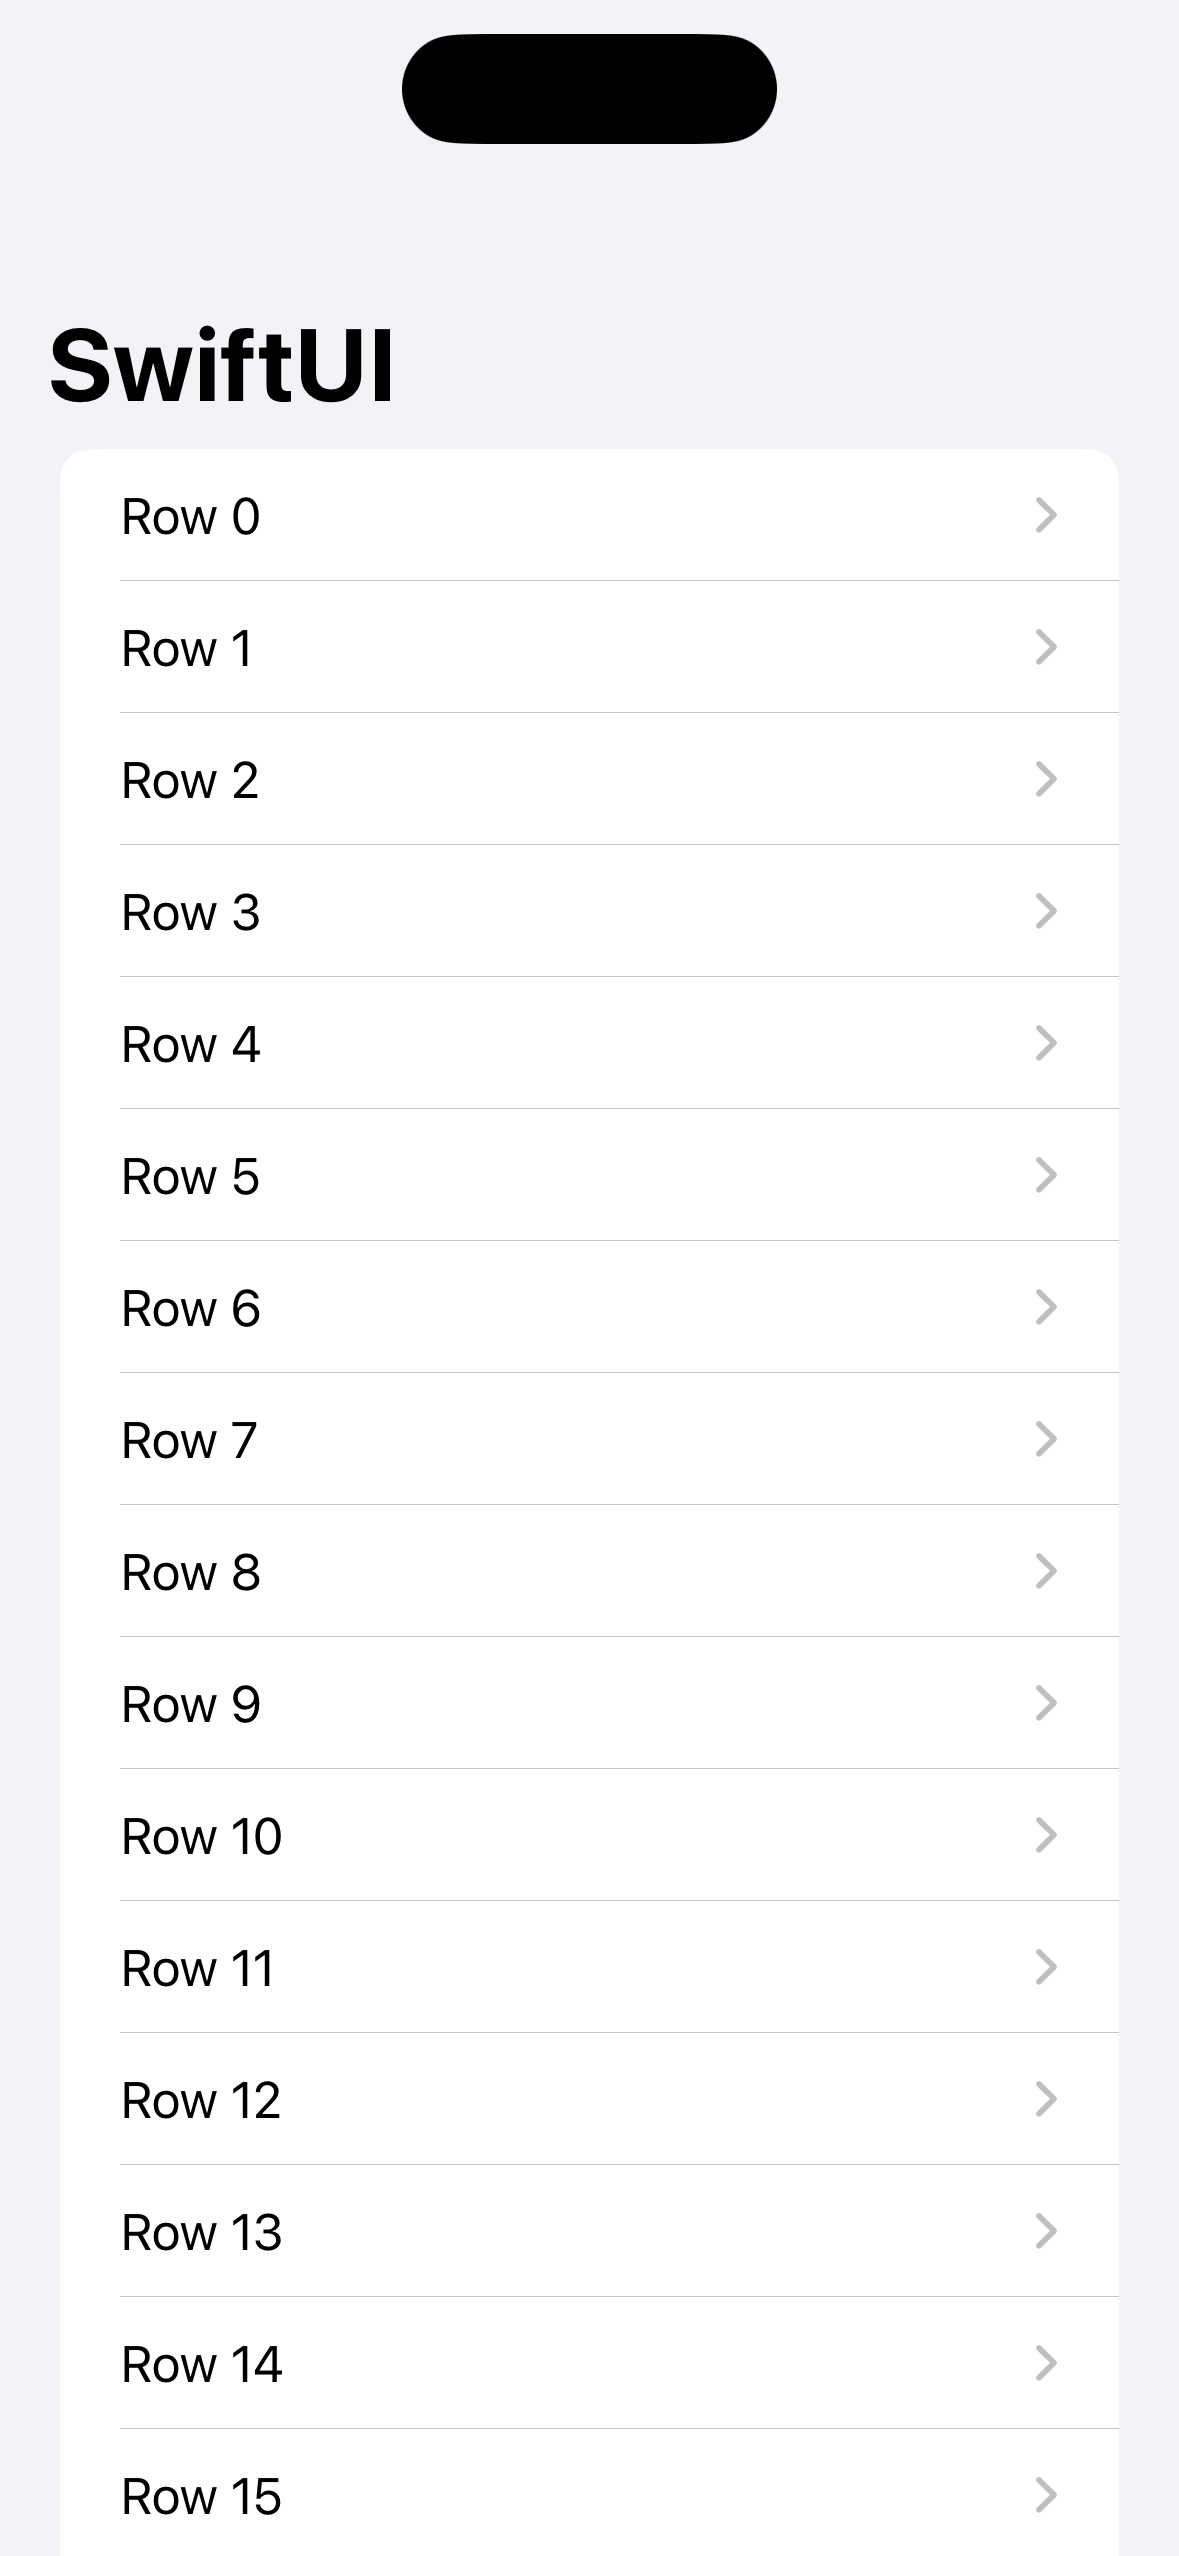
Hierarchy of codable structs
When we have complex Structs (with arrays or other structs as attributes) we have to ensure that every other Structs is Codable/
struct User: Codable {
    let name: String
    let address: Address
}

struct Address: Codable {
    let street: String
    let city: String
}

struct ContentView: View {
    var body: some View {
        Button("Decode JSON") {
            let input = """
            {
                "name": "Tim",
                "address": {
                    "street": "123, Tim Avenue",
                    "city": "Anywhereville"
                }
            }
            """
            let data = Data(input.utf8)
            let decoder = JSONDecoder()

            if let user = try? decoder.decode(User.self, from: data) {
                print(user.address.street)
            }
        }
    }
}
GridView
We can layout our elements in a grid way. We need an Array of GridItems (which specify the repetition in the axis which is not described by the ScrollView) and a ScrollView with a LazyVGrid or LazyHGrid inside.
struct ContentView: View {
    let layout = [
        GridItem(.adaptive(minimum: 80)),
    ]

    var body: some View {
        ScrollView {
            LazyVGrid(columns: layout, content: {
                ForEach(0..<1000) {
                    Text("Item \($0)")
                }
            })
        }
<div style="max-width: 100%;">
    <img id="NavigationStack" src="/assets/images/2024-06-20-100-days-of-swiftui/navigationStackA.png" alt="A list with elements as Row #">
        <div style="display: flex; flex-direction: row; justify-content: space-evenly">
        <button onclick="changeImage('NavigationStack', '/assets/images/2024-06-20-100-days-of-swiftui/navigationStackA.png', 'A list with elements as Row #')">1</button>
        <button onclick="changeImage('NavigationStack', '/assets/images/2024-06-20-100-days-of-swiftui/navigationStackB.png', 'The detail view of row 7: a text with written Detail 7')">2</button>
    </div>
</div>
    }
}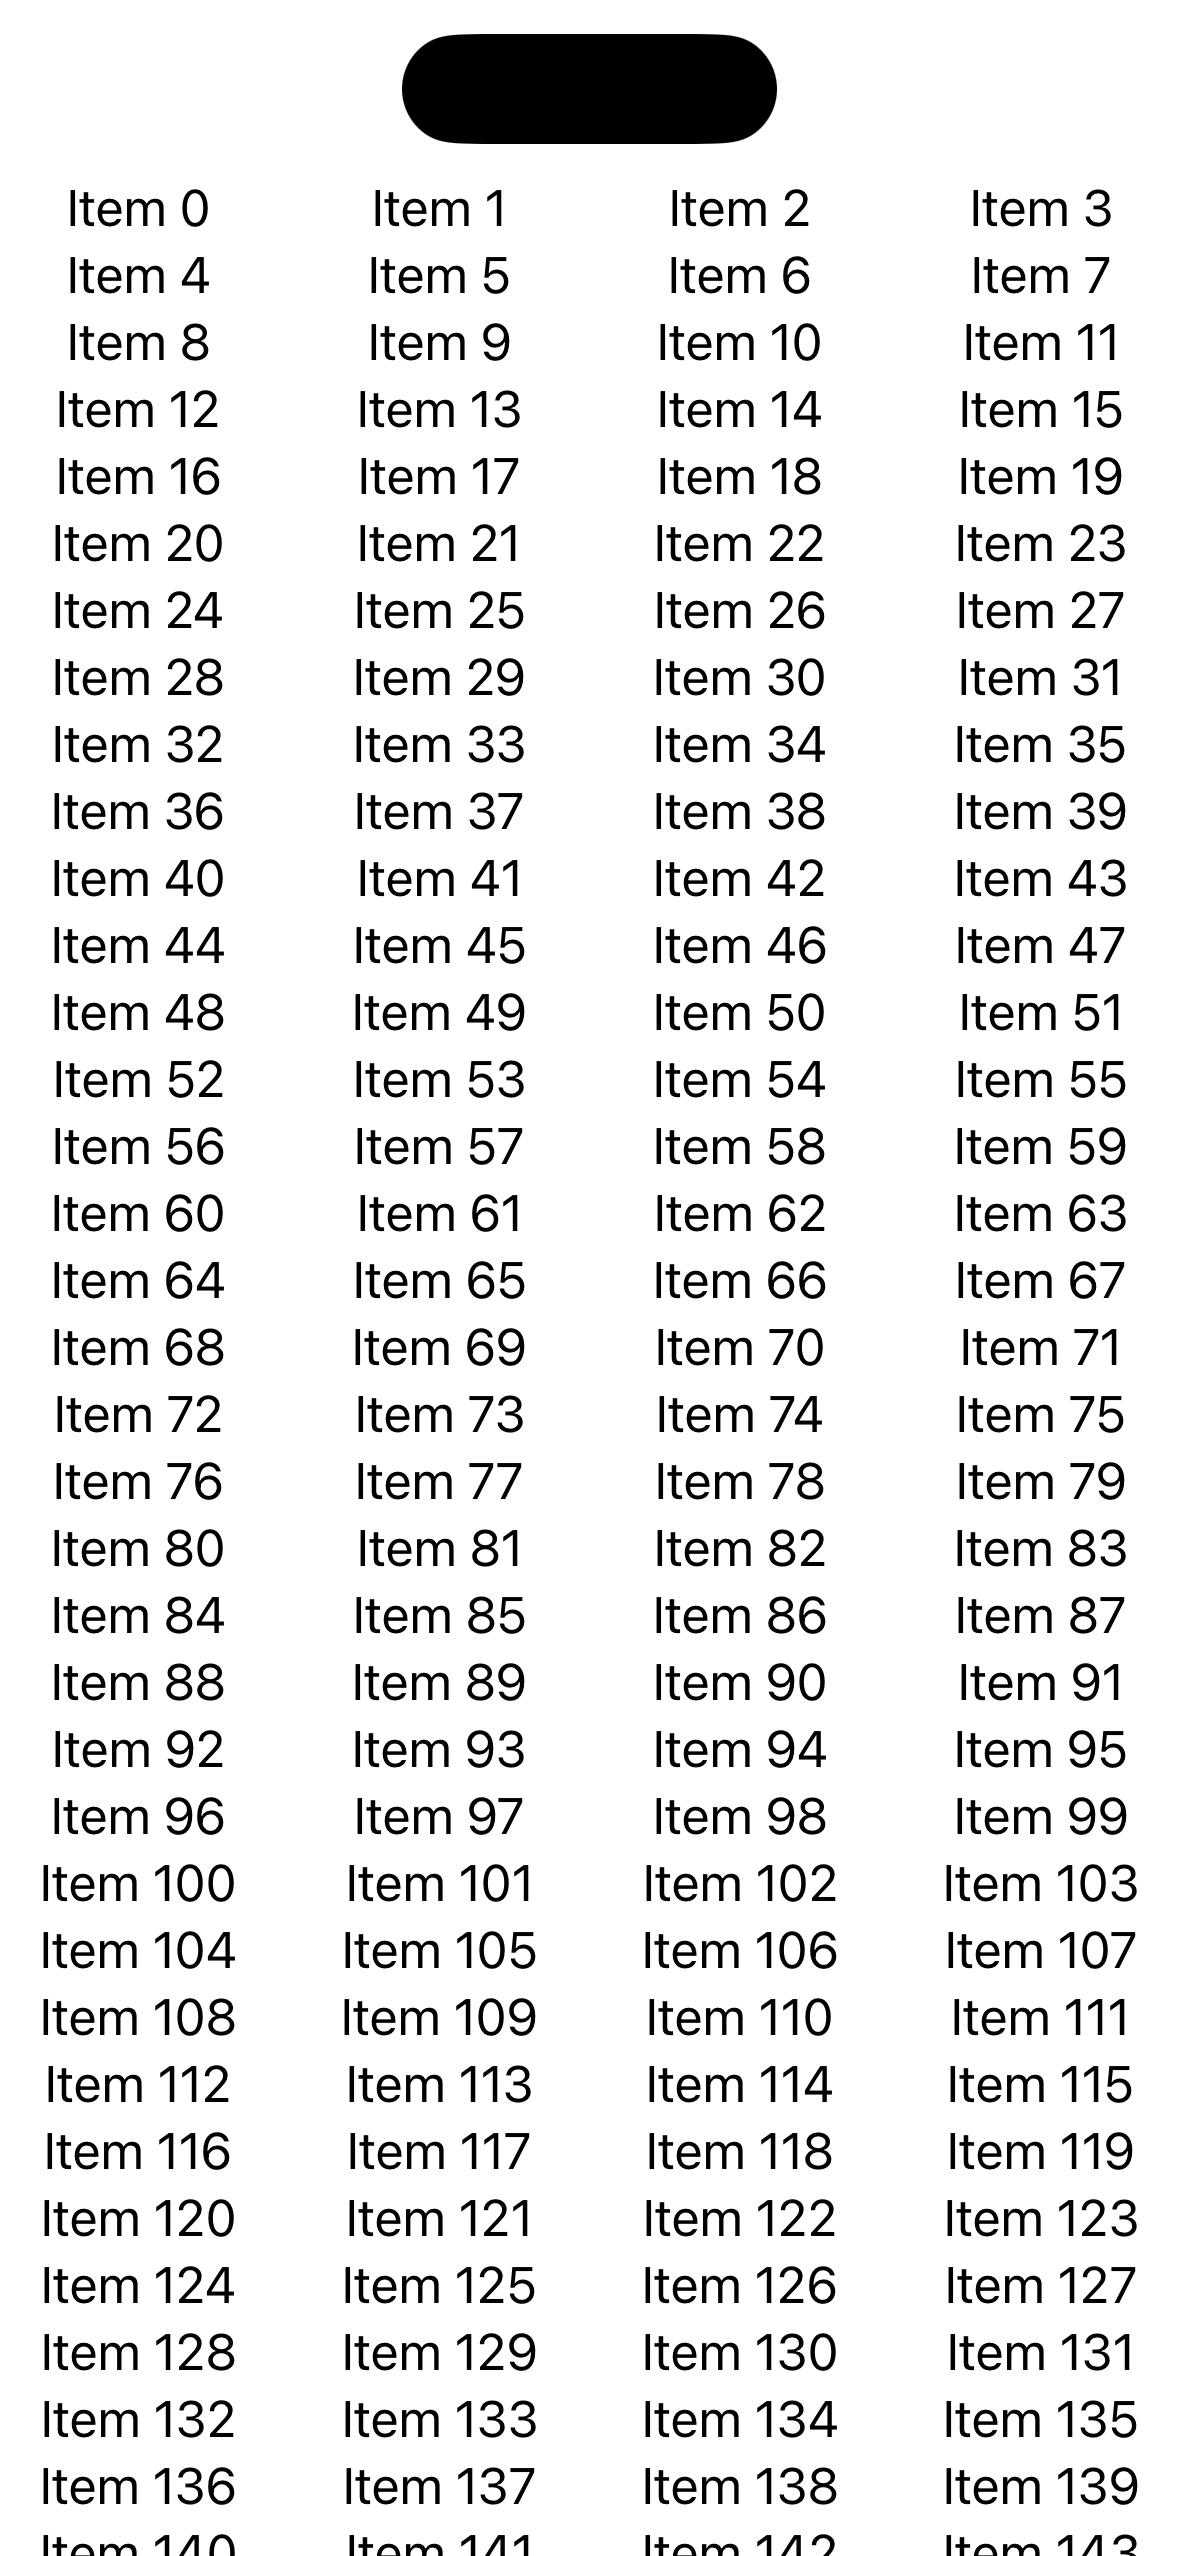
Day 40
Today we start building our MoonShoot app. We start from the data models: Astronaut and the way to decode them from a JSON file.
We start writing our struct which reflects the structure of our Astronauts in the JSON file:
struct Astronaut: Codable, Identifiable {
    let id: String
    let name: String
    let description: String
}
It implements the Codable protocol to be decoded from a JSONDecoder.
The decoding part is implemented in an extension of Bundle.
extension Bundle {
    func decode(_ file: String) -> [String: Astronaut] {
        guard let url = self.url(forResource: file, withExtension: nil) else {
            fatalError("Unable to locate \(file) in bundle")
        }

        guard let data = try? Data(contentsOf: url) else {
            fatalError("Failed to load \(file) from bundle")
        }

        let decoder = JSONDecoder()

        do {
            return try decoder.decode([String: Astronaut], from: data)
        } catch DecodingError.keyNotFound(let key, let context) {
            fatalError("Failed to decode \(file) from bundle due to missing key '\(key)'")
        } catch DecodingError.typeMismatch(_, let context) {
            fatalError("Failed to decode \(file) due to type mismatch - \(context.debugDescription)")
        } catch DecodingError.valueNotFound(let type, let context) {
            fatalError("Failed to decode \(file) from bundle due to missing \(type) value - \(context.debugDescription)")
        } catch DecodingError.dataCorrupted(_) {
            fatalError("Failed to decode \(file) from bundle because it appearts to be invalid JSON")
        } catch {
            fatalError("Unable to decode \(file)")
        }
    }
}
Our app has another data type: Missions. As always, we start writing its struct reflecting the json file from which they will be instantiated:
struct Mission: Codable, Identifiable {
    struct CrewRole: Codable {
        let name: String
        let role: String
    }

    let id: Int
    let launchDate: String?
    let crew: [CrewRole]
    let description: String
}
And then we need a method to decode the file. We could copy&paste the decode method we wrote earlier but the only thing which change would be the return type. A better solution is using generics. Let’s change the decode method:
func decode<T: Codable>(_ file: String) -> T {
    guard let url = self.url(forResource: file, withExtension: nil) else {
        fatalError("Unable to locate \(file) in bundle")
    }

    guard let data = try? Data(contentsOf: url) else {
        fatalError("Failed to load \(file) from bundle")
    }

    let decoder = JSONDecoder()

    do {
        return try decoder.decode(T.self, from: data)
    } catch DecodingError.keyNotFound(let key, let context) {
        fatalError("Failed to decode \(file) from bundle due to missing key '\(key)'")
    } catch DecodingError.typeMismatch(_, let context) {
        fatalError("Failed to decode \(file) due to type mismatch - \(context.debugDescription)")
    } catch DecodingError.valueNotFound(let type, let context) {
        fatalError("Failed to decode \(file) from bundle due to missing \(type) value - \(context.debugDescription)")
    } catch DecodingError.dataCorrupted(_) {
        fatalError("Failed to decode \(file) from bundle because it appearts to be invalid JSON")
    } catch {
        fatalError("Unable to decode \(file)")
    }
}
Now we can return any type conforms to the Codable protocol.
It is importart to notice that to use this method we need to specify the type before calling the method otherwise Swift would not know how to instantiate T.
struct ContentView: View {
    let astronauts: [String: Astronaut] = Bundle.main.decode("astronauts.json")
    let missions: [Mission] = Bundle.main.decode("missions.json")

    var body: some View {
        Text(String(astronauts.count))
        Text(String(missions.count))
    }
}
This implementation has still some flaws. In particular mission’s launchDate. Now, it will be parsed as a simple String but that it’s a bit awful. The solution is adopt the Date type that Swift provides.
let launchDate: Date?Now, our decoder has some problem understanding how to decode the launchDate properties in the JSON file. We have to specify the format in our decode function:
    let decoder = JSONDecoder()
    let formatter = DateFormatter()
    formatter.dateFormat = "y-MM-dd"
    decoder.dateDecodingStrategy = .formatted(formatter)
Finally we can move on building our view. We will use a grid to show the missions
struct ContentView: View {
    let astronauts: [String: Astronaut] = Bundle.main.decode("astronauts.json")
    let missions: [Mission] = Bundle.main.decode("missions.json")

    let colums = [
        GridItem(.adaptive(minimum: 150))
    ]

    var body: some View {
        NavigationStack {
            ScrollView {
                LazyVGrid(columns: colums) {
                    ForEach(missions) { mission in
                        NavigationLink {
                            Text("Detail view")
                        } label: {
                            VStack {
                                Image(mission.image)
                                    .resizable()
                                    .scaledToFit()
                                    .frame(width: 100, height: 100)
                                    .padding()

                                VStack {
                                    Text(mission.displayName)
                                        .font(.headline)
                                        .foregroundStyle(.white)

                                    Text(mission.formattedLaunchDate)
                                        .font(.caption)
                                        .foregroundStyle(.white.opacity(0.5))
                                }
                                .padding(.vertical)
                                .frame(maxWidth: .infinity)
                                .background(.lightBackground)
                            }
                            .clipShape(.rect(cornerRadius: 10))
                            .overlay {
                                RoundedRectangle(cornerRadius: 10)
                                    .stroke(.lightBackground)
                            }
                        }
                    }
                }
                .padding([.horizontal, .bottom])
            }
            .navigationTitle("Moonshot")
            .background(.darkBackground)
            .preferredColorScheme(.dark)
        }
    }
}
There are a couple of utilities added to make this code more readable:
- computed properties in
Mission - custom background colors
The first additions regard the Mission struct:
    var displayName: String {
        "Apollo \(id)"
    }

    var image: String {
        "apollo\(id)"
    }

    var formattedLaunchDate: String {
        launchDate?.formatted(date: .abbreviated, time: .omitted) ?? "Not available"
    }
They are three computed properties to simplify the presention of a mission removing the work from the view.
The custom background colors are implemented as extension of ShapeStyle (because Color is a ShapeStyle):
extension ShapeStyle where Self == Color {
    static var darkBackground: Color {
        Color(red: 0.1, green: 0.1, blue: 0.2)
    }

    static var lightBackground: Color {
        Color(red: 0.2, green: 0.2, blue: 0.3)
    }
}
Finally, it is worth noticing the .preferredColorScheme to force the color scheme to be the dark mode.
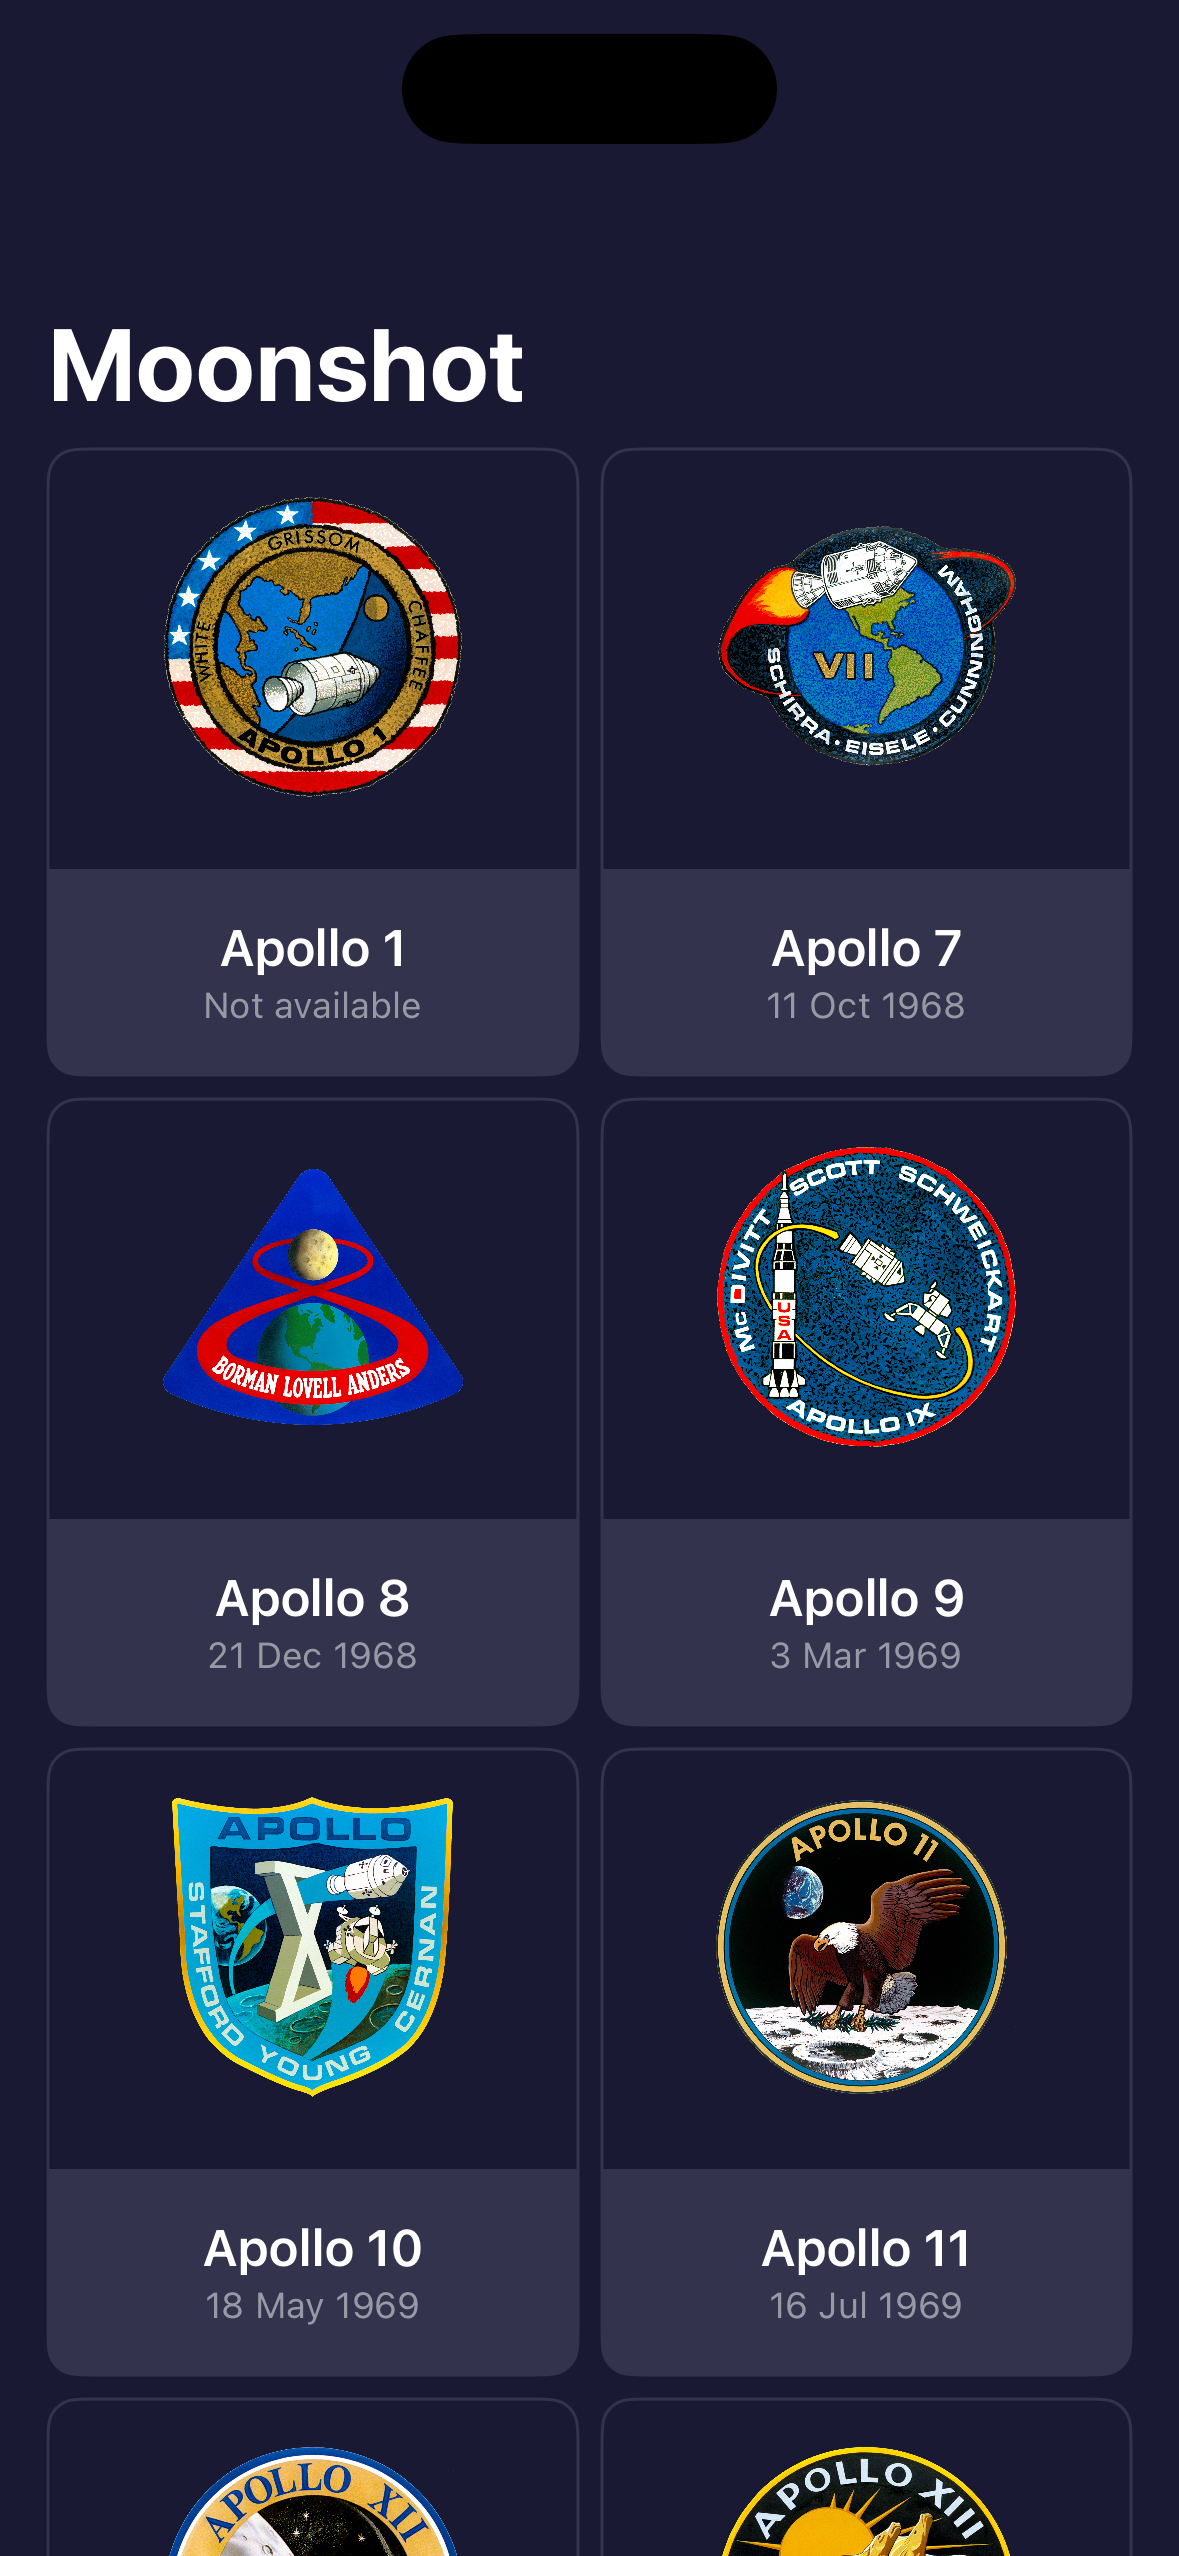
Day 41
Today we add two more views. The first one presents the mission and the second one presents an astronaut.
struct MissionView: View {
    struct CrewMember {
        let role: String
        let astronaut: Astronaut
    }

    let mission: Mission
    let crew: [CrewMember]

    var body: some View {
        ScrollView {
            VStack {
                Image(mission.image)
                    .resizable()
                    .scaledToFit()
                    .containerRelativeFrame(.horizontal) {width, axis in
                        width * 0.6
                    }

                VStack(alignment: .leading) {
                    Rectangle()
                        .frame(height: 2)
                        .foregroundStyle(.lightBackground)
                        .padding(.vertical)

                    Text("Mission Highlights")
                        .font(.title.bold())
                        .padding(.bottom, 5)

                    Text(mission.description)

                    Rectangle()
                        .frame(height: 2)
                        .foregroundStyle(.lightBackground)
                        .padding(.vertical)

                    Text("Crew")
                        .font(.title.bold())
                        .padding(.bottom, 5)
                }
                .padding(.horizontal)

                ScrollView(.horizontal, showsIndicators: false) {
                    HStack {
                        ForEach(crew, id: \.role) {crewMember in
                            NavigationLink {
                                AstronautView(astronaut: crewMember.astronaut)
                            } label: {
                                HStack {
                                    Image(crewMember.astronaut.id)
                                        .resizable()
                                        .frame(width: 104, height: 72)
                                        .clipShape(.capsule)
                                        .overlay {
                                            Capsule()
                                                .strokeBorder(.white, lineWidth: 1)
                                        }

                                    VStack(alignment: .leading) {
                                        Text(crewMember.astronaut.name)
                                            .foregroundStyle(.white)
                                            .font(.headline)

                                        Text(crewMember.role)
                                            .foregroundStyle(.white.opacity(0.5))
                                    }
                                }
                                .padding(.horizontal)
                            }
                        }
                    }
                }
            }
            .padding(.bottom)
        }
        .navigationTitle(mission.displayName)
        .navigationBarTitleDisplayMode(.inline)
        .background(.darkBackground)
    }

    init(mission: Mission, astronauts: [String: Astronaut]) {
        self.mission = mission

        self.crew = mission.crew.map({ member in
            if let astronaut = astronauts[member.name] {
                return CrewMember(role: member.role, astronaut: astronaut)
            } else {
                fatalError("Missing \(member.name)")
            }
        })
    }
}

#Preview {
    let missions: [Mission] = Bundle.main.decode("missions.json")
    let astronauts: [String: Astronaut] = Bundle.main.decode("astronauts.json")

    return MissionView(mission: missions[0], astronauts: astronauts)
        .preferredColorScheme(.dark)
}
struct AstronautView: View {
let astronaut: Astronaut
var body: some View {
ScrollView {
VStack {
Image(astronaut.id)
.resizable()
.scaledToFit()
Text(astronaut.description)
.padding(.horizontal)
}
}
.background(.darkBackground)
.navigationTitle(astronaut.name)
.navigationBarTitleDisplayMode(.inline)
}
}
#Preview {
let astronauts: [String: Astronaut] = Bundle.main.decode("astronauts.json")
return AstronautView(astronaut: astronauts["aldrin"]!)
.preferredColorScheme(.dark)
}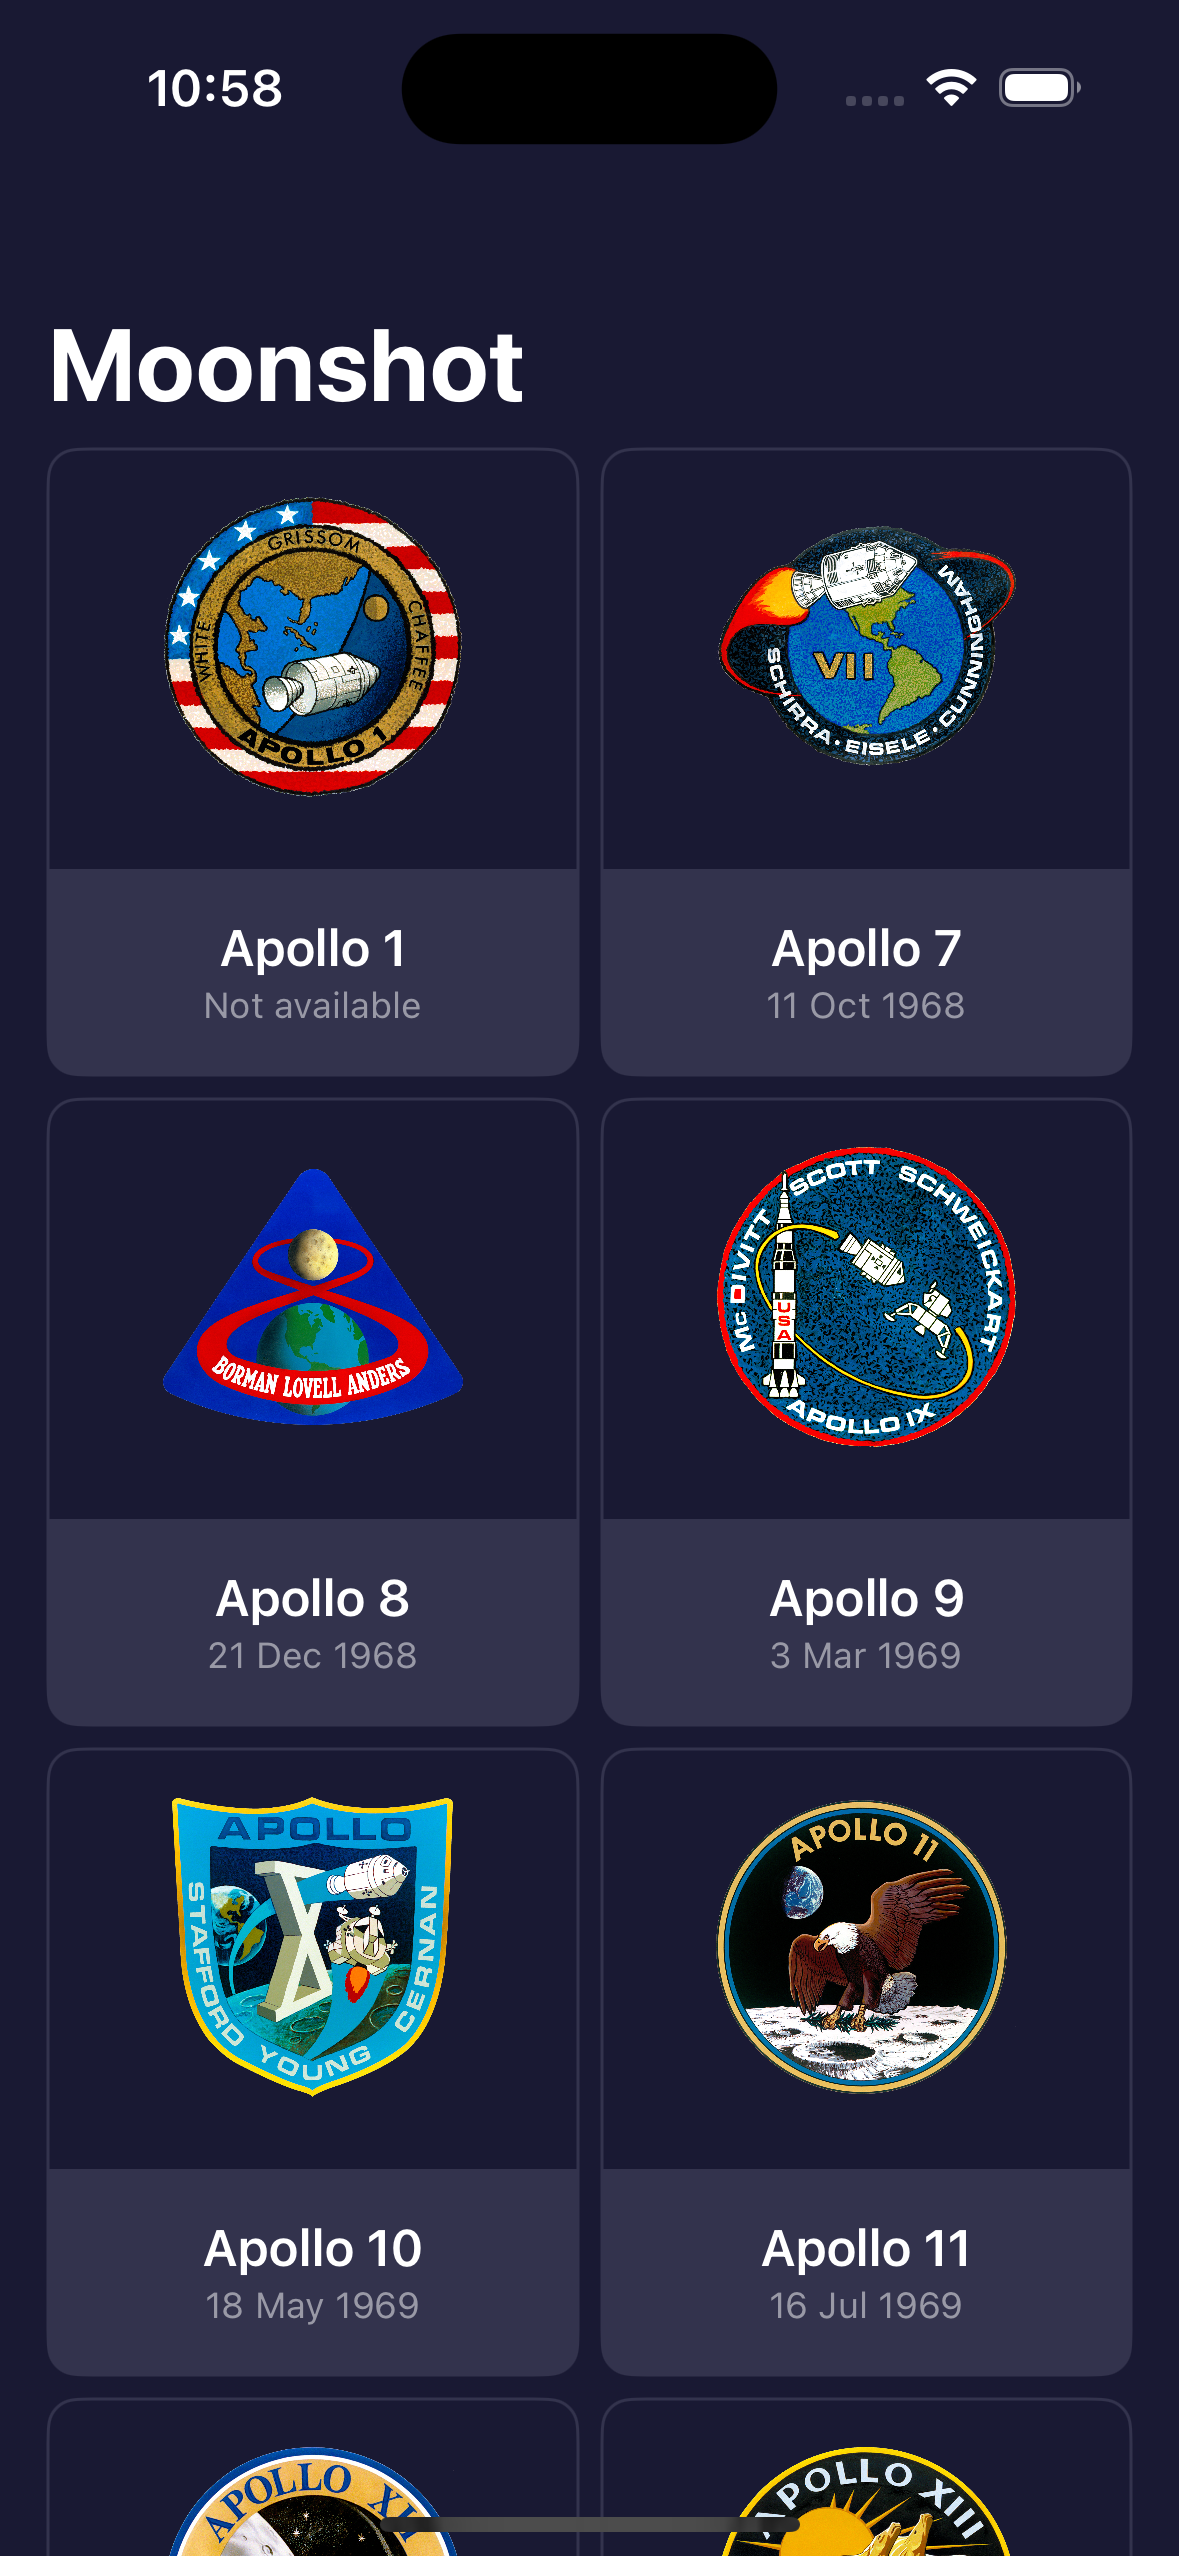
Day 42
Three challenges lay ahead today:
- Add the mission date to
MissionView - Move some complex part of
MissionViewin its ownView - Present the list of missions both as grid and list
The first two challenges are easy to complete.
struct CrewMember {
    let role: String
    let astronaut: Astronaut
}

struct CrewMemberView: View {
    let crewMember: CrewMember

    var body: some View {
        HStack {
            Image(crewMember.astronaut.id)
                .resizable()
                .frame(width: 104, height: 72)
                .clipShape(.capsule)
                .overlay {
                    Capsule()
                        .strokeBorder(.white, lineWidth: 1)
                }

            VStack(alignment: .leading) {
                Text(crewMember.astronaut.name)
                    .foregroundStyle(.white)
                    .font(.headline)

                Text(crewMember.role)
                    .foregroundStyle(.white.opacity(0.5))
            }
        }
        .padding(.horizontal)
    }
}

struct CustomDivider: View {
    var body: some View {
        Rectangle()
            .frame(height: 2)
            .foregroundStyle(.lightBackground)
            .padding(.vertical)
    }
}

struct MissionView: View {
    let mission: Mission
    let crew: [CrewMember]

    var body: some View {
        ScrollView {
            VStack {
                VStack {
                    Image(mission.image)
                        .resizable()
                        .scaledToFit()
                        .containerRelativeFrame(.horizontal) {width, axis in
                            width * 0.6
                        }
                    Text(mission.formattedLaunchDate)
                        .font(.headline)
                        .padding(.top)
                }

                VStack(alignment: .leading) {
                    CustomDivider()

                    Text("Mission Highlights")
                        .font(.title.bold())
                        .padding(.bottom, 5)

                    Text(mission.description)

                    CustomDivider()

                    Text("Crew")
                        .font(.title.bold())
                        .padding(.bottom, 5)
                }
                .padding(.horizontal)

                ScrollView(.horizontal, showsIndicators: false) {
                    HStack {
                        ForEach(crew, id: \.role) {crewMember in
                            NavigationLink {
                                AstronautView(astronaut: crewMember.astronaut)
                            } label: {
                                CrewMemberView(crewMember: crewMember)
                            }
                        }
                    }
                }
            }
            .padding(.bottom)
        }
        .navigationTitle(mission.displayName)
        .navigationBarTitleDisplayMode(.inline)
        .background(.darkBackground)
    }

    init(mission: Mission, astronauts: [String: Astronaut]) {
        self.mission = mission

        self.crew = mission.crew.map({ member in
            if let astronaut = astronauts[member.name] {
                return CrewMember(role: member.role, astronaut: astronaut)
            } else {
                fatalError("Missing \(member.name)")
            }
        })
    }
}
The last one is a bit more tricy. We can implement the functionality in two ways:
- With an
ifstatement we can switch from theScrollViewto aList - We can use the already working
ScrollViewas a list.
I have choosen the second one.
First of all, we need a property to store which presention mode we have: @State private var isGridView = true. Then we have to change the columns of our grid making them filling the whole screen when the property is set to false. We can change the columns property in this way:
    var colums: [GridItem] {
        [GridItem(.adaptive(minimum: isGridView ? 150 : .infinity))]
    }
Then we can add a button in the toolbar to toggle the isGridView property.
    .toolbar(content: {
                Button(isGridView ? "To list" : "To grid") {
                    isGridView.toggle()
                }
            })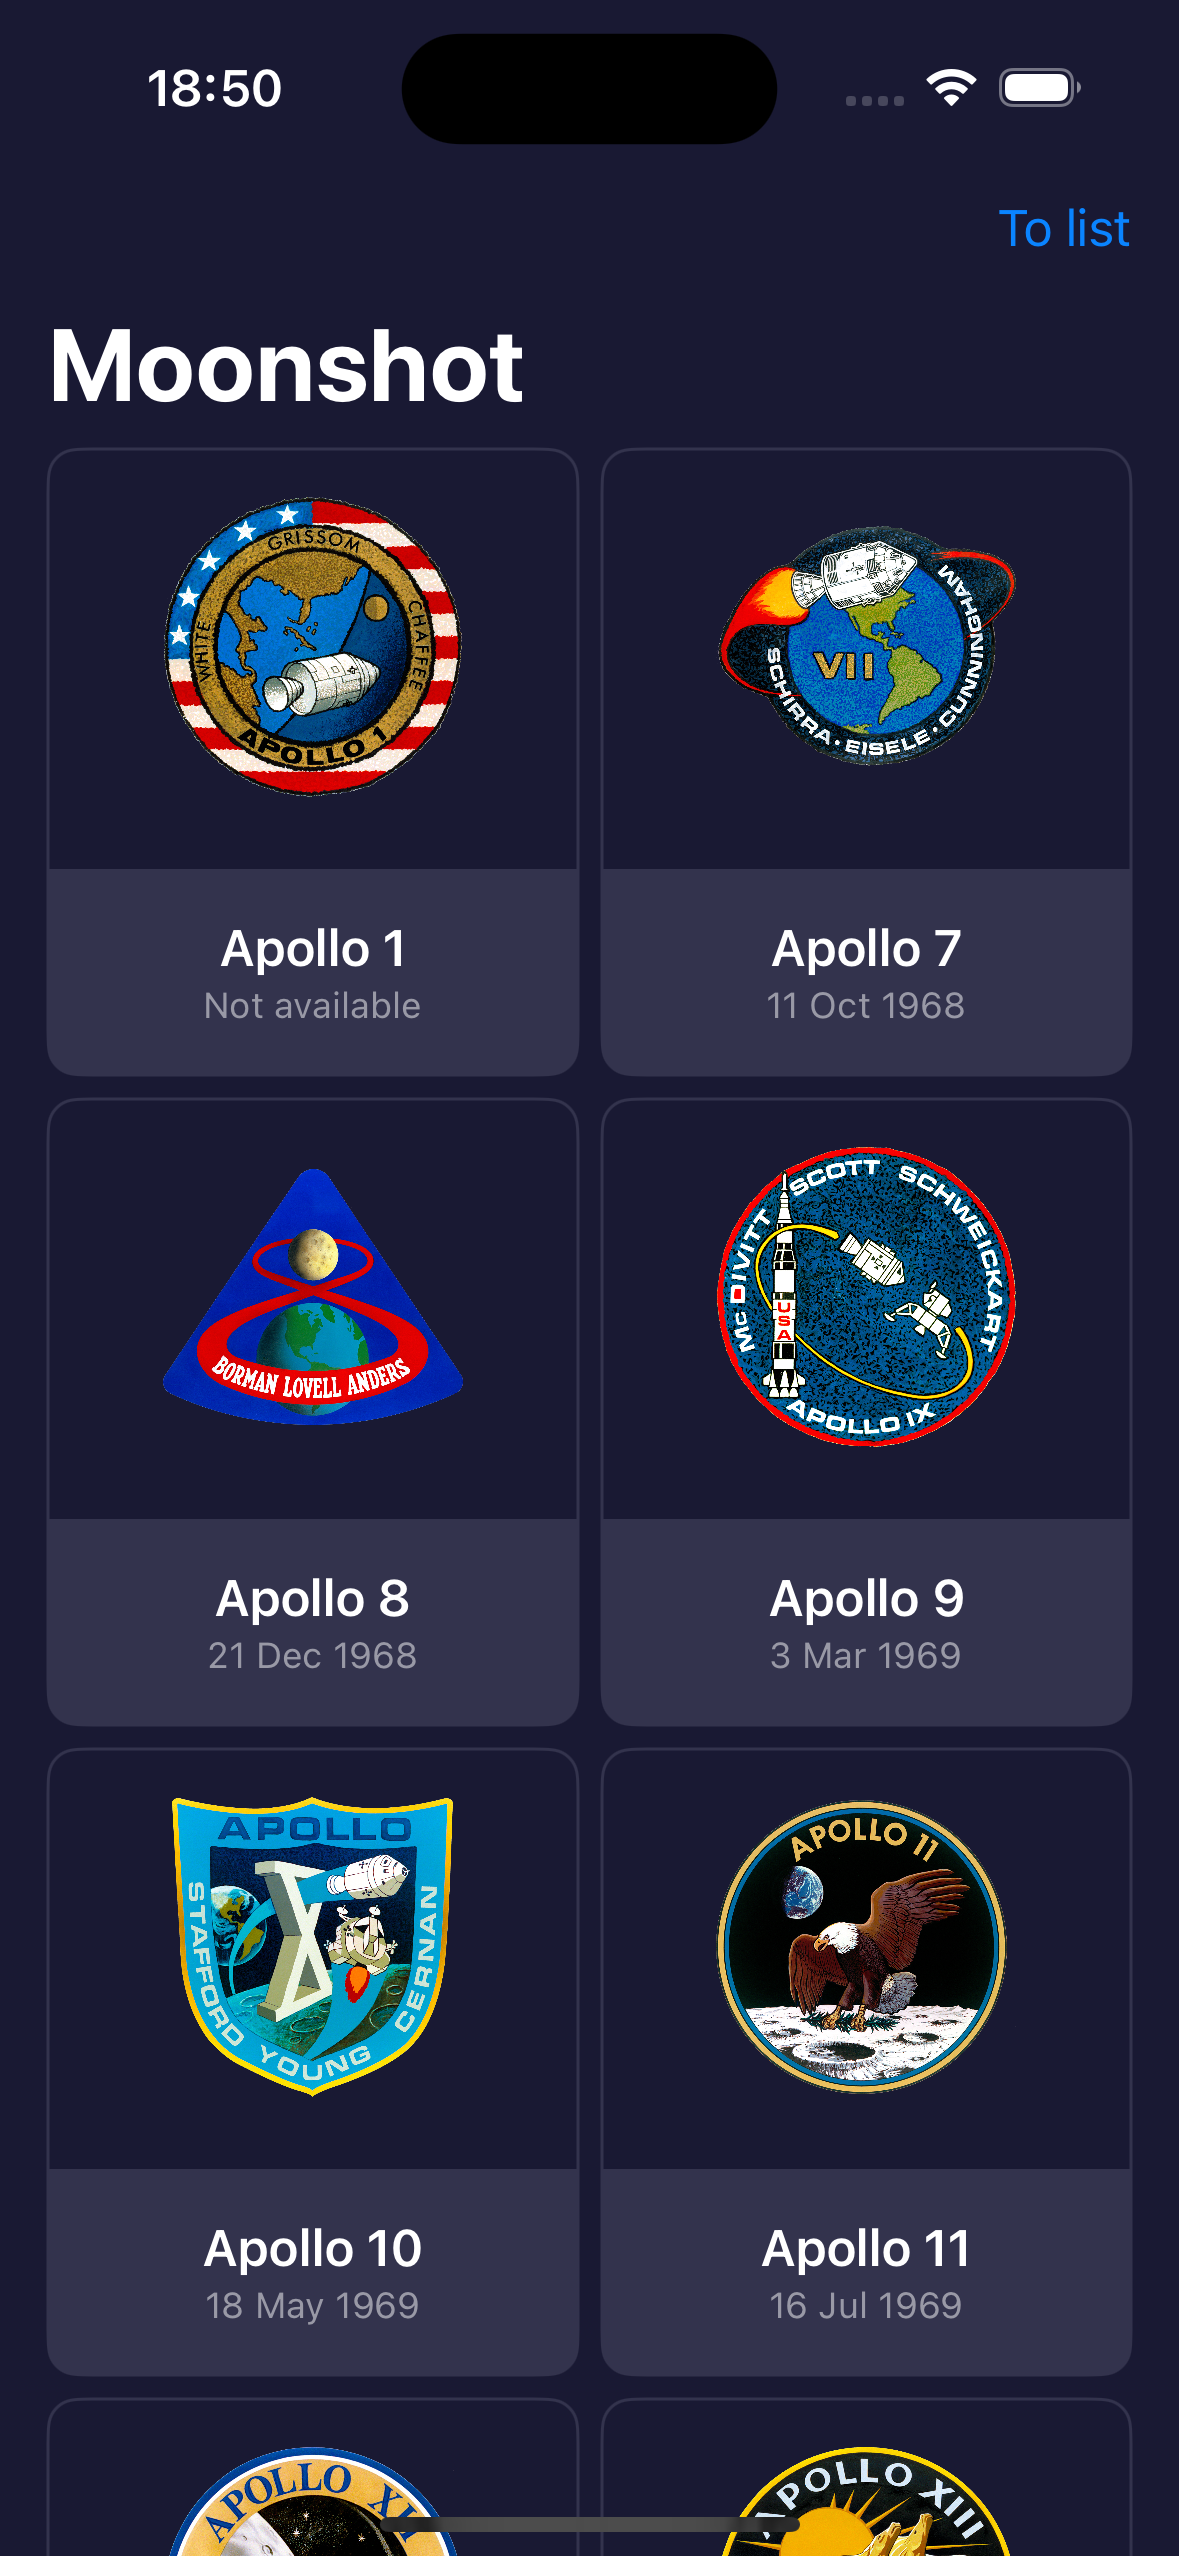
Day 43
There is a “huge” problem in using NavigationLink: it will immediately instantiate the view it has to present. This is not a problem when we have just one view but it can slow down our application if the new view require some time to be instantiated.
There is a better solution: navigationDestination(). To use it there are two steps:
- Define the
navigationLinkwith avalue - Add the
navigationDestinationmodifier
struct ContentView: View {
    var body: some View {
        NavigationStack {
            List(0..<100) { i in
                NavigationLink("Select \(i)", value: i)
            }
            .navigationDestination(for: Int.self) { selection in
                Text("You selected \(selection)")
            }
        }
    }
}
There is a requirement for the navigationDestination() to work: the value/for must conform to the Hashable protocol.
Day 44
Programmatic navigation
We can create the navigation stack programmatically. We have to bind an array to the NavigationStack and then we have just to change the content of the array to trigger the nagiationDestination(). An array because there could be more than one view that we want to show.
struct ContentView: View {
    @State private var path: [Int] = []

    var body: some View {
        NavigationStack(path: $path) {
            VStack {
                Button("Show 32") {
                    path = [32]
                }

                Button("Show 64") {
                    path.append(64)
                }

                Button("Show all") {
                    path = [32, 64]
                }
            }
            .navigationDestination(for: Int.self) { selection in
                Text("You selected \(selection)")
            }
        }
    }
}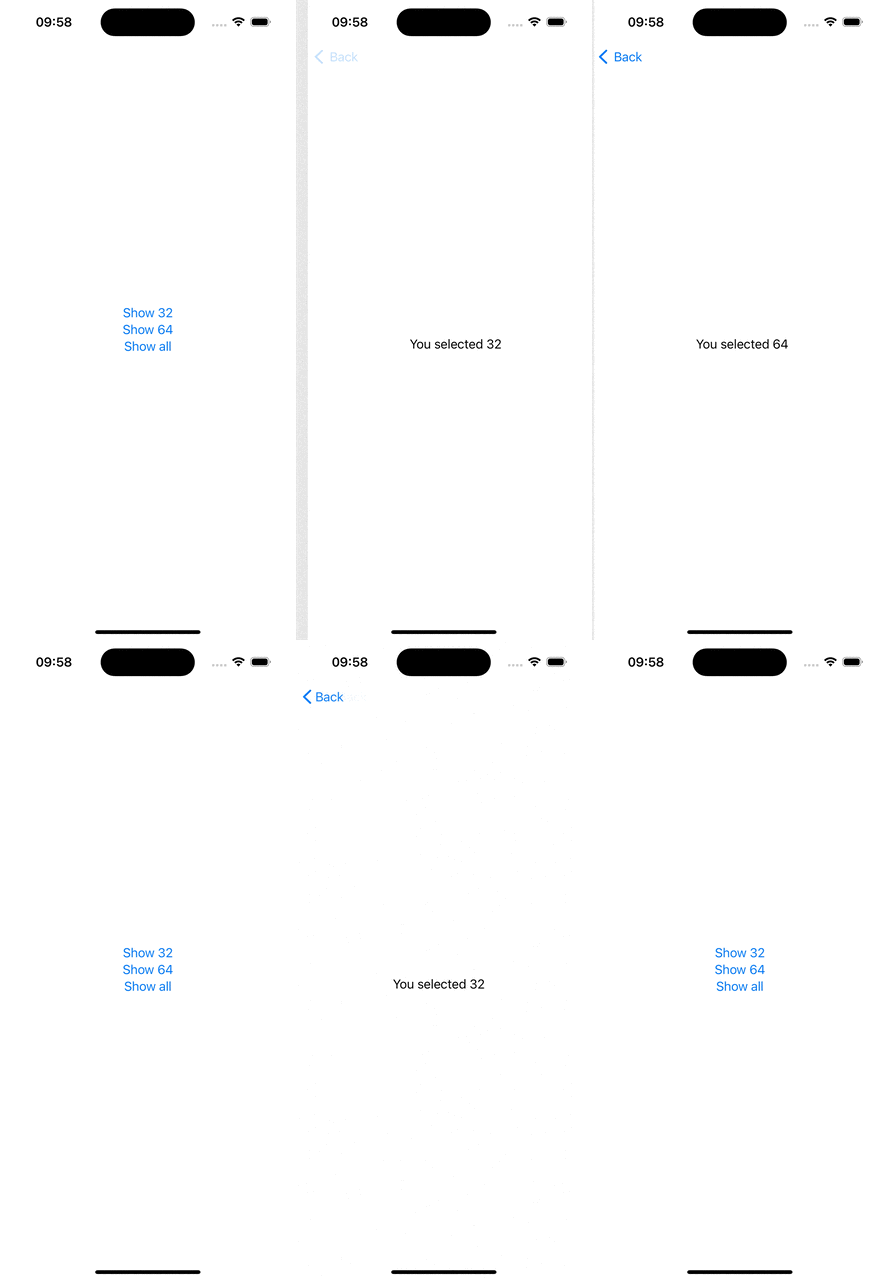
We can go further and change the path state in other views. For example we want to go back to the first view pressing one button.
struct DetailView : View {
    var number: Int
    @Binding var path: [Int]

    var body: some View {
        NavigationLink("Go to Random Number", value: Int.random(in: 1...1000))
            .navigationTitle("Number: \(number)")
            .toolbar(content: {
                Button("Home") {
                    path.removeAll()
                }
            })
    }
}

struct ContentView: View {
    @State private var path: [Int] = []

    var body: some View {
        NavigationStack(path: $path) {
            DetailView(number: 0, path: $path)
                .navigationDestination(for: Int.self) { selection in
                    DetailView(number: selection, path: $path)
                }
        }
    }
}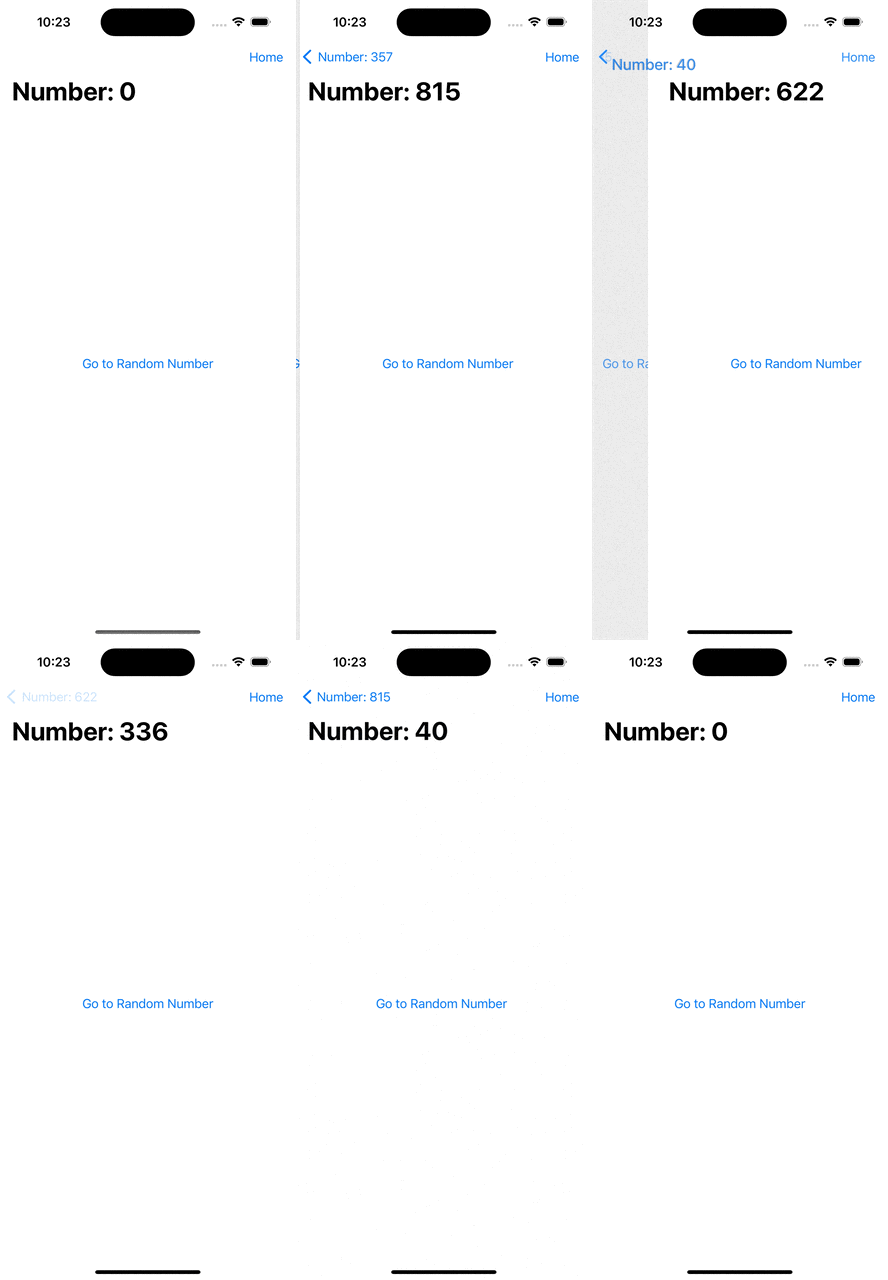
NavigationPath
How to handle path with different types? When the user touch the NavigationLink there isn’t any problem:
struct ContentView: View {

    var body: some View {
        NavigationStack{
            List {
                ForEach(0..<5) {i in
                    NavigationLink("Select number: \(i)", value: i)
                }

                ForEach(0..<5) {i in
                    NavigationLink("Select string: \(i)", value: String(i))
                }
            }
            .navigationDestination(for: Int.self) { selection in
                Text("You are viewing the integer \(selection)")
            }
            .navigationDestination(for: String.self) { selection in
                Text("You are viewing the string \(selection)")
            }
        }
    }
}
What about the programmatic way? As we have seen before we have to bind an array to to the path attribute of the NavigationStack but in this case we cannot have an array of both Int and String.
The solution is using a NavigationPath which behaves as an array but accepts any type.
struct ContentView: View {
    @State private var path = NavigationPath()

    var body: some View {
        NavigationStack(path: $path){
            List {
                ForEach(0..<5) {i in
                    NavigationLink("Select number: \(i)", value: i)
                }

                ForEach(0..<5) {i in
                    NavigationLink("Select string: \(i)", value: String(i))
                }
            }
            .toolbar(content: {
                Button("Push 556") {
                    path.append(556)
                }

                Button("Push 'Hello'"){
                    path.append("Hello")
                }
            })
            .navigationDestination(for: Int.self) { selection in
                Text("You are viewing the integer \(selection)")
            }
            .navigationDestination(for: String.self) { selection in
                Text("You are viewing the string \(selection)")
            }
        }
    }
}
Store the NavigationPath
We can save the NavigationPath for remembering where the user left.
First of all, we create a class that holds the NavigationPath and save it on file when it change and read from file at initialization.
@Observable
class PathStore{
    var path: NavigationPath {
        didSet {
            save()
        }
    }

    private let savePath = URL.documentsDirectory.appending(path: "SavedPath")

    init() {
        if let data = try? Data(contentsOf: savePath) {
            if let decoded = try? JSONDecoder().decode(NavigationPath.CodableRepresentation.self, from: data) {
                path = NavigationPath(decoded)
                return
            }
        }

        path = NavigationPath()
    }

    private func save() {
        guard let representation = path.codable else {return}

        do {
            let data = try JSONEncoder().encode(representation)
            try data.write(to: savePath)
        } catch {
            print("Failed to save naigation data")
        }
    }
}
It is worth noticing that we cannot save the NavigationPath directly because it could have non Decodable objects inside. We have to pass through its CodableRepresentation/codable.
The rest of the code is similar to other codes we wrote today.
struct DetailView : View {
    var number: Int

    var body: some View {
        NavigationLink("Go to Random Number", value: Int.random(in: 1...1000))
            .navigationTitle("Number: \(number)")
    }
}

struct ContentView: View {
    @State private var pathStore = PathStore()

    var body: some View {
        NavigationStack(path: $pathStore.path) {
            DetailView(number: 0)
                .navigationDestination(for: Int.self) { selection in
                    DetailView(number: selection)
                }
        }
    }
}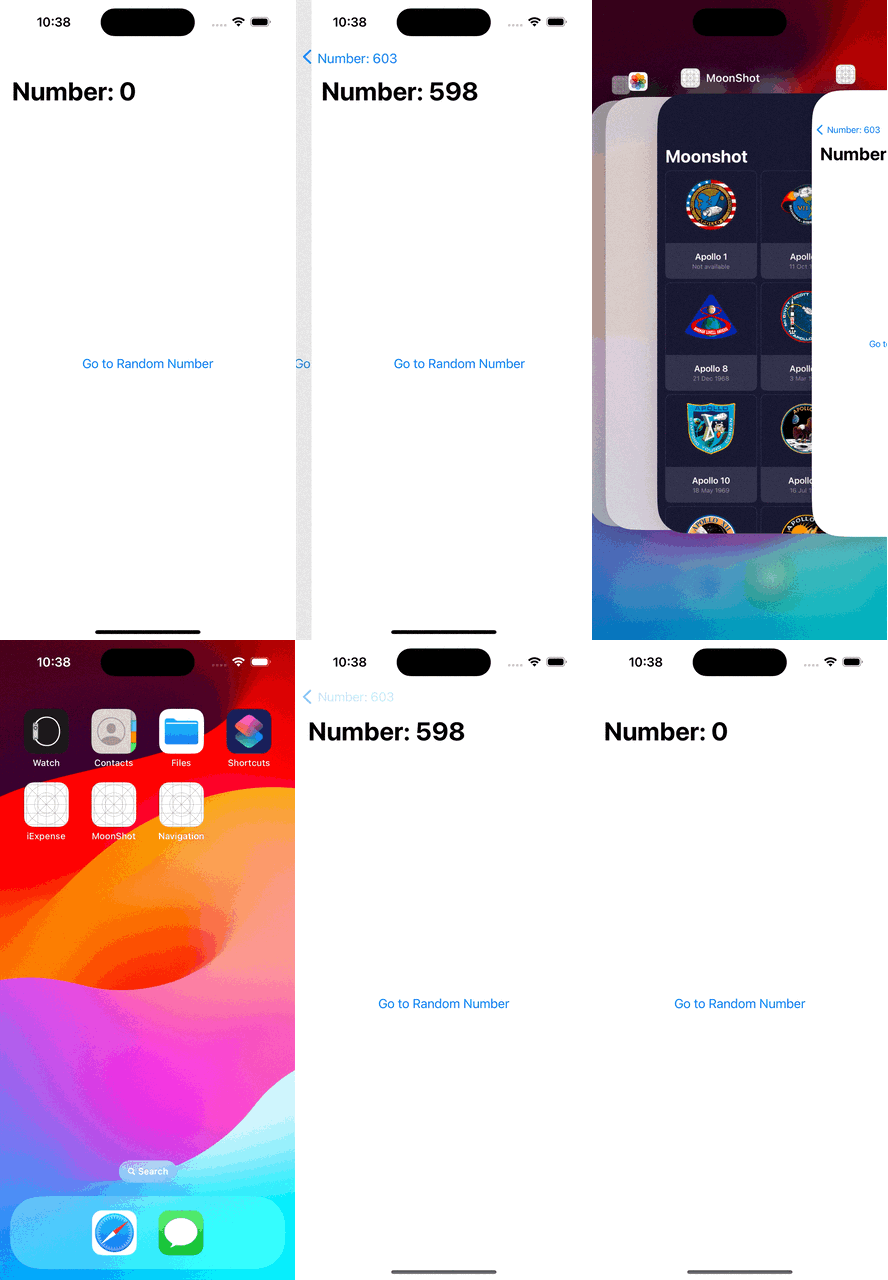
Day 45
Today we look at how we can change the appearence of the neviation bar. There are some modifiers for the bar and the title:
-
navigationBarTitleDisplayMode()-> change how thw title is presented:inlineorlarge -
toolbarBackground()-> set the background (color) after the scroll -
toolbarColorScheme()-> set the color scheme:darkorlight -
toolbar()-> set the visibility:visibleorhidden
Each modifier can specify the for parameter to tell at which component the modifier has to be applied: navigationBar, tabBar, or bottomBar.
We can change which buttons appears in the tollbar thanks to the toolbar modifer.
There are a couple of ways to add new buttons in the toolbar:
- Simply add
Buttons in thetoolbar’s closure - Add a
ToolbarItem()with inside the button. It allows to specify the placemente of the item withToolbarItem(palcement: .) - Add a
ToolbarItemGroupwith inside some buttons. As theToolbarItem, it allows to specify theplacementfor the group
Last thing, we can make the title editable. It only works in .inline display mode and the title need to be binded to a state property:
struct ContentView: View {
    @State private var title = "Title goes here"

    var body: some View {

        NavigationStack {
            Text("Hello World")
            .navigationTitle($title)
            .navigationBarTitleDisplayMode(.inline)
        }
    }
}
Day 46
Today we have three challenges to complete:
- In the iExpense project, we have to update the navigation with a
NavigationLinkinstad of a sheet - In the iExpense project, we have to change how the user insert the expense name, moving the
textFieldto the title - In the Moonshot project, we have to use the
NavigationLink
The first two challenges can be completed with a few change:
struct ContentView: View {
    @State private var expenses = Expenses()


    var body: some View {
        NavigationStack {
            List {
                Section("Personal") {
                    ForEach(expenses.items.filter({$0.type == "Personal"})) { item in
                        ExpenseListItem(item: item)
                    }
                    .onDelete(perform: {removeItems(at: $0, for: "Personal")})
                }

                Section("Business") {
                    ForEach(expenses.items.filter({$0.type == "Business"})) { item in
                        ExpenseListItem(item: item)
                    }
                    .onDelete(perform: {removeItems(at: $0, for: "Business")})
                }
            }
            .navigationTitle("iExpense")
            .toolbar {
                NavigationLink(destination: AddView(expenses: expenses)) {
                    Image(systemName: "plus")
                }

            }
        }
    }

    func removeItems(at offsets: IndexSet, for type: String) {
        let expensesToDelete = offsets.map { expenses.items.filter({ $0.type == type})[$0] }

        for expense in expensesToDelete {
            expenses.items.removeAll(where: {$0.id == expense.id})
        }
    }
}
struct AddView: View {
@Environment(\.dismiss) var dismiss
@State private var name = "New expense name"
@State private var type = "Personal"
@State private var amount = 0.0
var expenses: Expenses
let types = ["Business", "Personal"]
var body: some View {
NavigationStack {
Form {
// TextField("Name", text: $name)
Picker("Type", selection: $type) {
ForEach(types, id: \.self) {
Text($0)
}
}
TextField("Amount", value: $amount, format: .currency(code: Locale.current.currency?.identifier ?? "EUR"))
.keyboardType(.decimalPad)
}
.navigationTitle($name)
.navigationBarTitleDisplayMode(.inline)
.navigationBarBackButtonHidden()
.toolbar {
ToolbarItem(placement: .confirmationAction) {
Button("Save") {
let item = ExpenseItem(name: name, type: type, amount: amount)
expenses.items.append(item)
dismiss()
}
}
ToolbarItem(placement: .topBarLeading) {
Button("Cancel") {
dismiss()
}
}
}
}
}
}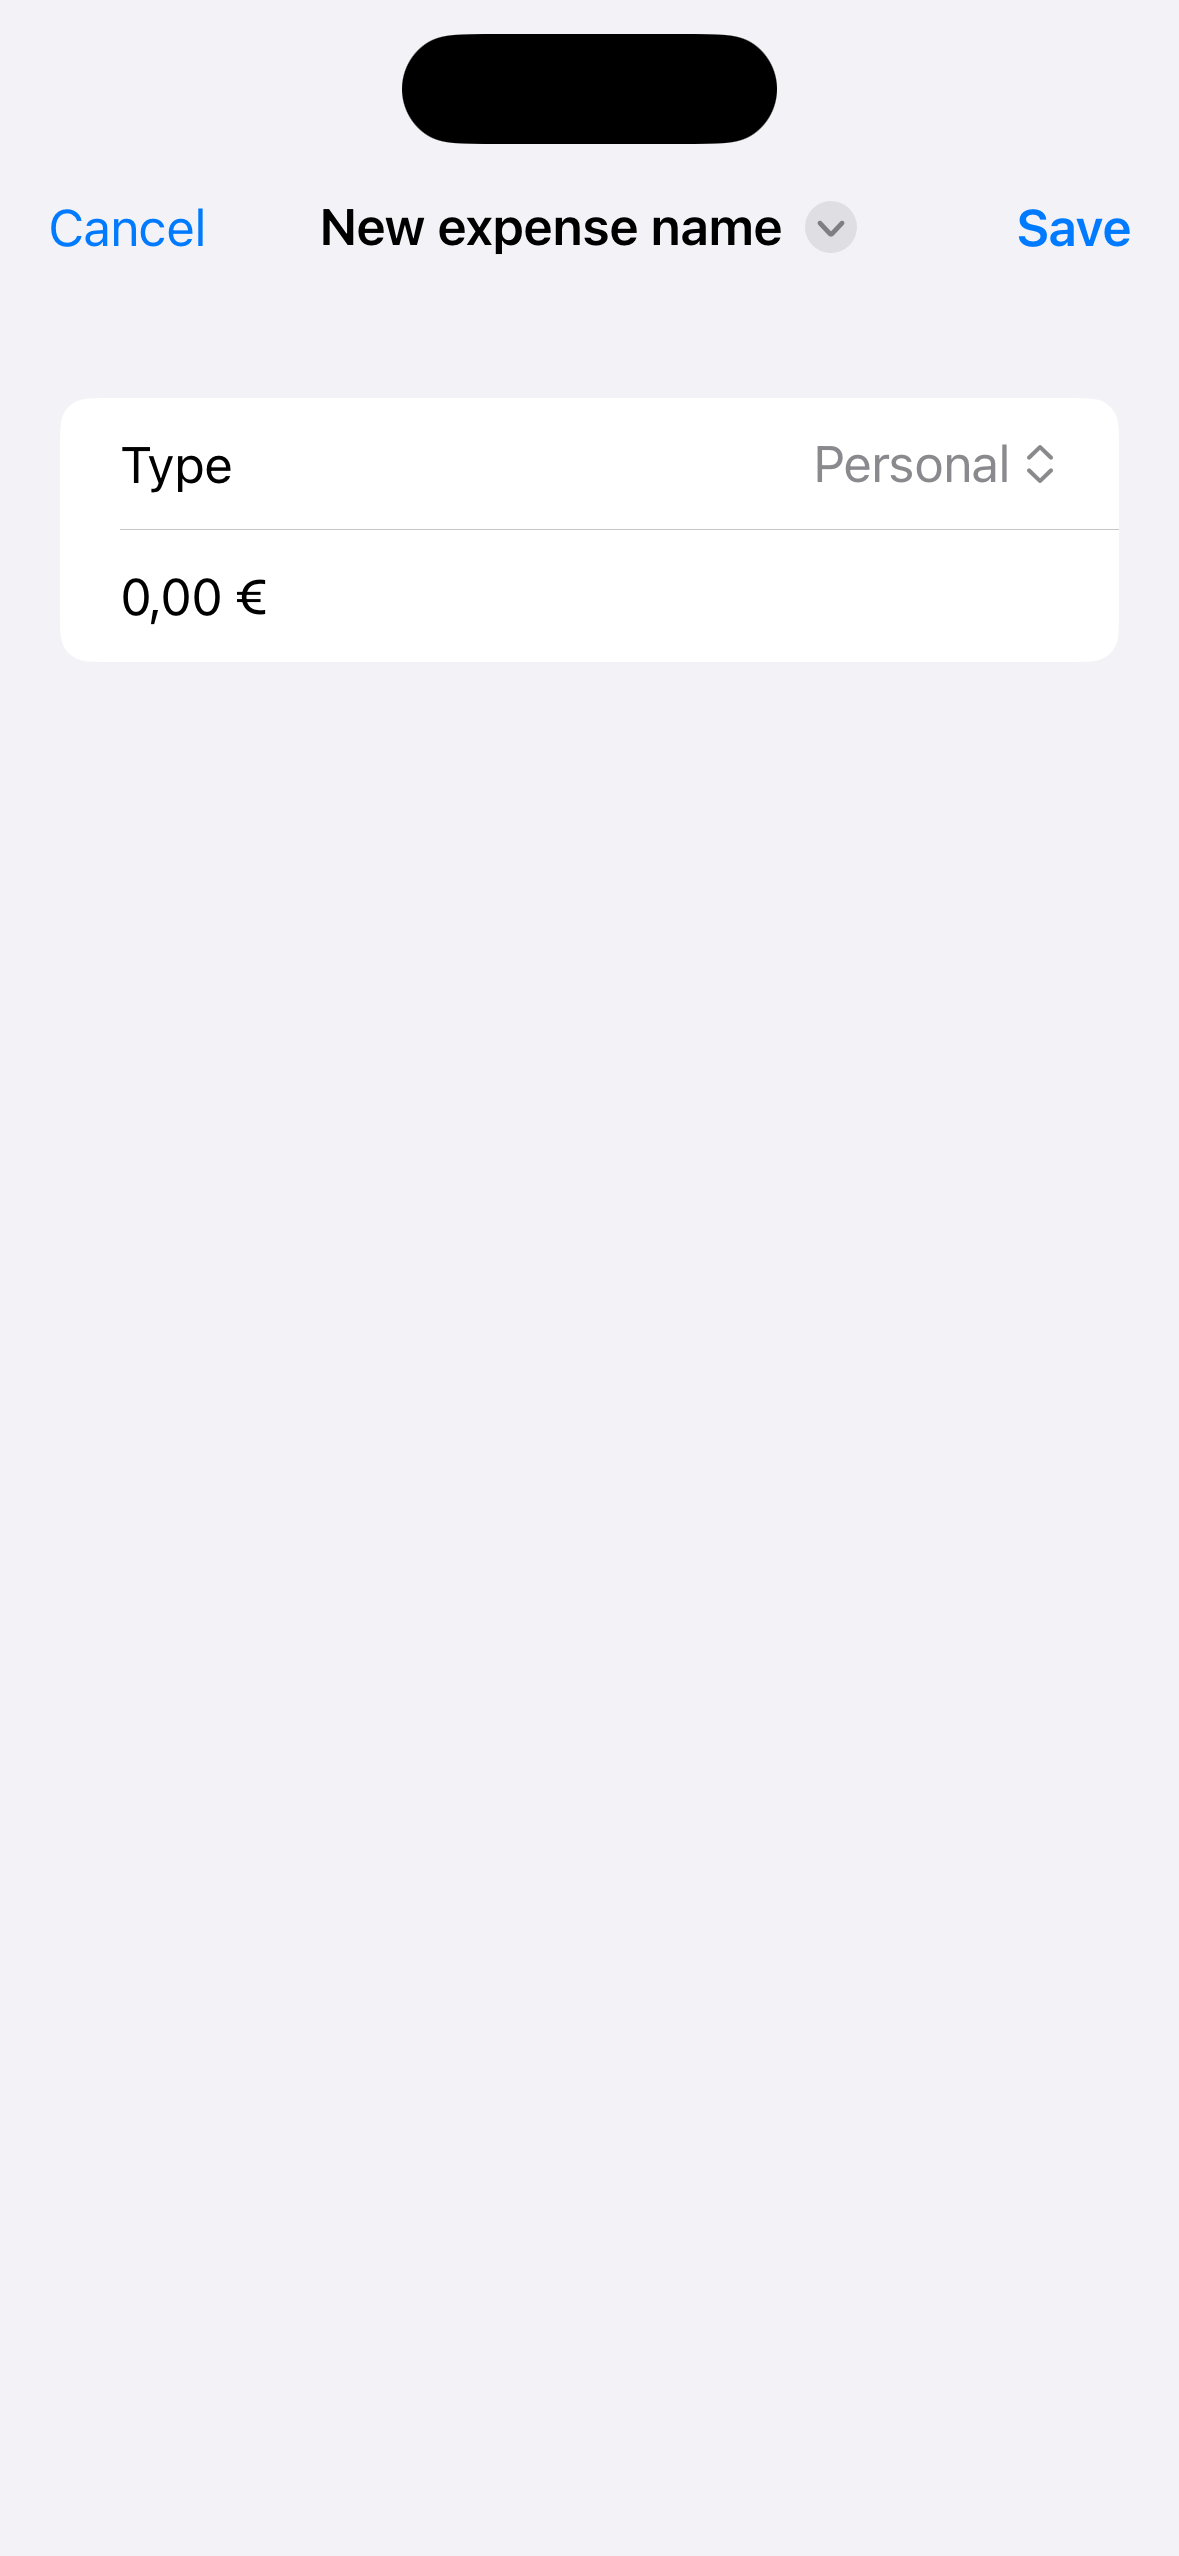
The next challenge requires some more changes.
First of all we have to make Mission, CrewRole, and Astronaut conform to the Hashable protocol. Then we can change the NavigationLinks to make them use the value propoerty. Both the navigationDestination must be set in the first view (the one with the NavigationStack)
struct ContentView: View {
    let astronauts: [String: Astronaut] = Bundle.main.decode("astronauts.json")
    let missions: [Mission] = Bundle.main.decode("missions.json")

    @State private var isGridView: Bool = true

    var colums: [GridItem] {
        [GridItem(.adaptive(minimum: isGridView ? 150 : .infinity))]
    }

    var body: some View {
        NavigationStack {
            ScrollView {
                LazyVGrid(columns: colums) {
                    ForEach(missions) { mission in
                        NavigationLink(value: mission, label: {
                            VStack {
                                Image(mission.image)
                                    .resizable()
                                    .scaledToFit()
                                    .frame(width: 100, height: 100)
                                    .padding()

                                VStack {
                                    Text(mission.displayName)
                                        .font(.headline)
                                        .foregroundStyle(.white)

                                    Text(mission.formattedLaunchDate)
                                        .font(.caption)
                                        .foregroundStyle(.white.opacity(0.5))
                                }
                                .padding(.vertical)
                                .frame(maxWidth: .infinity)
                                .background(.lightBackground)
                            }
                            .clipShape(.rect(cornerRadius: 10))
                            .overlay {
                                RoundedRectangle(cornerRadius: 10)
                                    .stroke(.lightBackground)
                            }
                        })
                    }
                }
                .padding([.horizontal, .bottom])
            }
            .toolbar(content: {
                Button(isGridView ? "To list" : "To grid") {
                    isGridView.toggle()
                }
            })
            .navigationTitle("Moonshot")
            .background(.darkBackground)
            .preferredColorScheme(.dark)
            .navigationDestination(for: Mission.self, destination: { selection in
                MissionView(mission: selection, astronauts: astronauts)
            })
            .navigationDestination(for: Astronaut.self) { selection in
                AstronautView(astronaut: selection)
            }
        }
    }
}
struct MissionView: View {
let mission: Mission
let crew: [CrewMember]
var body: some View {
ScrollView {
VStack {
VStack {
Image(mission.image)
.resizable()
.scaledToFit()
.containerRelativeFrame(.horizontal) {width, axis in
width * 0.6
}
Text(mission.formattedLaunchDate)
.font(.headline)
.padding(.top)
}
VStack(alignment: .leading) {
CustomDivider()
Text("Mission Highlights")
.font(.title.bold())
.padding(.bottom, 5)
Text(mission.description)
CustomDivider()
Text("Crew")
.font(.title.bold())
.padding(.bottom, 5)
}
.padding(.horizontal)
ScrollView(.horizontal, showsIndicators: false) {
HStack {
ForEach(crew, id: \.role) {crewMember in
NavigationLink(value: crewMember.astronaut, label: {CrewMemberView(crewMember: crewMember)})
}
}
}
}
.padding(.bottom)
}
.navigationTitle(mission.displayName)
.navigationBarTitleDisplayMode(.inline)
.background(.darkBackground)
}
init(mission: Mission, astronauts: [String: Astronaut]) {
self.mission = mission
self.crew = mission.crew.map({ member in
if let astronaut = astronauts[member.name] {
return CrewMember(role: member.role, astronaut: astronaut)
} else {
fatalError("Missing \(member.name)")
}
})
}
}Day 47
Today we work on an app to track activities. It is a challenge so everything is written by us. The requirements are:
- The user can add new activities
- Each activity has a title, a description, and the number of time it has been done
- The user can see the list of activities in a list
- The user can edit activities already added
My approach is: a list view and a create/edit view.
First of all the models:
struct Activity: Identifiable, Codable, Hashable, Equatable {
    var id = UUID()
    var title: String = ""
    var description: String = ""
    var repetition: Int = 0
}
@Observable
class ActivityList {
var activities: [Activity] = [] {
didSet {
if let encoded = try? JSONEncoder().encode(activities) {
UserDefaults.standard.set(encoded, forKey: "Activities")
}
}
}
init() {
if let savedItems = UserDefaults.standard.data(forKey: "Activities") {
if let decodedItems = try? JSONDecoder().decode([Activity].self, from: savedItems) {
self.activities = decodedItems
return
}
}
self.activities = []
}
func update(_ activity: Activity, title: String, description: String, repetition: Int) {
if let index = activities.firstIndex(of: activity) {
let newActivity = Activity(title: title, description: description, repetition: repetition)
activities[index] = newActivity
} else {
add(Activity(title: title, description: description, repetition: repetition))
}
}
func add(_ activity: Activity) {
activities.append(activity)
}
}Then we can move into implementing the views:
struct ContentView: View {
    @State private var activityList = ActivityList()

    var body: some View {
        NavigationStack {
            List {
                ForEach(activityList.activities) { activity in
                    NavigationLink(value: activity) {
                        HStack {
                            VStack(alignment: .leading) {
                                Text(activity.title)
                                    .font(.headline)
                                Text(activity.description)
                                    .font(.subheadline)
                            }

                            Spacer()

                            Text("\(activity.repetition)")
                        }
                    }
                }
            }
            .navigationTitle("Activity tracker")
            .toolbar {
                NavigationLink(value: Activity()) {
                    Image(systemName: "plus")
                }
            }
            .navigationDestination(for: Activity.self) { selection in
                ActivityView(activity: selection, activityList: activityList)
            }
        }
    }
}
struct ActivityView: View {
@Environment(\.dismiss) var dismiss
var activity: Activity
var activityList: ActivityList
@State private var title: String
@State private var description: String
@State private var repetition: Int
init(activity: Activity, activityList: ActivityList) {
self.activity = activity
self.activityList = activityList
self.title = activity.title
self.description = activity.description
self.repetition = activity.repetition
}
var body: some View {
Form {
TextField("Title", text: $title)
TextField("Description", text: $description)
Stepper("Repetition: \(repetition)", value: $repetition)
}
.navigationTitle("Activity details")
.toolbar(content: {
ToolbarItem(placement: .confirmationAction) {
Button("Done") {
activityList.update(activity, title: title, description: description, repetition: repetition)
dismiss()
}
}
})
}
}The idea and the functionalites are similar to iExpense.
![]()
Day 48
Today we aren’t studying anything technical but listening to a talk.
Day 49
After a little break go deeper into data. At this point we are goining to retrieve data from the Internet.
First of all we need to define our data model. We are going to collect some data from the iTunes service (songs and collection).
struct Response: Codable {
    var results: [Result]
}

struct Result: Codable {
    var trackId: Int
    var trackName: String
    var collectionName: String
}
Then we build our interface as usual but with a little twist:
struct ContentView: View {
    @State private var results: [Result] = []

    var body: some View {
        List(results, id: \.trackId) {item in
            VStack(alignment: .leading) {
                Text(item.trackName)
                    .font(.headline)

                Text(item.collectionName)
            }
        }
        .task {
            await loadData()
        }
    }

    func loadData() async {
        // 1. Create URL pointo to Apple Service
        guard let url = URL(string: "https://itunes.apple.com/search?term=taylor+swift&entity=song") else {
            print("Invalid URL")
            return
        }

        // 2. Get data from URL. This is the async part (the function could wiat some time)
        do {
            let (data, _) = try await URLSession.shared.data(from: url)

            // 3. Decode data into Respones
            if let response = try? JSONDecoder().decode(Response.self, from: data) {
                results = response.results
            }
        } catch {
            print("Invalid data")
        }
    }
}
As you can see we have introduced a couple of new things:
-
func ... asyncdeclares an asynchronous function -
.taks {...}is a “context” from which we can call asynchronous functions -
awaitis a keyword to call asynchronous functions -
UrlSessionsallows us to get data from the internet
We can also show images from the Internet. We cannot use an Image but we have to use an AsyncImage and there are three ways to use it:
struct ContentView: View {

    var body: some View {
        AsyncImage(url: URL(string: "https://binaryspritz.com/assets/logo.png"), scale: 3)
    }
}
This first method is the most simple but also the less customizable. We can only change the scale and anything else.
struct ContentView: View {

    var body: some View {
        AsyncImage(url: URL(string: "https://binaryspritz.com/assets/logo.png")) { image in
            image
                .resizable()
                .scaledToFit()
        } placeholder: {
            ProgressView()
        }
        .frame(width: 200, height: 200)
    }
}
This second way gives us the image after the loading (during while the preview is shown). In this way we can change is as we like.
The third way gives us a way to handle errors:
struct ContentView: View {

    var body: some View {
        AsyncImage(url: URL(string: "https://binaryspritz.com/assets/logo.png")) { phase in
            if let image = phase.image {
                image
                    .resizable()
                    .scaledToFit()
            } else if let error = phase.error {
                Text("There was an error loading the image (\(error.localizedDescription)")
            } else {
                ProgressView()
            }
        }
        .frame(width: 200, height: 200)
    }
}
Last thing for today is form validation. We can apply the disable modifier to a section of a form do disable all its content (for example the “submit” button) and binding the condition to a computed property.
struct ContentView: View {
    @State private var username = ""
    @State private var email = ""

    var disabledForm: Bool {
        username.count < 5 || email.count < 5
    }

    var body: some View {
        Form {
            Section {
                TextField("Username", text: $username)
                TextField("Email", text: $email)
            }

            Section {
                Button("Create account") {
                    print("Creating account")
                }
            }
            .disabled(disabledForm)
        }
    }
}
Day 50
Before starting diving into our app we need to understand better a couple of things.
Codable for Observable classe
When we add the Codable protocol to a class it will automatically allows us to generate string representation of objects of that class. For example:
@Observable
class User: Codable {
    var name = "Marco"
}

struct ContentView: View {

    var body: some View {
        Button("Encode User") {
            encodeUser()
        }
    }

    func encodeUser() {
        let data = try! JSONEncoder().encode(User())
        let str = String(decoding: data, as: UTF8.self)

        print(str)
    }
}
Will print:
{
    "_$observationRegistrar":{},
    "_name":"Marco"
}
Which is not the best looking JSON. Swift gives us a way to changes to automatic behaviour. We have to define an enum named CodingKeys which conforms to the CodingKey protocol.
@Observable
class User: Codable {
    enum CodingKeys: String, CodingKey {
        case _name = "name"
    }

    var name = "Marco"
}
Now the resulting JSON will be:
{
    "name":"Marco"
}
Haptic effects
There are two ways of interacting with the Haptic Engine of an iPhone.
The first one is simple. Just add the modifies sensoryFeedback to a view, add the parameter SensoryFeedback (an enum to configure the type of feedback) and trigger (a state which changes will trigger the feedback).
Another solution is configuring the Haptic Engine with much more details:
struct ContentView: View {
    @State private var engine: CHHapticEngine?

    var body: some View {
        Button("Play haptic", action: complexSuccess)
            .onAppear(perform: prepareHaptics)
    }

    func prepareHaptics() {
        guard CHHapticEngine.capabilitiesForHardware().supportsHaptics else { return }

        do {
            engine = try CHHapticEngine()
            try engine?.start()
        } catch {
            print("There was an error creating the engine: \(error.localizedDescription)")
        }
    }

    func complexSuccess() {
        guard CHHapticEngine.capabilitiesForHardware().supportsHaptics else { return }

        var events: [CHHapticEvent] = []

        let intensity = CHHapticEventParameter(parameterID: .hapticIntensity, value: 1)
        let sharpness = CHHapticEventParameter(parameterID: .hapticSharpness, value: 1)
        let event = CHHapticEvent(eventType: .hapticTransient, parameters: [intensity, sharpness], relativeTime: 0)
        events.append(event)

        do {
            let pattern = try CHHapticPattern(events: events, parameters: [])
            let player = try engine?.makePlayer(with: pattern)
            try player?.stop(atTime: 0)
        } catch {
            print("Cannot play pattenr: \(error.localizedDescription)")
        }
    }
}
Cupcake corner
Finally, we start implementing our app: Cupcake Corner.
We start defining our data model:
@Observable
class Order {
    static let types = ["Vanilla", "Strawberry", "Chocolate", "Rainbow"]

    var type = 0
    var quantity = 3

    var specialRequestEnabled = false {
        didSet {
            if specialRequestEnabled == false {
                extraFrosting = false
                addSprinkles = false
            }
        }
    }
    var extraFrosting = false
    var addSprinkles = false
}
And then moving into the form to customize our order:
struct ContentView: View {
    @State private var order = Order()

    var body: some View {
        NavigationStack {
            Form {
                Section {
                    Picker("Select your cake type", selection: $order.type) {
                        ForEach(Order.types.indices, id:\.self) {
                            Text(Order.types[$0])
                        }
                    }

                    Stepper("Number of cakes", value: $order.quantity, in: 3...20)
                }

                Section {
                    Toggle("Any special request?", isOn: $order.specialRequestEnabled)

                    if order.specialRequestEnabled {
                        Toggle("Add extra frosting", isOn: $order.extraFrosting)

                        Toggle("Add extra sprinkles", isOn: $order.addSprinkles)
                    }
                }

                Section {
                    NavigationLink("Delivery details") {
                        AddressView(order: order)
                    }
                }
            }
            .navigationTitle("Cupcake Corner")
        }
    }
}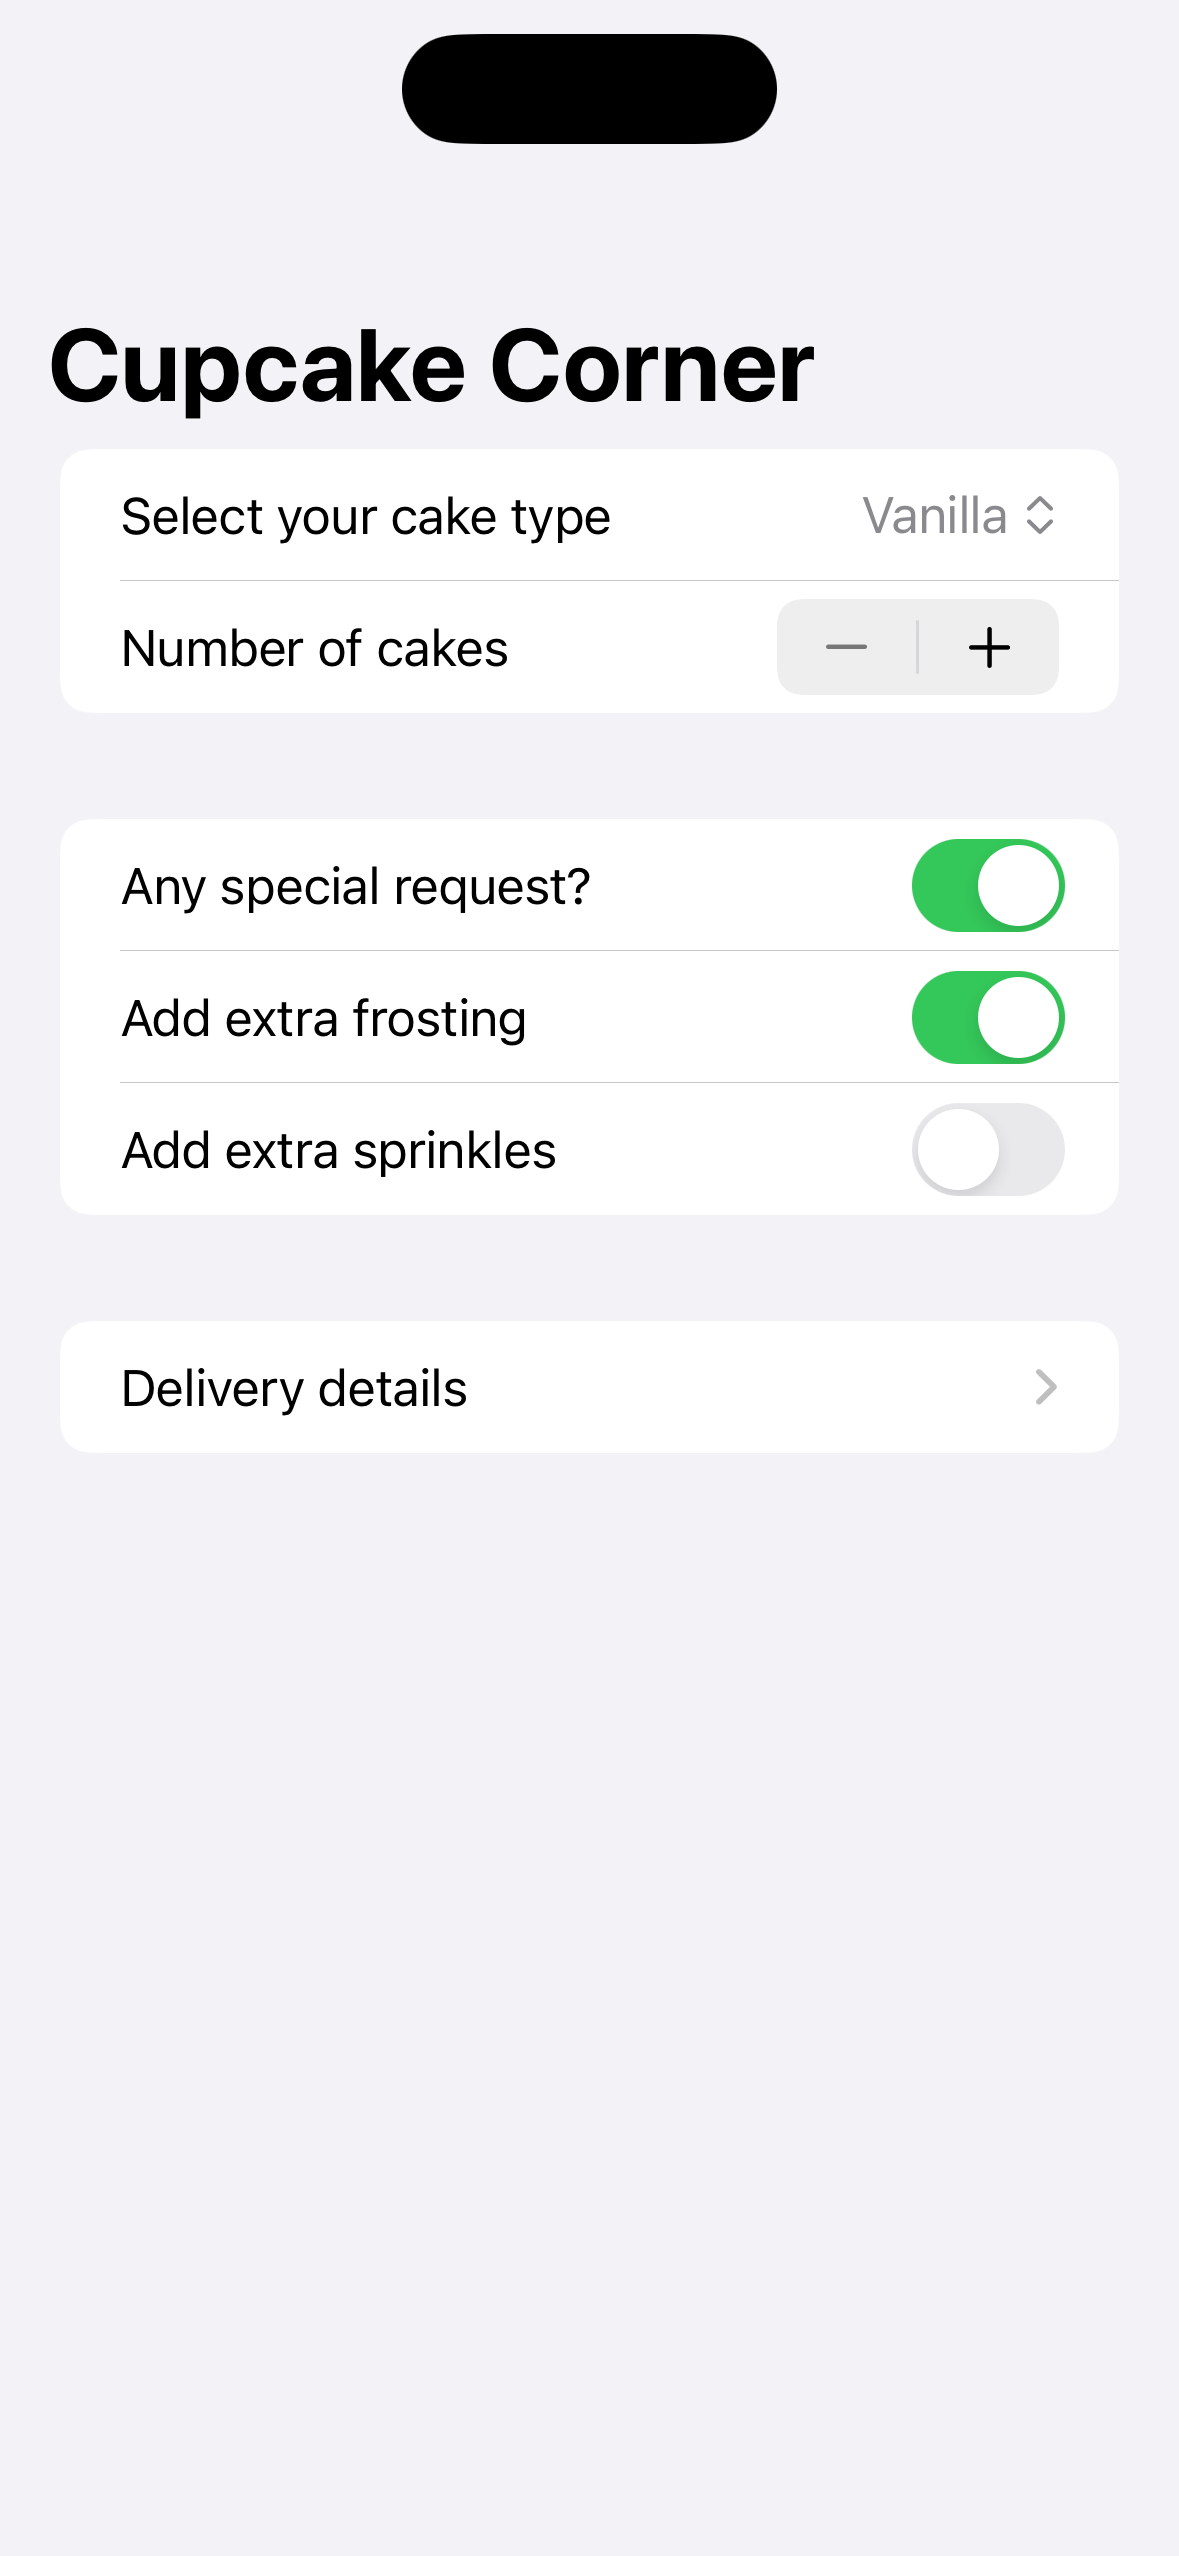
Day 51
Today we implemnt some neet functionality of Cupcake Corner:
- Form validation for the address
- Data upload and request from a web service
First of all let’s create the two AddressView:
struct AddressView: View {
    @Bindable var order: Order


    var body: some View {
        Form {
            Section {
                TextField("Name", text: $order.name)
                TextField("Street address", text: $order.streetAddress)
                TextField("City", text: $order.city)
                TextField("Zip code", text: $order.zipCode)
            }

            Section {
                NavigationLink("Check out") {
                    CheckoutView(order: order)
                }
            }
            .disabled(order.hasValidAddress == false)
        }
        .navigationTitle("Delivery details")
        .navigationBarTitleDisplayMode(.inline)
    }
}
We use @Bindable to tell SwiftUI that order is a bindable variable (declared as @State somewhere else).
Then we have the .disabled(order.hasValidAddress == false) that reflects some additions made to the Order class:
@Observable
class Order: Codable {
    static let types = ["Vanilla", "Strawberry", "Chocolate", "Rainbow"]

    var type = 0
    var quantity = 3

    var specialRequestEnabled = false {
        didSet {
            if specialRequestEnabled == false {
                extraFrosting = false
                addSprinkles = false
            }
        }
    }
    var extraFrosting = false
    var addSprinkles = false

    var name = ""
    var streetAddress = ""
    var city = ""
    var zipCode = ""

    var hasValidAddress: Bool {
        if name.isEmpty || streetAddress.isEmpty || city.isEmpty || zipCode.isEmpty {
            return false
        }

        return true
    }

    var cost: Decimal {
        // 2$ per cake
        var cost = Decimal(quantity) * 2

        // complicate cakes costs more
        cost += Decimal(type) / 2

        // $1/cake for extra frosting
        if extraFrosting {
            cost += Decimal(quantity)
        }

        // $0.50/cake for sprinkles
        if addSprinkles {
            cost += Decimal(quantity) / 2
        }

        return cost
    }
}
Then we can move on the CheckoutView which will handle the connection to the webserive to “place” the order:
struct CheckoutView: View {
    var order: Order

    @State private var confirmationMessage = ""
    @State private var showingConfirmation = false

    var body: some View {
        ScrollView {
            VStack {
                AsyncImage(url: URL(string: "https://hws.dev/img/cupcakes@3x.jpg"), scale: 3) { image in
                    image
                        .resizable()
                        .scaledToFit()
                } placeholder: {
                    ProgressView()
                }
                .frame(height: 233)

                Text("Your total cost is \(order.cost, format: .currency(code: "USD"))")
                    .font(.title)

                Button("Place order") {
                    Task{
                        await placeOrder()
                    }
                }
                .padding()
            }
        }
        .navigationTitle("Checkout")
        .navigationBarTitleDisplayMode(.inline)
        .scrollBounceBehavior(.basedOnSize)
        .alert("Thank you!", isPresented: $showingConfirmation) {
            Button("Ok") { showingConfirmation.toggle() }
        } message: {
            Text(confirmationMessage)
        }
    }

    func placeOrder() async {
        guard let encoded = try? JSONEncoder().encode(order) else {
            print("Fail to record order")
            return
        }

        let url = URL(string: "https://reqres.in/api/cupcakess")!
        var request = URLRequest(url: url)
        request.setValue("application/json", forHTTPHeaderField: "Content-Type")
        request.httpMethod = "POST"

        do {
            let (data, _) = try await URLSession.shared.upload(for: request, from: encoded)

            let decodedOrder = try JSONDecoder().decode(Order.self, from: data)
            confirmationMessage = "Your order for \(decodedOrder.quantity)x\(Order.types[decodedOrder.type].lowercased()) cupcakes is on its way!"
            showingConfirmation = true
        } catch {
            print("Check out failed: \(error.localizedDescription)")
        }
    }
}
Besides an AsyncImage there is the placeOrder function which upload the JSON version of our order to regres.in (a web serice to test clients). And then, we decode the response in another object of type Order (just because regres.in works in this way (it sends back the json we send to him)). The result is shown in an alert.
